Remote Water Quality Monitoring

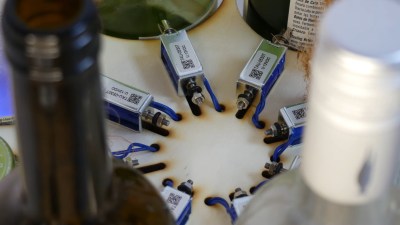
While it can be straightforward to distill water to high purity, this is rarely the best method for producing water for useful purposes. Even drinking water typically needs certain minerals in it, plants may need a certain pH, and wastewater systems have a whole host of other qualities that need to be measured. Measuring water quality is a surprisingly complex endeavor as a result and often involves a wide array of sensors, much like this water quality meter from [RowlesGroupResearch].

The water quality meters that they are putting to use are typically set up in remote locations, without power, and are targeting natural bodies of water and also wastewater treatment plants. Temperature and pH are simple enough to measure and grasp, but this device also includes sensors for total dissolved solids (TDS) and turbidity which are both methods for measuring various amounts and types of particles suspended in the water. The build is based around an Arduino so that it is easy for others to replicate, and is housed in a waterproof box with a large battery, and includes data logging to an SD card in order to make it easy to deploy in remote, outdoor settings and to gather the data at a later time.

The build log for this device also goes into detail about all of the steps needed to set this up from scratch, as well as a comprehensive bill of materials. This could be useful in plenty of professional settings such as community wastewater treatment facilities but also in situations where it’s believed that industrial activity may be impacting a natural body of water. For a water quality meter more focused on drinking water, though, we’d recommend this build that is trained on its own neural network.

Coffee Grinder Gets Bluetooth Weighing

Some people take their coffee grinding seriously. So what do you do when the hot new grinders automatically weigh coffee, and yours doesn’t? Well, if you are like [Tech Dregs] and the rest of us, you hack your existing grinder, of course. The link is to the source code, but for a quick overview, check out the video below.

In true hacker fashion, the first order of business was to pull a load cell out of a cheap scale. Originally, he intended to reuse the processor inside, too, but it was epoxied, so it was a good excuse to use some more modules. A load cell amplifier, an OLED display, and a tiny Xiao processor, which he describes as “ridiculous.” From the context, we think he means ridiculously small in the physical sense and ridiculously powerful for such a tiny board.

With the modules, the wiring wasn’t too hard, but you still need some kind of app. Thanks to App Inventor, an Android app was a matter of gluing some blocks together in a GUI. Of course, the devil is in the details, and it took a lot of “focused cursing” to get everything working correctly.

The coffee grinder has a relay to turn the motor on and off, so that’s the point the scale needs to turn the motor on and off. Conveniently, the grinder’s PCB had an unpopulated pin header for just this purpose.

This is one of those simple projects you can use daily if you drink coffee. We are always impressed that the infrastructure exists today and that you can throw something like this together in very little time without much trouble.

WiFi hacking coffee makers is a popular Java project in these parts. Upgrading a machine can get pretty serious with PID control loops and more.

Continue reading “Coffee Grinder Gets Bluetooth Weighing”

This Retro Game Console Puts Vacuum Fluorescent Display To Good Use

Small in size, low-resolution, blocky segments, and a limited color palette — all characteristics of the typical vacuum fluorescent display, any of which would seem to disqualify them as the display of choice for a lot of applications. But this is Hackaday, and we don’t really pay much attention to what we’re supposed to do, but rather to what’s fun and cool to do. So when we see something like a VFD game console, we just have to sit up and take notice.

In a lot of ways, the design of [Simon Boak]’s Arduino-based VFD console is driven by his choice of display. The Noritake Itron GU20X8-301 VFD is a “tricolor” display with eight rows of 20 rectangular pixels. Each pixel is composed of six short linear segments, with alternating red and blue colors. Turning on either set of segments yields one of the two base colors, while turning on both yields a sorta-kinda whitish color, if you squint a bit.

[Simon] chose a two-piece design for his console, with a separate controller and display. The controller holds the Arduino Nano and all the controls, plus a piezo buzzer for fun. The display case connects to the controller with a ribbon cable and holds the VFD power supply and driver. To celebrate the retro look of the VFD, both cases are decked out with woodgrain side panels. [Simon] chose appropriately blocky games for the console, like Snake, Conway’s Game of Life, and the venerable snow demo. We’d imagine Pong would be a good choice too, as well as perhaps Tetris if the display were flipped on its side.

We really like the look of this console, and we appreciate putting an otherwise obsolete display to use in a creative way. If you want to learn a little more about these displays, check out this love letter to the VFD.

Continue reading “This Retro Game Console Puts Vacuum Fluorescent Display To Good Use”

The Eyes Have It: Stare Down Your Lighting

You know how you can feel when someone is looking at you? Thanks to a person detector, [Michael Rigsby’s] little robotic light switch also knows when you are looking at it. As you can see in the video below, when it notices you are looking at it, it lights up an LED. If you continue to gaze at it, it will turn to stare back at you. Keep staring it down and it will toggle the state of a remote control light switch.

This all works because of the person sensor module by Useful Sensors. The little module has a camera and face detection built into it. It doesn’t draw much power at 150 milliwatts. It can sense faces, including where they are and how many people are looking.

Continue reading “The Eyes Have It: Stare Down Your Lighting”

PCB Makes 7 Segment Displays

Of course, there’s nothing unusual about using 7-segment displays, especially in a clock. However, [Edison Science Corner] didn’t buy displays. Instead, he fabricated them from a PCB using 0805 LEDs for the segments. You can see the resulting clock project in the video below.

While the idea is good, we might have been tempted to use a pair of LEDs for each segment or used a diffuser to blur the LEDs. The bare look is nice, but it can make reading some numerals slightly confusing.

Continue reading “PCB Makes 7 Segment Displays”

A Mega-Tiny Arduino

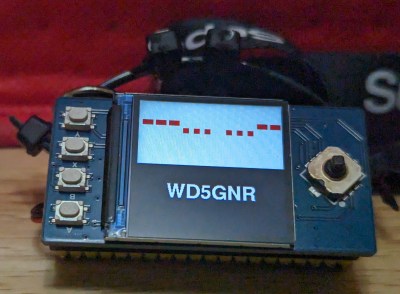
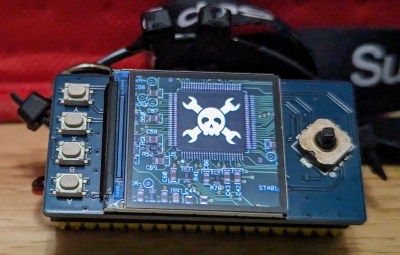
Integrated circuits, chipsets, memory modules, and all kinds of other transistor-based technology continues to get smaller, cheaper, and more energy efficient as time moves on. Not only are the components themselves smaller, but their supporting infrastructure is as well. Computers like the Raspberry Pi are about the size of a credit card and have computing power on the order of full-sized PCs from a few decades ago. The Arduino is no exception to this trend, either, and this new dev board called the Epi 32U4 might be the smallest ATmega platform we’ve seen so far.

As the name suggests, the board is based around the ATmega32U4 which is somewhat unique among Atmel chips in that it includes support for USB within the chip itself rather than relying on external translating circuitry. This makes it an excellent choice for any project which involves sending keyboard, mouse, or other peripheral information to a computer. This goes a few steps further with eliminating “bloat” compared to other boards, too — there’s no on-board voltage regulator, and just a single LEDs on pin 13.

One of the other features this board boasts over other small form factor boards is on-board USB-C, which is definitely a perk as more and more devices switch away from the various forms of older USB-type plugs. The project’s specifications are also available on this GitHub page for anyone that wants to produce their own. And, if you don’t have a 32U4 on hand and still want to build a keyboard project, it’s possible to get some other Arduinos to support these features but it’ll take a little more work.

Thanks to [Rasmus L] for the tip!

How To Build Jenny’s Budget Mixing Desk

Jenny did an Ask Hackaday article earlier this month, all about the quest for a cheap computer-based audio mixer. The first attempt didn’t go so well, with a problem that many of us are familiar with: Linux applications really doesn’t like using multiple audio devices at the same time. Jenny ran into this issue, and didn’t come across a way to merge the soundcards in a single application.

I’ve fought this problem for a while, probably 10 years now. My first collision with this was an attempt to record a piano with three mics, using a couple different USB pre-amps. And of course, just like Jenny, I was quickly frustrated by the problem that my recording software would only see one interface at a time. The easy solution is to buy an interface with more channels. The Tascam US-4x4HR is a great four channel input/output audio interface, and the Behringer U-PHORIA line goes all the way up to eight mic pre-amps, expandable to 16 with a second DAC that can send audio over ADAT. But those are semi-pro interfaces, with price tags to match.

But what about Jenny’s idea, of cobbling multiple super cheap interfaces together? Well yes, that’s possible too. I’ll show you how, but first, let’s talk about how we’re going to control this software mixer monster. Yes, you can just use a mouse or keyboard, but the challenge was to build a mixing desk, and to me, that means physical faders and mute buttons. Now, there are pre-built solutions, with the Behringer X-touch being a popular solution. But again, we’re way above the price-point Jenny set for this problem. So, let’s do what we do best here at Hackaday, and build our own. Continue reading “How To Build Jenny’s Budget Mixing Desk”