HammerPong Game Takes Pong To New Heights

large scoreboard with lots of flashy lights

[Jason] is back at it again with another new twist on the technically sophisticated and advanced game of Pong. Fashioned in a ‘Chuck E. Cheese’ style platform, the two players stand side by side each other with large foam hammers. A wack sends the 32 bit ARM powered dot skyward and then back down to the other player, where another wack will send the dot back whence it came. A brightly lit scoreboard keeps track of how many dots slip by.

[Jason] is a veteran of pong inspired games, but putting the HammerPong game together brought with it some new challenges. After being unable to squeeze a few MDF panels into his car, and fighting off flies, yard debris and pet dander that were trying to attach themselves to his freshly painted artwork, [Jason] managed to get his project completed.

The HammerPong is powered by an Arduino Due that controls six WS2812 LED strips and runs the background code. Various latches, shift registers and power transistors control the lights and scoreboard. Be sure to check out the linked project for more detail, and take a look at the video demonstration after the break.

Continue reading “HammerPong Game Takes Pong To New Heights”

The Rabbit H1 Is A Stationary Mouse Replacement

rabbit h1

[Dave] has some big plans to build himself a 1980’s style computer. Most of the time, large-scale projects can be made easier by breaking them down into their smaller components. [Dave] decided to start his project by designing and constructing a custom controller for his future computer. He calls it the Rabbit H1.

[Dave] was inspired by the HOTAS throttle control system, which is commonly used in aviation. The basic idea behind HOTAS is that the pilot has a bunch of controls built right into the throttle stick. This way, the pilot doesn’t ever have to remove his hand from the throttle. [Dave] took this basic concept and ran with it.

He first designed a simple controller shape in OpenSCAD and printed it out on his 3D printer. He tested it out in his hand and realized that it didn’t feel quite right. The second try was more narrow at the top, resulting in a triangular shape. [Dave] then found the most comfortable position for his fingers and marked the piece with a marker. Finally, he measured out all of the markings and transferred them into OpenSCAD to perfect his design.

[Dave] had some fun with OpenSCAD, designing various hinges and plywood inlays for all of the buttons. Lucky for [Dave], both the 3D printer software as well as the CNC router software accept STL files. This meant that he was able to design both parts together in one program and use the output for both machines.

With the physical controller out of the way, it was time to work on the electronics. [Dave] bought a couple of joysticks from Adafruit, as well as a couple of push buttons. One of the joysticks controls the mouse cursor. The other joystick controls scrolling vertically and horizontally, and includes a push button for left-click. The two buttons are used for middle and right-click. All of these inputs are read by a Teensy Arduino. The Teensy is compact and easily capable of emulating a USB mouse, which makes it perfect for this job.

[Dave] has published his designs on Thingiverse if you would like to try to build one of these yourself.


Angry Birds Sentry Gun Has Pigs Flying

[Farlei Heinen] has a C programming class at school. Not wanting to do another boring cookie-cutter project out of the textbook, he decided to do something different — he’s built an Arduino controlled sentry gun!

It consists of two parts: The sentry gun itself and a sonar detection tower which can tell if you’ve successfully knocked down the pigs or not. He’s using an Arduino Mega at the heart of the project, which controls the servos and reads information off of the sonar sensors.

The sentry gun uses two servo motors to control up and down, and left and right. The loading mechanism is manual, using elastic bands to launch the projectile. The firing mechanism however is a micro (9g) servo, which can release the elastic and shoot the projectile. The target is an Angry Birds toy play set made for kids.

It’s a pretty cool project, and [Farlei] has even released the source code for it if you’re interested in building your own — check it out in action, after the break!

Continue reading “Angry Birds Sentry Gun Has Pigs Flying”

Rubik’s Cube Solver Made Out Of Popsicle Sticks And An Arduino

rubix cube solver

[Matt] recently learned both how to solve a Rubik’s cube and the basics of an Arduino. Putting the two together, he decided to try his hand at making an automatic Rubik’s Cube solver!

We’ve seen this done quite a few times using LEGO Mindstorms, but we’re much more impressed with [Matt’s] clever use of popsicle sticks and mechanical linkages…. The device uses just two servos. One to rotate the base, and the second to flip the cube over.

He’s using an Arduino UNO (R3) with 2 Hitec HS-311 hobby servos, some popsicle sticks, hot glue, a paper towel roll, and a bit of plywood. He wrote the code to solve the cube himself, and has shared it on GitHub — but he didn’t stop there and decided to create a GUI to go with it using Python.

It’s not that fast, but it’ll solve a cube in about 20 minutes — stick around after the break to see it in action!

Continue reading “Rubik’s Cube Solver Made Out Of Popsicle Sticks And An Arduino”

Build A Bass Master 3000 Carnival Game

Bass Master 3000

We’ve all been there. You are having fun walking around the carnival when you suddenly find yourself walking past the carnival games. The people working the booths are taunting you, trying to get you to play their games. You know the truth, though. Those games are rigged. You don’t know how they do it. You just know that they do… somehow.

Now you can put your worries to rest and build your own carnival game! [John] built his own “Bass Master 3000” style carnival game and posted an Instructable so you can make one too.

The game is pretty straightforward. You have a giant fish-shaped target with a wide open mouth. You take hold of a small fishing reel with a rubber ball on the end. Your goal is to cast the ball out and hit the fish in its big mouth. If you hit the mouth, you get to hear a loud buzzer and see some flashing lights. The system also uses a webcam to take a candid photo of the winner. A computer screen shows all of the winners of the day.

The brain of the system is an Arduino Yún. The Yún is similar to an Uno but it also has some extra features. Some good examples are an Ethernet port, a wireless adapter, and an SD card slot. The mouth sensors are just two piezo elements. Each sensor is hooked up to the Arduino through a small trim pot. This allows you to dial in the sensitivity of each sensor. The lights and the buzzer are controlled via a relay, triggered by a 5V digital pin on the Arduino.

The Yún actually has a small on-board Linux computer that you can communicate with from inside the Arduino environment. This allows [John] to use the Yún to actually take photos directly from a web cam, store them on the local SD card, and display them on a local web server. The web server runs a simple script that displays a slide show of all of the photos stored on the card.

The final piece of the game is the physical target itself. The target is painted using acrylic paint onto a small tarp. The tarp is then attached to a square frame made from PVC pipe. The mouth of the fish is cut out of the tarp. A large piece of felt is then placed behind the hole with the piezo sensors attached. A short length of copper pipe helps to weigh down the bottom of the felt and keep it in place. The important thing is to make sure the felt isn’t touching the tarp. If it touches, it might be overly sensitive and trigger even when a player misses.

Now you know how to build your own Bass Master 3000 carnival game. Whether you rig the game or not is up to you. Also, be sure to check out a video of the system working below. Continue reading “Build A Bass Master 3000 Carnival Game”

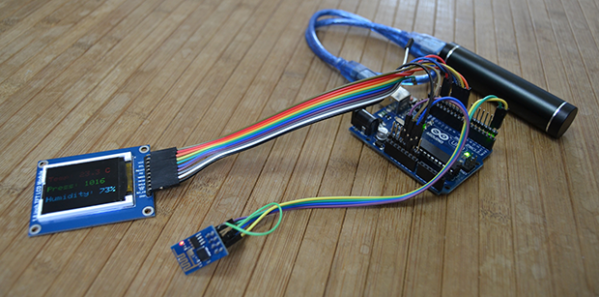
A SI5351 clock generator chip and an Arduino

Generate Clocks With The SI5351 And An Arduino

If you’re dealing with RF, you’ll probably have the need to generate a variety of clock signals. Fortunately, [Jason] has applied his knowledge to build a SI5351 library for the Arduino and a breakout board for the chip.

The SI5351 is a programmable clock generator. It can output up to eight unique frequencies at 8 kHz to 133 MHz. This makes it a handy tool for building up RF projects. [Jason]’s breakout board provides 3 isolated clock outputs on SMA connectors. A header connects to an Arduino, which provides power and control over I2C.

If you’re looking for an application, [Jason]’s prototype single-sideband radio shows the chip in action. This radio uses two of the SI5351 clocks: one for the VFO and one for the BFO. This reduces the part count, and could make this design quite cheap.

The Arduino library is available on Github, and you can order a SI5351 breakout board from OSHPark.

Bluetooth Security And Capacitive Sensing Tool Cabinet Handles

Locking tool cabinet

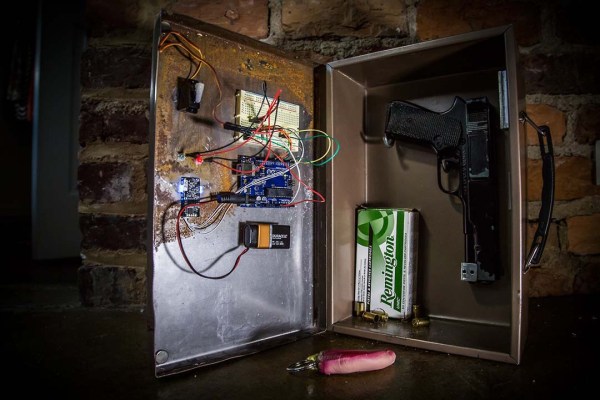
[Andy] needed a new set of locks for his tool cabinets at work, but not wanting to carry around another key (or to remember a combination!) he decided to throw this little hack together — solenoid locking, capacitive sensing, tool cabinet door handles.

To do this he’s using a Bluetooth low energy breakout board coupled with an Arduino, two solenoid locks, and two capacitive sensors. He’s modified a pre-existing iPhone app to control the system, dubbed: The BlueLock Control.

When [Andy] is present with his phone, the system can be activated, allowing for automatic unlocking the moment you touch the metal handle. Usually he leaves it unlocked for the majority of the work day, but as soon as the day is done it’s just a simple swipe on his phone to engage lock mode for the night. And just in case he’s also added manual push-buttons for both solenoids in case anything goes wrong with the capacitive sensors. Cool hack [Andy!]

While you’re at it, why not make a keyless entry system for your car using Bluetooth too?