Sniffing NRF24L01+ Traffic With Wireshark

Wireshark trace

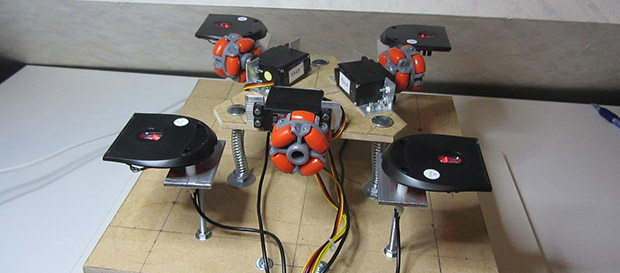
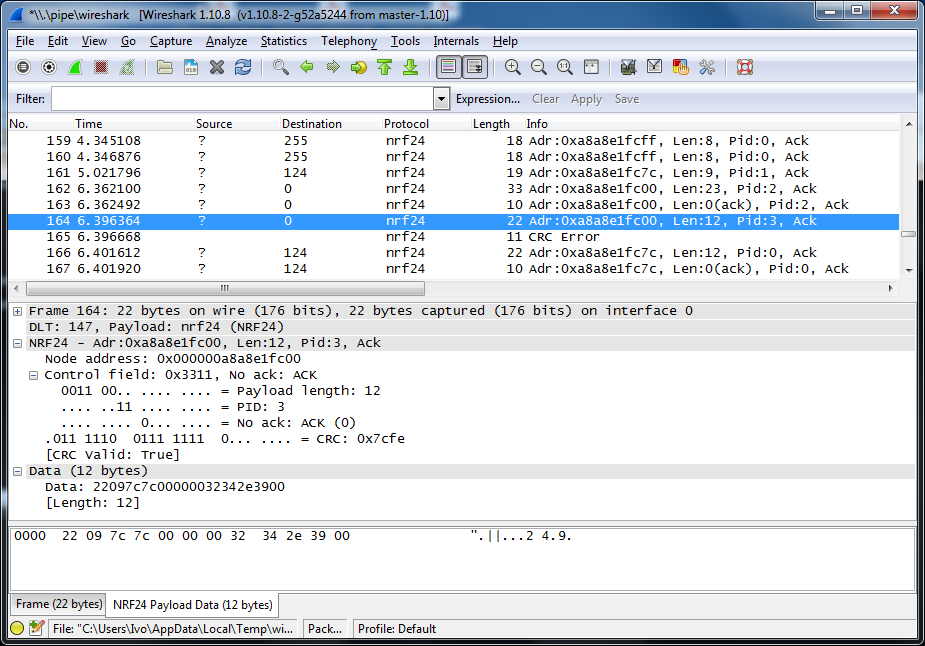
We’re sure that some of our readers are familiar with the difficult task that debugging/sniffing nRF24L01+ communications can be. Well, [Ivo] developed a sniffing platform based on an Arduino Uno, a single nRF24L01+ module and a computer running the popular network protocol analyzer Wireshark (part1, part2, part3 of his write-up).

As these very cheap modules don’t include a promiscuous mode to listen to all frames being sent on a particular channel, [Ivo] uses for his application a variation of [Travis Goodspeed]’s technique to sniff Enhance Shockburst messages. In short, it consists in setting a shorter than usual address, setting a fix payload length and deactivating the CRC feature. The Arduino Uno connected to the nRF24L01+ is therefore in charge of forwarding the sniffed frames to the computer. An application that [Ivo] wrote parses the received data and forwards it to wireshark, on which can be set various filters to only display the information you’re interested in.

The Arduino Yun Shield

YUN

A few years ago, the most common method to put an Arduino project on the web was to add a small router loaded up with OpenWrt, wire up a serial connection, and use this router as a bridge to the Internet. This odd arrangement was possibly because the existing Arduino Ethernet and WiFi shields were too expensive or not capable enough, but either way the Arduino crew took notice and released the Arduino Yun: an Arduino with an SoC running Linux with an Ethernet port. It’s pretty much the same thing as an Arduino wired up to a router, with the added bonus of having tons of libraries available.

Since the Yun is basically a SoC grafted onto an Arduino, we’re surprised we haven’t seen something like this before. It’s an Arduino shield that adds a Linux SoC, WiFi, Ethernet, and USB Host to any Arduino board from the Uno, to the Duemilanove and Mega. It is basically identical to the Arduino Yun, and like the Yun it’s completely open for anyone to remix, share, and reuse.

The Yun shield found on the Dragino website features a small SoC running OpenWrt, separated from the rest of the Arduino board with a serial connection. The Linux side of the stack features a 400MHz AR9331 (the same processor as the Yun), 16 MB of Flash, and 64 MB of RAM for running a built-in web server and sending all the sensor data an Arduino can gather up to the cloud (Yun, by the way, means cloud).

All the hardware files are available on the Yun shield repo, with the Dragino HE module being the most difficult part to source.

Hardware “Security” And A DMCA Takedown Notice

tektronix-autoLast week we published a post about how it was discovered through trial and error that Tektronix application modules are designed with laughable security. We’ll get to that part of it in a minute. We received a DMCA Takedown Notice from Tektronix (which you can read after the break) demanding that we remove the post. We have altered the original post, but we believe our coverage of this story is valid and we don’t agree that the post should be completely removed.

First off, Tektronix sells the modules to unlock the features already present on the Oscilloscope in questions. We’re operating on the moral assumption that using these features without paying their asking price is wrong. If you want the features they’ve developed you should pay for them.

The real story here is that Tektronix designed a woefully weak system for unlocking these modules. Learn from this. If you’re ever designing a hardware key, don’t do it like this!

An EEPROM, a connector, and a plain text string of characters which is already published publicly on their website is all that is necessary to unlock these “crippled” features. Let’s just say that again: apparently every hardware key is the same and just uses a plain-text string found on their website which is not encrypted or obfuscated. If you were selling these keys for $2.99 perhaps this would be adequate, but Tek values these modules at $500 apiece.

If you were designing this system wouldn’t it be worth using an encryption key pair based on the serial number or some other piece of unique information? How do you think this should have been done? Leave your comment below.

Continue reading “Hardware “Security” And A DMCA Takedown Notice”

Unlocking A Door With A Phone – Easy As Pi!

doorman2

[Ian] has created a way for his office colleagues to get inside the door, even if they have forgotten their keys. This office automation, Raspberry Pi set up is appropriately named the ‘Doorman’ and provided an alternative method of unlocking the entry system.

His solution tapped into the existing security circuit, which is closed by a simple relay, which is connected to the main piece of hardware; a Raspberry Pi. On one side of the Pi is the GPIO pins that allow control access while the other side links to the internet. The company’s internal system is responsible for authenticating users, issuing keys and processing access requests. A mobile client, aka a smartphone, can request a set of keys from the Doorman.

[Ian] used the Golgi SDK to speed up the development of the in-house app. With the wires in place, the Doorman has become a great success, and now forgotten keys are a thing of the past. And even though staff members no longer need to buzz into the office interrupting their co-workers, the development team has plans to beef up their office automation system. Already other innovations are being created to be integrated in with the Doorman.

Now all that’s left is to show a video demonstration of the Doorman, which can be seen after the break:

Continue reading “Unlocking A Door With A Phone – Easy As Pi!”

Retrotechtacular: We Heard You Like Tubes, So Here’s A Film About Tube Tubes From The Webtubes

EF80

This lovely little number is the EF80 pentode thermionic valve, or vacuum tube, made by Mullard beginning in 1950. They were used in radio and radar applications, but most of them wound up in VHF television sets. This week’s Retrotechtacular takes a close look at the assembly of and on-site materials production for the EF80 in particular.

The film begins with slow and careful hand assembly of an EF80. The cathode is inserted into a mica disc, and a series of three grids are placed over the cathode. The semicircular anode sits around the outermost grid. Another mica disc is placed on top which does triple duty as a spacer, a base for the getter/plate assembly, and a firewall against the getter flash.The dark lining of the upper part of the tube is the residue of the vaporized getter, which is heated after the first stage of air removal.

Before the vacuuming begins, the inner assembly is mounted on a glass base with nine pins that have been pre-bent to meet the inner assembly wires. The heater, dissipating shield, and a meshy cylinder are added, and then the getter on its plate. A tube is slipped over the assembly and fused to the base in a jig, forming an airtight seal. Continue reading “Retrotechtacular: We Heard You Like Tubes, So Here’s A Film About Tube Tubes From The Webtubes”

Your 15 Days To Be Excellent

15-days-to-be-excellent

This is it. It’s time to step up and be a hardware hacker.

If you haven’t submitted your entry for The Hackaday Prize, get out that graph paper and mechanical pencil and start scribbling. The coming fortnight is your time to shine.

As of right now you have exactly fifteen days to tell us about your concept for an Open, Connected device. This doesn’t mean you have to finish the build, there’s time for that after the August 20th deadline. What you do need to do is describe your idea and explain how you plan to build a working prototype for the final deadline in early November.

I’ve appealed to your vanity — it’s hard to call yourself a hacker if you sit on the sidelines for this one! Now I’ll appeal to your want of recognition and the prizes that dreams are made of. Right now we haven’t quite crossed the 500 entry mark. When was the last time you had a chance as good as 1 in 500 for such a huge bag of booty?

THP Entry: A Holonomic Drive 3D Printer

holo

[Sugapes] always wanted to cut a few corners and build a really, really cheap 3D printer, but the idea of using linear actuators – pricing them, sourcing them, and the inevitable problems associated with them – scared him away. One day, he realized that moving in a plane in the X and Y dimensions wasn’t hard at all; cars and robots do this every day. Instead of moving a 3D printer bed around with rods and pulleys, [Sugapes] is moving his 3D printer around with wheelsIt’s different, it’s interesting, and it’s the perfect project to show of his creativity for The Hackaday Prize.

The drive system [Sugapes] is using is called a holonomic drive system. In his build, three omnidirectional wheels are attached to continuous rotation servos, each of them mounted 120 degrees apart. The print bed is simply placed on these wheels, and with the right control algorithms, [Sugapes] can move the bed in the X and Y axes. With an extruder on a Z axis above the bed, this setup becomes a 3D printer with a theoretically unlimited XY build axis. Pretty clever, huh?

There are a few problems [Sugapes] will have to overcome to turn this project into a proper printer. The omnidirectional wheels aren’t the best at transferring movement to the bed, so a quartet of USB optical computer mice are being used for a closed loop system. [Sugapes] put up a video of his project, you can check that out below.


SpaceWrencherThe project featured in this post is an entry in The Hackaday Prize. Build something awesome and win a trip to space or hundreds of other prizes.

Continue reading “THP Entry: A Holonomic Drive 3D Printer”