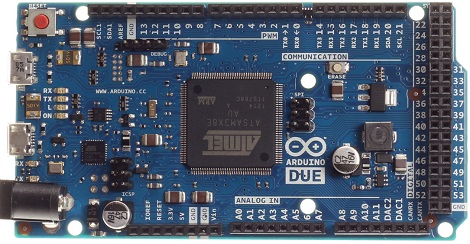
Making The Arduino Sleep The Long Sleep

Earlier this week, I showed you [Naim Busek’s] kickstarter for his turn signal helmet. In that article I explained that, while the helmet is a neat idea, I was really interested in what [Naim] had told me about his power consumption.  To put it the shortest way, he has made his arduino sleep so efficiently, it can be waiting for input longer than the battery’s optimum shelf life.

After that article, [Naim] wrote in to give me the details on what he did to achieve such an efficient system. You can read his entire explanation, un altered here.

Continue reading “Making The Arduino Sleep The Long Sleep”

Turn Signals On Your Head

Several weeks ago, I was in Culver City L.A., and happened to find a hackerspace nearby. It was a pleasant coincidence that the night I chose to randomly show up, was their public meeting which focused more on projects people were doing. The place was packed, I was barely able to squeeze in the door and actually stood outside for part of the meeting, just listening to people talk about what they’re making.

One of the projects I did get to see was this bike helmet built by [Naim]. At first I was amused at the idea, but the idea of putting lights and an accelerometer on a helmet wasn’t that groundbreaking. But as [Naim] kept talking, he caught my attention. For one thing, the one he was showing at the hackerspace seemed to have some built in correction for natural head movement. In this video he does look around a bit without false positives. At the hackerspace he explained the way he monitors the motion to avoid natural movements causing the lights to initialize.

The part I was really interested in was his power. He spent tons of time reducing the power consumption on the base arduino. I believe the number he used was 10 years of standby without causing the battery to vent or die. If you pick up the helmet at any point during that time period, it automatically turns itself on based on the accelerometer’s motion. While the bike helmet itself was a fairly cute idea, I was really trying to get him to send me the information on how he’s saving power. I believe he had to cut the traces to the arduino’s native power management. Hopefully we’ll still hear from him on the details.

Arduino Voltage Measurement Tricks

We think it’s a great learning experience to tear back the veil of abstraction and learn a bit more about the hardware found on an Arduino board. This project is a great example. [Scott Daniels] takes a look at the other voltage measurement options available to AVR chips used by Arduino.

If you’ve used the analogRead() function then you’ve already measured a voltage using the Arduino. But do you know what is going on behind the scenes to make this happen? The Analog to Digital converter on the AVR chip is being used to measure an incoming voltage by comparing it to a known voltage reference. That reference is by default the supply voltage line for the chip. This should be 5V but will only be as accurate as the regulator supplying it. [Scott] looks at the other voltage references that may be used. An external reference can be used by adding hardware, but that’s not the focus of his article. Instead he looks at using the 1.1V internal reference. He’s written some short example code that let’s you measure the incoming line voltage based on that internal reference. This is a very handy trick that can let you detect when the chips is running from a battery and how much juice is left in the cell.

Donation Meter Raises Alarm When Not Plugged With Coins

This is something of a mandatory donation meter. If you don’t feed it with coins it sounds a very loud alarm continuously.

[Piet De Vaere] built the device for a free festival in Ghent, Belgium. The intent is to help raise awareness that although free of an admission price, the success of the event depends on donations. It works much like a parking meter. When you feed it coins time is added to the meter. When it runs all the way down that large loudspeaker on the right side of the case sounds the alarm.

In the video after the break [Piet] walks us through a demonstration, followed by a tour of the hardware. The pointer on the meter is a piece of cardboard connected to a servo. An Arduino board controls the servo, adding time in two-minute intervals whenever a coin enters the chute and passes by an optical sensor. There is no distinction between types of coins.

The use of a pizza box as a prototyping board shows that you don’t have to be fancy to build something neat.

Continue reading “Donation Meter Raises Alarm When Not Plugged With Coins”

Birth Of An Arduino

Hey look, an Arduino without its clothes on. This one’s just started its journey to becoming the ubiquitous prototyping tool. The image is from [Bunnie’s] recent tour of the fab house where Arduino boards are made.

As it says on every true Arduino board, they’re made in Italy. [Bunnie’s] trip to the factory happened in Scarmagno, on the outskirts of Torino. The process starts with large sheets of FR4 copper clad material, usually about 1 by 1.5 meters in size. The first task is to send the sheets through a CNC drill. With all of the holes done it’s time for some etch resist; the image above is just after the resist has been applied. A robotic system takes over from here, running the panels through the chemicals which first etch away the copper, then remove the resist and plate the remaining traces. From there it’s off to another machine for solder mask and silk screen.

There are videos of each step available. But our favorite piece is the image at the end that shows a pallet with stacks of completed PCB panels which are headed off to be populated with components.

[via Reddit]

Robot Cares For Grave Stones While Honoring The Dead

This robot was built to care for the graves and honor the dead in the Jewish tradition. It is called “Stoney” and was developed by [Zvika Markfeld] based on a concept by [Itamar Shimshony] who is working toward an MFA degree. The image above shows it in action as part of an installation; to our knowledge it has not been used for actual grave sites. But the concept is not a joke; it’s something that makes the observers think.

The base of the robot is an iRobot Roomba on top of which is built a platform for a robot arm. The arm has easy access to two palettes, one holds small stones, and the other flowers. There is also a small box which holds a rag. It navigates around the grave, placing stones, flowers, and using the rag and a water dispenser to symbolically clean the headstone. All of this is controlled by an Arduino Mega board which controls another Arduino running the arm, as well as the microcontroller in the Roomba.

The details of the ritual, as well as the components of the robot are well explained in the clip after the break.

Continue reading “Robot Cares For Grave Stones While Honoring The Dead”

Making A Game With Capacitive Touch

Hackaday has seen a ton of builds make use of the Arduino CapSense library of late, so it was only a matter of time before we posted a capacitive sensing game controller that is able to move sprites around a screen.

For this build, the controller is made out of small strips of Aluminum foil, wired straight to an Arduino with a few resistors. Once embedded inside a wonderful enclosure that brings about pangs of nostalgia it’s time tow write the game.

For the game portion of the build, Processing was brought into the mix to create a SpongeBob-themed ‘capture all the jellyfish in jellyfish fields’ game. By taping the contacts for the d-pad, the player can move SpongeBob around to catch jellyfish. If you’d like to give the game a go, you can play it in your browser on the project page.

This isn’t the first – or the last – CapSense build we’ll see on Hackaday, but it is the first one dedicated to making a DIY (albeit Nintendo inspired) video game controller. If six buttons aren’t enough, you’ll just have to wait for the PS3 version.