Just two weeks ago, the crew from the International Space Station released a photo of their nine crew members – an odd number considering that the facility only has space to house six astronauts at a time. In fact, the crew had just gathered for a celebratory dinner before three of the astronauts were to return home. The new astronauts joining including Hazza Al Mansouri, the first astronaut from the United Arab Emirates (who has since returned from his mission), as well as astronaut Jessica Meir and cosmonaut Oleg Skripochka.
Amidst the excitement over the upcoming 10 (!) spacewalks in the next three months, there’s also been some cool developments in the open source space, with one of the first ESP32s launched into space.
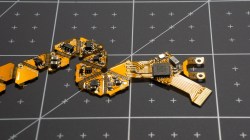
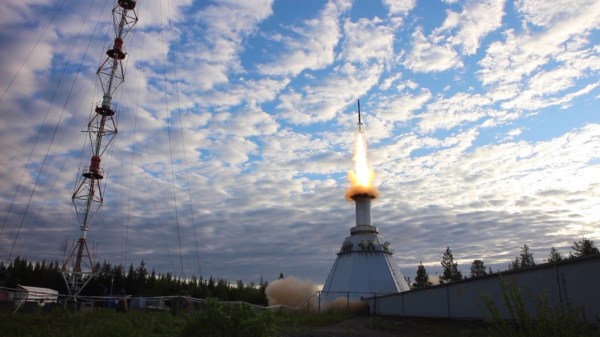
[Nico Maas] from the Microgravity User Support Center (MUSC) at DLR (German Aerospace Center) worked on an experiment launched by MORABA (Mobile Rocket Base) at DLR. The launch site was at the Esrange Space Center in Kiruna, Sweden, with the mission launching on June 13, 2019 at 4:21 am local time.
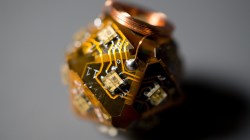
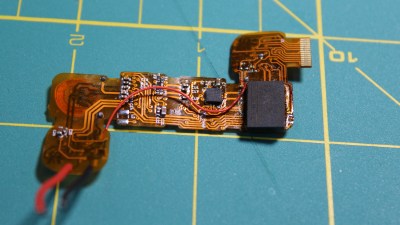
The experiment – APEX (Advanced Processors, Encryption, and Security Experiment) was onboard the ATEK / MAPHEUS-8, mission, rising to an altitude of 240km into space and returning back to earth after six minutes of microgravity.
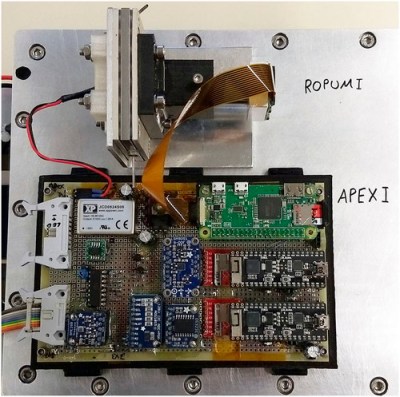
The main board included two ESP32s and a Raspberry Pi Zero W, running resinOS / balenaOS, an operating system designed to run parallel Docker containers and optimized for IoT fleet management.
Prior to the experiment, the standard for on-board computers for use in CubeSats was the ATmega/Arduino-based ARDUSAT. Since it was first made available for use in CubeSats in 2013, the performance has become limited, with improvements needed to perform higher throughput data sampling or operations requiring more computational power.
It’s also cool to note that the system, built using a 3D-printed holder, survived the re-entry (reaching up to 20.6g) with hardly a scratch.