A display based on magnetic viewing film

Moving Magnet Draws Stylish Shapes On Flexible Film

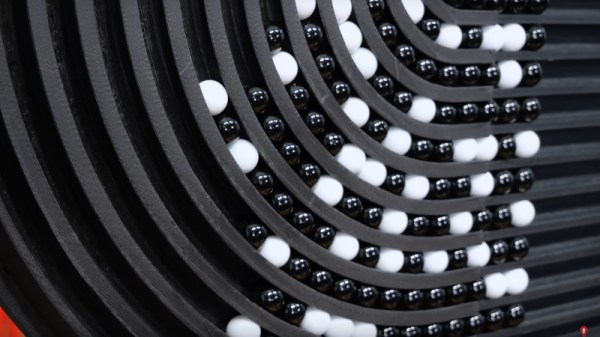
[Moritz v. Sivers] has a knack for making his own displays, which are typically based on some obscure physical effect. Magnetic viewing films, those thin plastic sheets that change color in response to a magnetic field, are his latest area of interest, as you can see in his Magnetic Kinetic Art Display.

The overall idea of the display is similar to a kinetic sand art table, in which a ball traces out shapes in a pile of sand. In [Moritz]’s project, the magnetic viewing film is the sand, and a 2 mm diameter magnet is the ball. The magnet is moved along the film by two sets of coils embedded inside a flex PCB mounted just below the film. One set of coils, on the top layer of the PCB, moves the magnet in the x direction, while a second set on the bottom layer moves it in the y direction.

A flex PCB with coils on both sides
The flex PCB is small, but carries lots of windings

[Moritz] used a flex PCB not because it had to be bendy, but to keep the two sets of coils as close together in the z direction as possible. This helps to avoid a big difference in strength between the two directions. To drive the coils, he used a pair of TB6612FNG stepper motor drivers, controlled by a Wemos D1 Mini.

The housing was 3D printed mostly from PLA, but with a few bits done in PETG. This was for structural rigidity as well as thermal performance — the coils can carry up to two amps and get pretty warm as a result.

The video, embedded below, shows some of the shapes that can be drawn: squares, spirals and even digits to turn the display into a clock. [Moritz] got the PCB coil idea from a project by [bobricius], and cleverly extended it into a useful product. It’s not the first time [Moritz] used magnetic viewing film to make a clock, either.

Continue reading “Moving Magnet Draws Stylish Shapes On Flexible Film”

Sailing On A Sea Of Seven-Segment Displays

The amount of information the humble seven-segment display can convey is surprising. There are the ten numerals, dead-ringers or reasonable approximations for about half the alphabet, and even a few not-quite-canonical symbols. But when you put 12,288 segments to work, you get all that and much more.

Behold Sea of Segments, an art piece by [Will Gallia] that really pushes what’s possible with seven-segment displays. The piece, which looks about the size of a decent flat-panel TV, is composed of an 8×6 array of PCBs, each of which holds an 8×4 array of white LED seven-segment displays; each board also holds two TLC5920 LED drivers. [Will] designed the PCBs to tile horizontally and vertically, making it possible to take data either from the top or right side and output to the bottom or left. Power is distributed to the modules through a series of steel bus bars, which also provide structural support for the display. The whole thing lives in an enclosure with a smoked acrylic front panel, and hangs from a pair of steel cables that also provide power.

Under the hood, a PocketBeagle does all the heavy lifting of talking to the display and translating images onto the display. [Will] came up with an encoding scheme that gives about five bits of grayscale, and built a program to figure out which segments should be lit to create an image. The result is a smooth and convincing reproduction of videos of waves on a beach, which is where the project gets its name. Check out the results in the video below.

[Will] says he drew inspiration for this build from the DigitGrid by [Skot9000]. That was a great project too, but Sea of Segments takes the concept to another level.

Continue reading “Sailing On A Sea Of Seven-Segment Displays”

Sneaky Clock Displays Wrong Time If It Catches You Looking

We have a soft spot for devices that subvert purpose and expectation, and that definitely sums up [Guy Dupont]’s Clock That Is Wrong. It knows the correct time, but whether or not it displays the correct time is another story. That’s because nestled just above the 7-segment display is a person sensor module, and when it detects that a person is looking towards it, the clock will display an incorrect time, therefore self-defeating both the purpose and primary use case of a clock in one stroke.

The person sensor is a tiny board with tiny camera that constantly does its best to determine whether a person is in view, and whether they are looking towards the sensor. It’s a good fit for a project like this, and it means that one can look at the clock from an oblique angle (meaning one is out of view of the sensor) and see the correct time. But once one moves in front of it, the time changes. You can watch a brief video of it in action in this Twitter thread.

One interesting bit is that [Guy] uses an ESP32-based board to drive everything, but had some reservations about making a clock without an RTC. However, he found that simply syncing time over the network every 10 minutes or so using the board’s built-in WiFi was perfectly serviceable, at least for a device like this.

This reminds us a little of other clocks with subtly subversive elements, like the Vetinari Clock which keeps overall accurate time despite irregularly drifting in and out of sync. Intrigued by such ideas? You’re not alone, because there are even DIY hobby options for non-standard clock movements. Adding the ability to detect when someone is looking directly at such a device opens up possibilities, so keep it in mind if it’s time for a weekend project.

Drawing Knots On An Oscilloscope Using Analog Means

Generating interesting imagery on an analog oscilloscope is a fun activity enjoyed by many, with an excellent demonstration by [Henry Segerman] provided in a recent video which covers [Matthias Goerner]’s demonstration. Using the electron beam, shapes can be drawn onto the phosphor of the oscilloscope’s CRT — all without touching any digital circuitry. At the core are analog components like an operational amplifier integrator, multipliers and other elements.

With just a number of these simple components in a circuit, it’s possible to draw a wide variety of shapes, all by applying the appropriate trigonometric parameters. In addition to the drawing of shapes, it is also demonstrated how these analog signals can be used for an analog audio synthesizer, and finally the image displayed on the oscilloscope is captured on Kodak (Polaroid) instant film, making the entire generating, processing and capturing chain fully analog.

While we’d be the last to campaign against digital electronics, it is fascinating to consider just how much can be done with analog electronics and a bit of mathematics. We assume that everyone did pay attention during math classes, making this a perfect chance to use all that knowledge of trigonometry.

Continue reading “Drawing Knots On An Oscilloscope Using Analog Means”

Directing Ambient Light For Some Extra Glow

[Yuichiro Morimoto] wanted to create a decorative lamp, one that wasn’t burdened with batteries or wires, but used just the ambient light in the room to create a directed glow effect. Using a coloured circular acrylic sheet, with a special coating (not specified) ambient light impinging on the surface is diffused toward the edge. This centre sheet is embedded in an opalescent sheet, which scatters the light from the center sheet, giving a pleasant glow, kind of akin to a solar corona. An additional diffuser cover sheet on the front covers over the edge to hide it, and further enhance the glow effect.

Details of the ‘special coating’ are scarce, with the coloured sheet described as a condenser plate. This clearly isn’t the same as diffuser plastic, as that cannot be seen through as clearly as some of the photographs show. So we’re a little stumped on this one! Please answer in the comments if you can, ahem, shed some light on this one!

When talking about ambient light, many people will think more along the lines of active lighting, for example, adaptive ambient light around a TV like this hack.

Continue reading “Directing Ambient Light For Some Extra Glow”

Domino Ring Machine Tips Tiles In A Never-ending Wave

Like to see dominoes fall? [JK Brickworks] has got what you need, in the form of a never-ending ring of falling and resetting tiles. LEGO pieces are the star in this assembly, which uses a circular track and moving ramp to reset tiles after they have fallen. Timed just right, it’s like watching a kinetic sculpture harmoniously generating a soliton wave as tiles fall only to be endlessly reset in time to fall again.

A Mindstorms IR sensor monitors a tile’s state for timing.

It’s true that these chunky tiles aren’t actually dominoes — not only are they made from LEGO pieces and hinged to their bases, they have a small peg to assist with the reset mechanism. [JK Brickworks] acknowledges that this does stretch the definition of “dominos”, but if you’re willing to look past that, it’s sure fun to see the whole assembly in action.

The central hub in particular is a thing of beauty. For speed control, an IR sensor monitors a single domino’s up/down state and a LEGO Mindstorms EV3 with two large motors takes care of automation.

The video does a great job of showing the whole design process, especially the refinements and tweaks, that demonstrate the truly fun part of prototyping. [JK Brickworks] suggests turning on subtitles for some added details and technical commentary, but if you’re in a hurry skip directly to 4:55 to see it in action.

Want to see more automated domino action? This domino-laying robot sets them up for you to knock down at your leisure, and this entirely different robot lays out big (and we do mean BIG) domino art displays.

Continue reading “Domino Ring Machine Tips Tiles In A Never-ending Wave”

Levitating Banana Is An Excellent Conversation Starter

“I really like your floating banana.” If that’s something you’ve always wanted your guests to say when visiting your living room, this levitating banana project from [ElectroBing] is for you.

The design is simple. It relies on a electromagnet to lift the banana into the air. As bananas aren’t usually ferromagnetic, a simple bar magnet is fitted to the banana to allow it to be attracted to the electromagnet. One could insert the magnets more stealthily inside the banana, though this would come with the risk that someone may accidentally consume them, which can be deadly.

Of course, typically, the magnet would either be too weak to lift the banana, or so strong that it simply attracted the banana until it made contact. To get the non-contact levitating effect, some circuitry is required. A hall effect sensor is installed directly under the electromagnet. As the banana’s magnet gets closer to the electromagnet, the hall effect sensor’s output voltage goes down. Once it drops below a certain threshold, a control circuit cuts power to the electromagnet. As the banana falls away, power is restored, pulling the banana back up. By carefully controlling the power to the electromagnet on a continuous basis, the banana can be made to float a short distance away in mid-air.

It’s a fun build, and one that teaches many useful lessons in both physics and electronics. Other levitation techniques exist, too, such as through the use of ultrasound. Video after the break.

Continue reading “Levitating Banana Is An Excellent Conversation Starter”