Hackaday Prize 2023: Bluetooth Spell To Speak

Have you ever known what you wanted to say but couldn’t figure out exactly how to say it? For some individuals, that’s all the time. The gap between intention and action can be a massive chasm. [Pedro Martin] is trying to help bridge that gap with a Bluetooth RPM letterboard.

[Soma Mukhopadhyay] developed Rapid Prompting Method (RPM) for teachers to work with students with autism. Gentle physical cues can help individuals complete motor movements, which can be used as a communication mechanism by pointing to a letterboard. Students can eventually move onto an tablet, but some students see the light as sensory noise or might associate it with playtime.

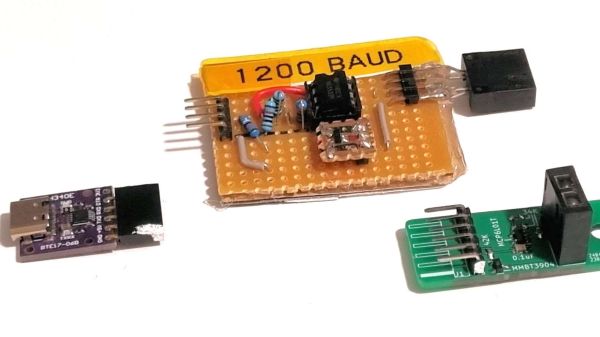
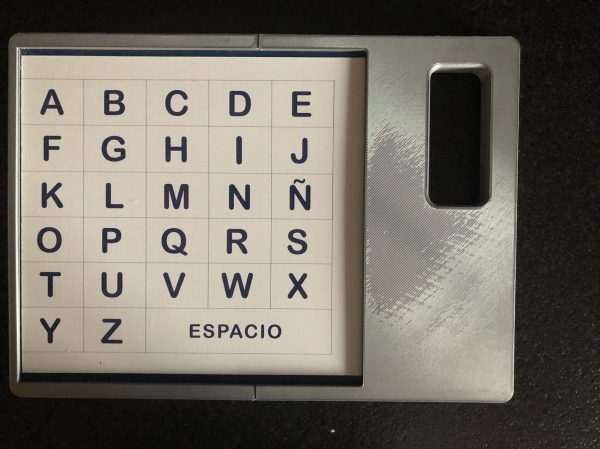
[Pedro] hopes that his letterboard will be able to provide tactile feedback for each letter to strengthen the connection the teacher is trying to establish. The letter board is a 22 by 14 grid (308 total) of touch electrodes connected to three MPR121 12-channel capacitive touch sensors connected to an ESP32 via I2C. Additionally, 60 LEDS controlled by two shift registers are interspaced between the touch electrodes. As only one LED will be on at a given time, [Pedro] can use the shift registers in a row/column setup since the current draw should be small. A piezo buzzer serves as additional feedback for the student. The ESP32 emulates a Bluetooth keyboard, so the teacher doesn’t have to keep track of what the student is spelling and can focus on RPM.

[Pedro] encountered the usual slew of debugging problems, such as ground bouncing, captive noise, and Bluetooth wonkiness. The code, KiCad, and STL files are on the Hackaday.io project page. If you want more accessibility-focused keyboards, look at the RP2040-based Intellikeys we saw recently.

Continue reading “Hackaday Prize 2023: Bluetooth Spell To Speak”

RetroPie, Without The Pi

The smart television is an interesting idea in theory. Rather than having the cable or satellite company control all of the content, a small computer is included in the television itself to host and control various streaming clients and other services. Assuming you have control of the software running on the computer, and assuming it isn’t turned into a glorified targeted advertising machine, this can revolutionize the way televisions are used. It’s even possible to turn a standard television into a smart TV with various Android devices, and it turns out there’s a lot more you can do with these smart TV contraptions as well.

With most of these devices, a Linux environment is included running on top of an ARM platform. If that sounds similar to the Raspberry Pi, it turns out that a lot of these old Android TV sets are quite capable of doing almost everything that a Raspberry Pi can do, with the major exception of GPIO. That’s exactly what [Timax] is doing here, but he notes that one of the major hurdles is the vast variety of hardware configurations found on these devices. Essentially you’d have to order one and hope that you can find all the drivers and software to get into a usable Linux environment. But if you get lucky, these devices can be more powerful than a Pi and also be found for a much lower price.

He’s using one of these to run RetroPie, which actually turned out to be much easier than installing a more general-purpose Linux distribution and then running various emulation software piecemeal. It will take some configuration tinkering get everything working properly but with [Timax] providing this documentation it should be a lot easier to find compatible hardware and choose working software from the get-go. He also made some improvements on his hardware to improve cooling, but for older emulation this might not be strictly necessary. As he notes in his video, it’s a great way of making use of a piece of electronics which might otherwise be simply thrown out.

Continue reading “RetroPie, Without The Pi”

Reverse Engineering A Better Night’s Sleep

All you want is a decent night’s sleep, so you decide to invest in one of those fancy adjustable beds. At first, it’s fine — being able to adjust the mattress to your needs on the fly is a joy, and yet…something isn’t quite right. Something nags at you every night, thwarting your slumber and turning your dreams of peaceful sleep into a nightmare once you realize your bed has locked you into a vertically integrated software ecosystem from which there’s no escape.

Or is there? That’s what [Chris Laplante] wanted to know, and why he reverse-engineered his Tempur-Pedic remote control. As many products these days do, his bed was touted as having an Android application for smartphone adjustability, but alas, the app hasn’t been updated since 2014 (!) and doesn’t appear to work on modern phones. [Chris] decided to take matters into his own hands and build a gateway to talk to the bed using its native RF protocol.

Most good reverse engineering stories start with research, and this one is no exception. Digging into the FCC database revealed a wealth of clues, such as the frequency — 433-MHz ISM band, no surprise — and even spectrum analyzer screenshots of the remote’s signals. A HackRF One revealed more about the signals, but it turned out that sniffing in on the SPI bus between the microcontroller and the Si4431 RF transceiver with a Salae logic analyzer was more fruitful, allowing him to dig into the packet structure.

The engineers at Tempur-Pedic threw quite a few challenges at [Chris], like an application-level CRC in addition to the CRC used by the Si4431, and interesting complications to control the massage features of the bed. In the end, [Chris] managed to get a pretty complete snapshot of the conversation between the bed and the remote, and is now in the process of building a gateway that’ll actually connect to his phone, plus integrate into his home automation system. We’re looking forward to updates on that.

A Lightweight Smart Home Server

Working towards automating a few things in a home often seems simple on the surface, but it’s easy for these projects to snowball into dozens of sensors and various servos, switches, and cameras strewn about one’s living space. The same sort of feature creep sneaks into some of the more popular self-hosted home server platforms as well, with things like openHAB requiring so much computing power that they barely function on something like a Raspberry Pi. [Paulo] thought there should be a more lightweight way of tackling a project like this, and set about building his own smart home server with help from some interesting software.

The project is based around the Dirigera hub from Ikea, partially because [Paulo] is planning to use other smart home devices from Ikea as he can easily find them where he is, and also because these devices tend to use Zigbee, a non-proprietary communications standard. This means that if he ever wants to swap out the hub for another one in the future, it won’t be difficult to do. From here the major hurdle is that using the default software from these devices is fairly limiting, so [Paulo] reached for a Raspbee 2 Zigbee gateway for use with a Raspberry Pi and an extremely lightweight and customizable web server called Mako to make this happen. Using Lua as the high-level language to tie everything together he was able to easily deploy the server to control the Ikea hub and devices and automate them in any way he sees fit.

While it is true that software like openHAB and others already exists to do virtually any home automation task that could be imagined, if you’re looking to do something with a bare minimum of computing power something like [Paulo]’s solution is likely going to be the fastest and most reliable method of getting a few things automated around the home. If you’re looking for something completely open source and built from the ground up, though, we have seen a few alternative smart home solutions like this one which don’t rely on any proprietary hardware or software, but do take a little bit more effort on the user’s part.

Detail of a circuit sculpture in the shape of a lighthouse

Op Amp Contest: This Lighthouse Sculpture Flickers In The Rhythm Of Chaos

Op amps are typically used to build signal processing circuits like amplifiers, integrators and oscillators. Their functionality can be described by mathematical formulas that have a single, well-defined solution. However, not every circuit is so well-behaved, as Leon Chua famously showed in the early 1980s: if you make a circuit with three reactive elements and a non-linear component, the resulting oscillation will be chaotic. Every cycle of the output will be slightly different from its predecessors, and the circuit might flip back and forth between different frequencies.

A circuit sculpture in the shape of a lighthouseA light modulated with a chaotic signal will appear to flicker like a candleflame, which is the effect [MaBe42] was looking for when he built a lighthouse-shaped circuit sculpture. Its five differently-colored LEDs are driven by a circuit known as Sprott’s chaotic jerk circuit. A “jerk”, in this context, is the third-order derivative of a variable with respect to time – accordingly, the circuit uses three RC integrators to implement its differential equation, along with a diode to provide nonlinearity.

The lighthouse has three chaotic oscillators, one in each of its legs. Their outputs are used to drive simple pulse-width modulators that power the LEDs in the top of the tower. [MaBe42] used the classic LM358 op amp for most of the circuits, along with 1N4148 diodes where possible and 1N4004s where needed – not for their higher power rating, but for their stronger leads. As is common in circuit sculptures, the electronic components are also part of the tower’s structure, and it needs to be quite sturdy to support its 46 cm height.

[MaBe42] used 3D printed jigs to help in assembling the various segments, testing each circuit before integrating it into the overall structure. The end result is a beautiful ornament for any electronics lab: a wireframe structure with free-hanging electronic components and randomly flickering lights on top. Want to learn more about circuit sculpture? Check out this great talk from Remoticon 2020.

Continue reading “Op Amp Contest: This Lighthouse Sculpture Flickers In The Rhythm Of Chaos”

Know Audio: Distortion Part One

If you follow audiophile reviewers, you’ll know that their stock-in trade is a very fancy way of saying absolutely nothing of quantifiable substance about the subject while sounding knowledgeable about imagined differences between devices that are all of superlative quality anyway. If you follow us, we’ll tell you that the only reviews that matter are real-world measurements of audio performance, and blind listening tests. We don’t have to tell you how to listen to music, but perhaps it’s time in our Know Audio series to look at how audio performance is measured.

Before reaching for the bench, it’s first necessary to ask just what we are measuring. What are the properties which matter in an audio chain, or in other words, just what is it that makes an audio device good?

Continue reading “Know Audio: Distortion Part One”

Souped-Up Reflective Sensor Uses Itself For Wireless Programming

Proximity sensors are common enough in automation projects that we hardly give them a second thought — pick something with specs that match the job and move on. But they can be fussy to get adjusted just right, a job made more difficult if they’re located in some out-of-the-way corner.

But where lies a challenge, there’s also an opportunity, as [Ido Gendel] shows us with this remote-controlled proximity sensor. The story behind this clever little hack starts with an off-the-shelf sensor, the kind with an IR LED and a phototransistor pointed in the same direction that gives a digital output when the light bouncing back into the phototransistor exceeds a certain threshold. It was setting the threshold that gave [Ido]’s client trouble, so [Ido] decided to build a programmable drop-in replacement to make the job easier.

The first try at this used an OBP732 reflective transmitter and an ATtiny202 microcontroller and had three pads on the PCB for programming. This still required physical contact for programming, though, so [Ido] had the idea to use the sensor for wireless IR programming. The microcontroller on version two was switched to an ATtiny212, and a couple of components were added to control the power of the LED so the sensor could do double duty. A programmer using the same sensor and a USB-to-UART adapter completes the system, and allows the sensor threshold to be set just by shining the programmer in its general direction from up to 25 cm away.

We think that getting multiple uses from a single sensor is pretty clever, so hats off for this one. It’s not the first time we’ve featured one of [Ido]’s projects, but it’s been quite a while — this one-clock-cycle-a-day Shabbat clock was the most recent, but you can clearly see the roots of the sensor project in this mouse pointer data encoder that goes all the way back to 2015.