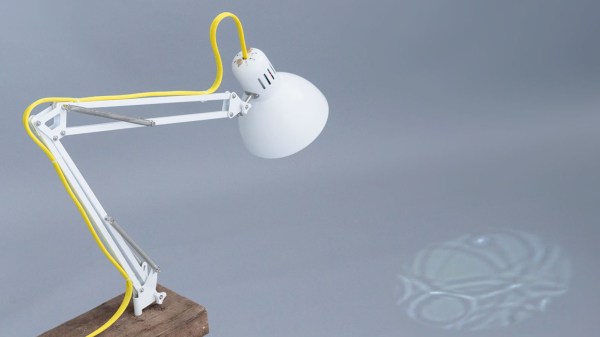
We love to hack IKEA products, marvel at Raspberry Pi creations, and bask in the glow of video projection. [Nord Projects] combined these favorite things of ours into Lantern, a name as minimalist as the IKEA lamp it uses. But the result is nearly magic.
The key component in this build is a compact laser-illuminated video projector whose image is always in focus. Lantern’s primary user interface is moving the lamp around to switch between different channels of information projected on different surfaces. It would be a hassle if the user had to refocus after every move, but the focus-free laser projector eliminates that friction.
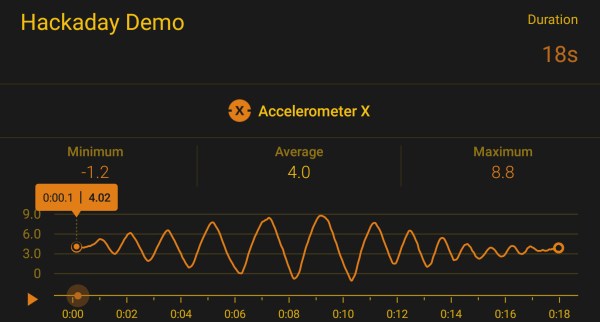
A user physically changing the lamp’s orientation is detected by Lantern’s software via an accelerometer. Certain channels project an information overlay on top of a real world object. Rather than expecting its human user to perform precise alignment, Lantern gets feedback from a Raspberry Pi camera to position the overlay.
Speaking of software, Lantern as presented by [Nord Projects] is a showcase project under Google’s Android Things umbrella that we’ve mentioned before. But there is nothing tying the hardware directly to Google. Since the project is open source with information on Hackster.io and GitHub, the choice is yours. Build one with Google as they did, or write your own software to tie into a different infrastructure (MQTT?), or a standalone unit with no connectivity at all.
Continue reading “IKEA Lamp With Raspberry Pi As The Smartest Bulb In The House”