[phirzcol] sent us this cool step by step build of a retro looking keyboard, Inspired by [Von Slatt] and his work. [phirzcol] starts with a standard keyboard and removes the keys. He steams some wood to wrap the keyboard, then finishes it off nicely. The process of making the keys looks pretty grueling. Each key has 4 parts which have to be hand cut and assembled. A blue accent light is a nice touch as well. The keyboard looks pretty good, but we’d like to try typing on it for a while to see how usable it is. If it looks like too much effort, you can actually buy it on ebay.
classic hacks2767 Articles
Robot Fish CAD Models
[Bre] dug up this excellent robot fish prototype project. The PPF-O9 has three servos. One on the forward fins to control depth, one on the middle joint, and one final one drives the tail fin. The battery box is mounted to the underside. The control scheme is interesting: the right stick controls left/right and up/down while the left stick controls the frequency and amplitude of the motion. They say the robot is fairly stable, but swimming and turning can be slow. They’ve included CAD files for almost every component to help you with your own designs.
In June, we highlighted a robofish designed for swarm communication.
Flash Sync Port Hacking
Reader [Adrian] picked up a couple cheap wireless flash triggers on eBay. Unfortunately, his Sigma EF-500 DG Super strobe doesn’t have the necessary sync port to make use of these. He popped the device open to try to figure out a way to trigger the device manually. The first idea was to use the test button to fire the device. Thanks to lag, it didn’t work for anything under 1/20th. The solution was to go straight for the optical trigger. [Adrian] has posted some teardown pictures that will help you determine the appropriate solder points for your own mod. The only bit that’s left is adding a 3.5mm mono headphone jack as a sync port. He also has a post on modifying the flash for greater head movement.
Hexbug Brain Transplant
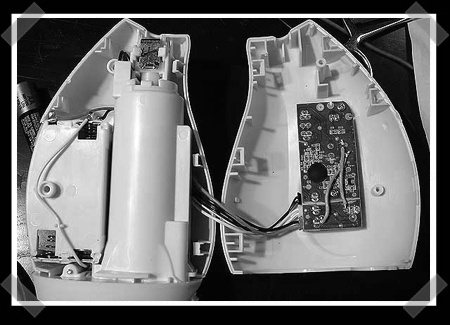
The Hex Bug, at $10, proves to be a perfect platform for building your own droid. Out of the box, it has pretty limited functionality. It walks forward until its antennae bump something, then it backs up and turns left. Applied inspirations shows us how you can replace the bug’s brains with a microcontroller to give it much more life. Instead of hacking into the existing electronics, they chose to completely replace the board. The final result, though still only able to turn one direction, is much more robust. They discuss the ability to add numerous sensors as well as pre program different behaviours and personalities.
Flickering LED Circuit
Here’s a simple project for your Halloween celebration. The other day while looking through our box of Halloween decorations, we noticed that the incandescent lamp in one of the jack-o’-lanterns was burnt out. Instead of simply replacing the outdated bulb, we decided to build a small dark detecting circuit with 2 yellow LEDs based on this Evil Mad Scientist Laboratories design. After successfully building the circuit, we took the project one step further by incorporating an Atmel ATtiny13 microcontroller. The code switches the LEDs on and off randomly for a flickering effect and is based on this instructable. Below is the schematic we created in EAGLE and a parts list.
Aspire One 3G Hack
[tnkgrl] is back with part three of her Acer Aspire One hacking. This time she’s adding in 3G. You may look at the picture the above and think, “Cake. She just plugged the card in”. No, the Acer doesn’t ship with the mini-PCIe slot or the SIM card holder. First you have to solder a right angle mini-PCIe connector to the board pads and bridge two others to provide power. The SIM holder was another problem. She wasn’t able to find a pin compatible one. The one she installed is mounted to a riser so she could change the wiring order (let her know if you can find the correct part). This mod definitely requires some good soldering skills and she warns that even she managed to destroy a SIM in the process.
The Dell Mini 9 is another netbook that doesn’t have the appropriate connectors soldered on board, but JKK has a work-around. You need a 3G modem that has the SIM card on board. You plug it into the WiFi slot after taping over a few pins and then use a USB WiFi card instead.
Cellular Automata And LED Matrix Fun
Blinkomat, an LED matrix, turned out quite well. 240 LEDs controlled by an Atmega 16 is what we call a decent bookshelf decoration. The dimensions of 12×20 were chosen due to the fact that the microcontroller has 32 I/O lines. The LEDs are switched on and off using multiplexing. The brightness, controlled by pulse width modulation can be varied by 16 levels. The overall effect is quite smooth an fun to look at. He has programmed it to do other things than just cellular automata. Our personal favorite is a simple sine wave. Watch it after the break.