Broken Pocket Watch Becomes Pocket Sundial

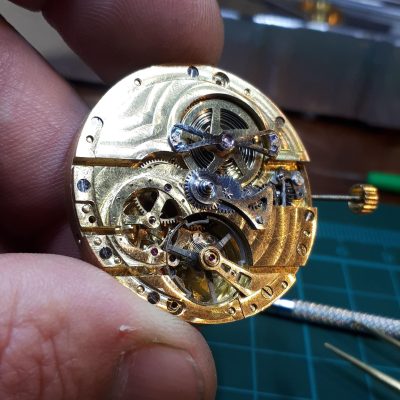
Pocket watches are all well and good, but they have some caveats. They either need regular rewinding, or they need batteries. Sundials on the other hand need only the light from our One True Sun. [JGJMatt] has just the project to convert your broken or disused pocket watches to the solar way of telling the time.

The key is to replace the clockwork internals and face of the pocket watch with a sundial instead. The first step is to create a face for the watch marked out for sundial use. [JGJMatt] explains how to do this with a variety of CNC, painting, or etching methods. He also explains how to use simple tools to generate a sundial design that’s ideally suited to your geographical location. This includes methods for aligning the sundial to True North or True South with an offset compared to Magnetic North or Magnetic South. This allows the sundial to be as accurate as possible. [JGJMatt] describes the general techniques while also building a sundial of his very own. The resulting piece is a handsome bit of brass with a lovely gnomon standing tall to cast a shadow on the dial.

It’s not a quick way to tell the time, by any means. However, the next time your friends ask you what time it is, and you whip out a compass to line up your sundial, they’re sure to be impressed. We’ve seen some creative sundial designs before, too, and if you’ve been creating your own fancy timepieces, don’t hesitate to let us know on the tipsline!

The Nixie Clock From Outer Space

Nixie clocks are nothing new. But [CuriousMarc] has one with a unique pedigree: the Apollo Program. While restoring the Apollo’s Central Timing Equipment box, [Marc] decided to throw together a nixie-based clock. The avionics unit in question sent timing pulses and a mission elapsed time signal to the rest of the spacecraft. Oddly enough, while it had an internal oscillator, it was only used during failures. It normally synched to the guidance computer’s onboard clock.

There is a detailed explanation of the unit, along with some of the ancillary equipment and panels. Much of what the output from the unit is driving counters to display timers, although some of the clocks drive other pieces of equipment, like the telemetry commutator, which time stamps each telemetry frame.

Continue reading “The Nixie Clock From Outer Space”

A display based on magnetic viewing film

Moving Magnet Draws Stylish Shapes On Flexible Film

[Moritz v. Sivers] has a knack for making his own displays, which are typically based on some obscure physical effect. Magnetic viewing films, those thin plastic sheets that change color in response to a magnetic field, are his latest area of interest, as you can see in his Magnetic Kinetic Art Display.

The overall idea of the display is similar to a kinetic sand art table, in which a ball traces out shapes in a pile of sand. In [Moritz]’s project, the magnetic viewing film is the sand, and a 2 mm diameter magnet is the ball. The magnet is moved along the film by two sets of coils embedded inside a flex PCB mounted just below the film. One set of coils, on the top layer of the PCB, moves the magnet in the x direction, while a second set on the bottom layer moves it in the y direction.

A flex PCB with coils on both sides
The flex PCB is small, but carries lots of windings

[Moritz] used a flex PCB not because it had to be bendy, but to keep the two sets of coils as close together in the z direction as possible. This helps to avoid a big difference in strength between the two directions. To drive the coils, he used a pair of TB6612FNG stepper motor drivers, controlled by a Wemos D1 Mini.

The housing was 3D printed mostly from PLA, but with a few bits done in PETG. This was for structural rigidity as well as thermal performance — the coils can carry up to two amps and get pretty warm as a result.

The video, embedded below, shows some of the shapes that can be drawn: squares, spirals and even digits to turn the display into a clock. [Moritz] got the PCB coil idea from a project by [bobricius], and cleverly extended it into a useful product. It’s not the first time [Moritz] used magnetic viewing film to make a clock, either.

Continue reading “Moving Magnet Draws Stylish Shapes On Flexible Film”

Displaying The Time Is Elemental With This Periodic Table Clock

We see a lot of clocks here at Hackaday, so many now that it’s hard to surprise us. After all, there are only so many ways to divide the day into intervals, as well as a finite supply of geeky and quirky ways to display the results, right?

That’s why this periodic table clock really caught our eye. [gocivici]’s idea is a simple one: light up three different elements with three different colors for hours, minutes, and seconds, and read off the time using the atomic number of the elements. So, if it’s 13:03:23, that would light up aluminum in blue, lithium in green, and vanadium in red. The periodic table was designed in Adobe Illustrator and UV printed on a sheet of translucent plastic by an advertising company that specializes in such things, but we’d imagine other methods could be used. The display is backed by light guides and a baseplate to hold the WS2812D addressable LEDs, and a DS1307 RTC module gives the Arduino Nano a sense of time. The 3D printed frame of the clock has buttons for setting the time and controlling the clock; the brief video below shows it going through its paces.

We really like the attention to detail [gocivici] showed here; that UV printing really gave some great results. And what’s not to like about the geekiness of this clock? Sure, it may not be as action-packed as a game of periodic table Battleship, but it would make a great conversation starter.

Continue reading “Displaying The Time Is Elemental With This Periodic Table Clock”

PCB Makes 7 Segment Displays

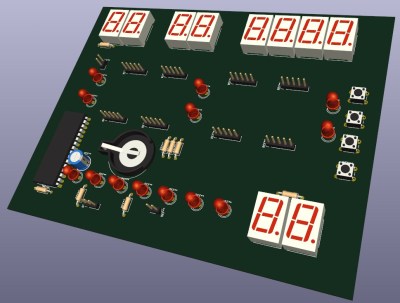
Of course, there’s nothing unusual about using 7-segment displays, especially in a clock. However, [Edison Science Corner] didn’t buy displays. Instead, he fabricated them from a PCB using 0805 LEDs for the segments. You can see the resulting clock project in the video below.

While the idea is good, we might have been tempted to use a pair of LEDs for each segment or used a diffuser to blur the LEDs. The bare look is nice, but it can make reading some numerals slightly confusing.

Continue reading “PCB Makes 7 Segment Displays”

The Curved Nature Of Time Clock

While we’re told that space-time curves, we aren’t sure that was what [andrei.erdei] was going for when he built a great-looking curved LED clock. The LEDs are courtesy of a strip of 84 WS2812 smart LEDs, the curve comes from a 3D printed part, and a Wemos D1 mini provides the brains.

Like all of our favorite clocks, this one has a unique way of displaying the time. If you find the description in the post hard to understand, the video below makes it a bit easier to wrap your head around. Note the time appears in the top left corner of the video in several cases — so you can check to see if you’re reading it correctly.

The secret sauce, of course, is the curved plastic grid that holds the LEDs. Because of the unusual shape, supports are a must and there are notes in the post about the settings used to get the best results. With 84 LEDs, the software has to be careful not to turn them to full brightness at one time, or else the clock would need a 6 amp power supply. Instead, the software limits the brightness to a little less than half of the maximum. No LED is ever white, and not all LEDs are on at once. The clock works easily, according to [andrei], with a 2 A supply. The clock has a WiFi connection where you can set things up easily.

Overall, a nice-looking project that would look at home on a science fiction movie set. We’ve seen color clocks before. If you want to economize on LEDs, we’ve seen a clock with only five!

Continue reading “The Curved Nature Of Time Clock”

Morse Code Clock For Training Hams

It might seem antiquated, but Morse code still has a number of advantages compared to other modes of communication, especially over radio waves. It’s low bandwidth compared to voice or even text, and can be discerned against background noise even at extremely low signal strengths. Not every regulatory agency requires amateur operators to learn Morse any more, but for those that do it can be a challenge, so [Cristiano Monteiro] built this clock to help get some practice.

The project is based around his favorite microcontroller, the PIC16F1827, and uses a DS1307 to keep track of time. A single RGB LED at the top of the project enclosure flashes the codes for hours in blue and minutes in red at the beginning of every minute, and in between flashes green for each second.

Another design goal of this build was to have it operate with as little power as possible, so with a TP4056 control board, single lithium 18650 battery, and some code optimization, [Cristiano] believes he can get around 60 days of operation between charges.

For a project to help an aspiring radio operator learn Morse, a simple build like this can go a long way. For anyone else looking to build something similar we’d note that the DS1307 has a tendency to drift fairly quickly, and something like a DS3231 or even this similar Morse code clock which uses NTP would go a long way to keeping more accurate time.

Continue reading “Morse Code Clock For Training Hams”