The Perils Of Buying A Stereo Microscope Without A Stand

scope

[Steve] has wanted a stereo microscope in his lab for years now. Since his eyesight is becoming progressively worse, he figured it was time to look around on ebay and see what he could dig up. He ended up buying a very cheap microscope without a stand, figuring he could build one rather easily. Well, the articulated stand was rather easy to put together, but it did take a whole lot of time to build.

The main goal of [Steve]’s project was to have his microscope at the end of an articulated arm. With this setup, he could easily tuck the ‘scope against the back of his workbench when not in use and easily bring it out when necessary. This meant building a custom arm, though, and in the building process [Steve] used just about every machine tool he had at his disposal.

The end result is a fully articulated arm that can be moved to just about any point on his workbench and adjusted up and down for those really weird project. [Steve] says this may be a great introduction to home powder coating, and he really should build a small LED light source, but we’re loving the project so far.

Continue reading “The Perils Of Buying A Stereo Microscope Without A Stand”

OpenSCAD Is For Use With 2D Machine, Not Just 3D Printing

openscad-for-2d-machining

Here’s an enclosure which was designed with OpenSCAD and cut out on a CNC router. [Matthew Venn] wrote about the project because he sees tons of 3D printing hacks that use the software, but almost never hears about it as a tool for laser cutting or CNC router/mill work. When we read that we thought we must have seen a lot of 2D hacks but a search of Hackaday’s previous offerings proved us wrong. Just this week we heard about the software in use with the Makerbot. Or you could go back about a year and read about creating 3D molds. But nothing on 2D work.

His post is a quick read and shows off the bare bones of the case designs he’s been working with for a few years. By referencing the code itself, and playing with how it changes the render in OpenSCAD he makes a strong case for quick and easy enclosure design. If you use this technique make sure to document your experience because we want to hear about it!

Add Speed Control To A DIY CNC Machine

adding-speed-control-to-diy-cnc

[Jesse Merritt] bought a manual speed controller for his router. It’s used in the CNC mill he build and he figured, why not add the ability for the computer to control the speed.

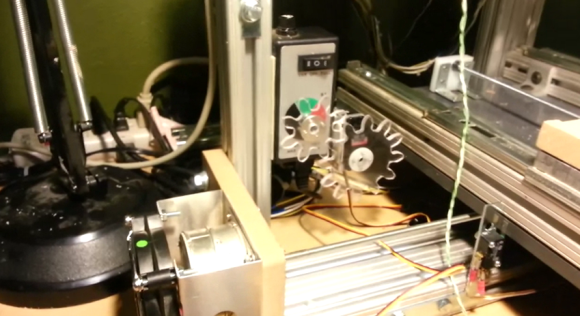
The speed controller is a $20 unit from Harbor Freight. It comes with an On/Off switch and knob which adjusts the power going to the router. [Jesse] pulled off the knob and milled a gear which takes its place. The second gear is attached to the horn of a hobby servo mounted on the side of the speed controller. The video after the break demonstrates an Arduino driving the servo based on a potentiometer input as well as commands from the CNC controller board he’s using.

Design files for the gears and the Arduino code which drives the servo is available from his Github repository.

Continue reading “Add Speed Control To A DIY CNC Machine”

Script Lets You Import Eagle Boards For Use In FreeCAD

eagle-designs-imported-for-freecad

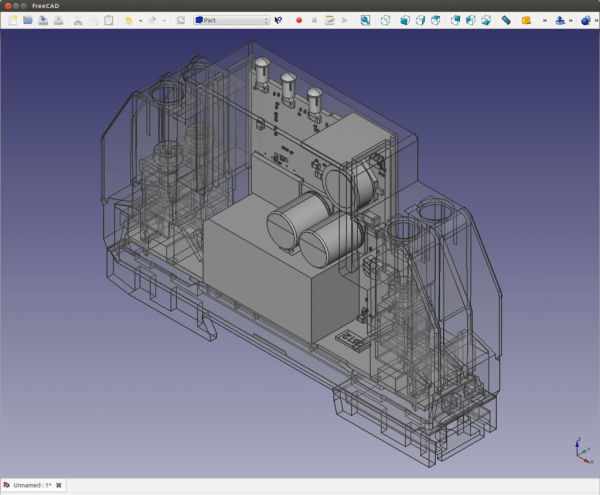
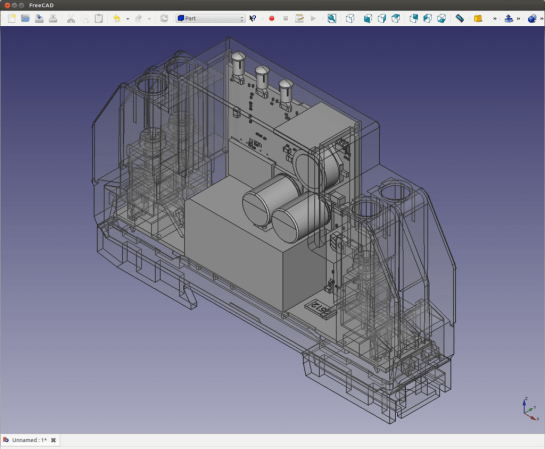
[Christian Aurich] wanted to use his Eagle CAD circuit board design in a proper CAD program in order to design enclosures. There are already a few options along these lines, but they didn’t quite fit his needs so he developed a script to import Eagle boards into FreeCAD. The script is packaged as a python macro for FreeCAD.

In describing the shortcomings of what’s already out there [Christian] does mention the use of EagleUp to model boards in Google SketchUp. But he feels the way the data is produced by SketchUp makes these models work well with 3D printing, but says they’re not easy to use with mechanical design CAD software. He also feels that the photo-realistic renderings are useless when developing enclosures.

It’s worth mentioning that this approach is only possible because CadSoft’s migration to XML makes it dead simple to get at the data.

Web Connected Treat Dispenser Appeases The Pets

web-connected-treat-dispenser

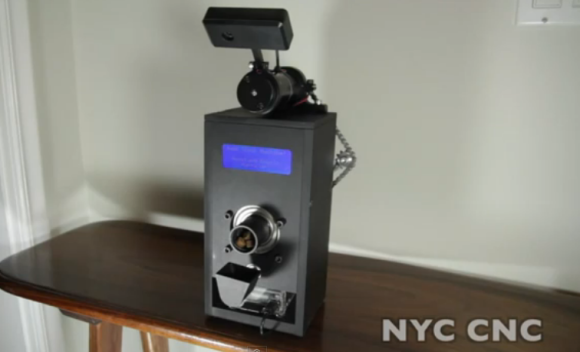
[John] was looking for a project for his newly acquired Raspberry Pi and decided to include his dog in the fun. although his finished project looks a lot like an old time camera, it’s actually a web-connected treat dispenser that uses his dog’s email address for dispensation.

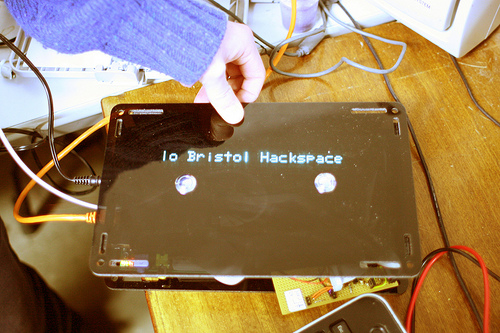
Let’s take a look at the hardware from top to bottom. There’s a camera with a eagle’s eye shot of his furry friend waiting for treats. The cylinder below that is the motor which drives the treat dispenser. You can see the chain tensioner on the back which connects the motor to the tube dispenser in the center of the box. Just above that outlet is the character display which gives feedback to anyone watching the dispenser. Nearing the bottom is a hopper that catches the treats, then flips over to dump them onto the floor. And finally at the bottom is a slot for the Raspberry Pi which drives everything.

Most of [John’s] projects revolve around CNC work. In addition to the demo video found after the break there’s a second that focuses on CAD design. About half way through that clip he gives us a close-up tour of all the hardware.

Continue reading “Web Connected Treat Dispenser Appeases The Pets”

Extending The Features Of An IP Camera

adding-external-control-via-IP-camera

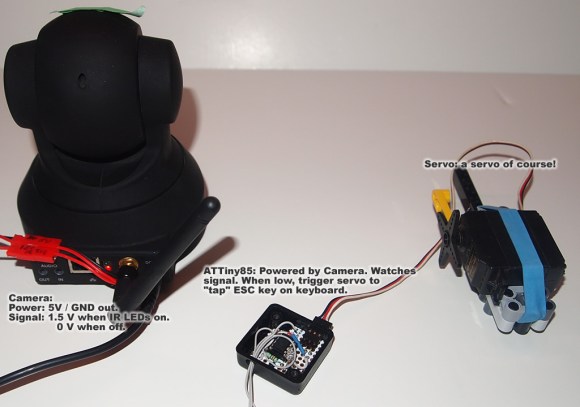
[Dave Astolfo] wanted to be able to let his CNC mill run by itself with the ability to monitor it remotely. The only problem with that idea is that if he checked in and saw something bad happening he needed a remote kill switch as well. He ended up killing two birds with one stone by adding extra features to an IP camera.

These Internet Protocol cameras are pretty nifty. Just plug their power cord in and they’ll connect to WiFi and start streaming video. Many of them offer features like pan and tilt, and this model even features IR LEDs for night viewing that can be switched on and off through the web interface. That’s the point at which [Dave] started his hack. He patched into the leads on the IR LEDs. They’re monitored by an ATtiny85. When he turns on the LEDs via the webpage the ATtiny85 senses it and drives a servo motor to push the ESC key on the keyboard. As you can see in the clip after the break, this will stop the milling in its tracks. We especially liked the use of LEGO Technique pieces to make the servo mount removable.

Continue reading “Extending The Features Of An IP Camera”

Printing Images With A Wood Burning CNC Machine

printing-images-with-a-wood-burning-cnc-machine

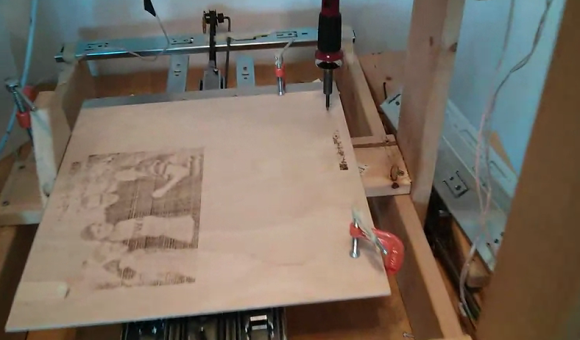
Just to clear up any confusion from the title, this wood burning CNC machine runs on electricity. The wood burner acts as the print head. It’s the thing in the upper right of the field that looks a bit like a soldering iron. In this case it’s being used like a dot matrix printer.

We suppose this is a form of halftone printing, although it doesn’t produce the uniformity we’ve seen with mill-based halftone techniques. [Random Sample] built the machine from wood, drawer sliders, and stepper motors with toothed belts. His Python script takes an image and transforms it into a file which can be used to guide each of the three axes of the machine. An Arduino receives these commands via the USB connection. Each image prints in a grid, with darker pixels created by leaving the hot tip in contact with the wood for a longer period of time.

Don’t miss the sample video embedded after the jump.

Continue reading “Printing Images With A Wood Burning CNC Machine”