DIY Low-power PSU For Home Server Use

diy_pc_psu

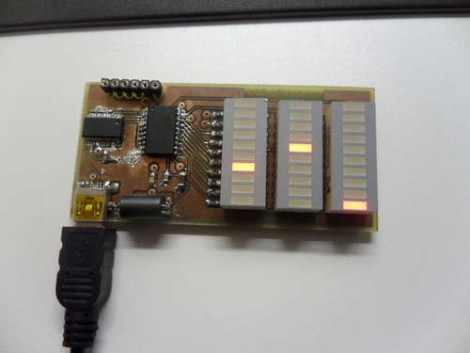
[Viktor] decided to replace his old power hungry home server with a model that is much easier on the old electric bill. The new motherboard uses an Intel Atom chip and consumes far less power than its predecessor. He figured there was no reason to use a bulky ATX power supply when all he needed was 12V for the mainboard and a pair of 5V rails for his hard drives, so he decided to build a PSU himself.

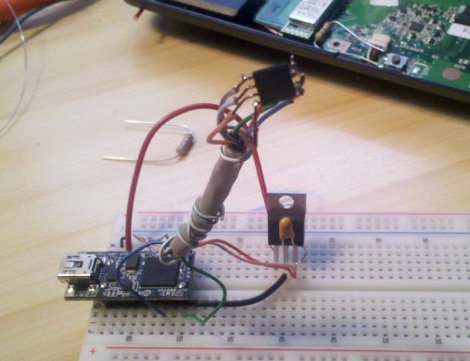
He sourced a 100VA toroid transformer as the basis of the power supply due to its popularity with audio amp builders, adding a standard bridge rectifier and smoothing capacitor before regulating the DC output. A pair of switching regulators were added, one for the 6A, 12V, and a second for the 1.5A, 5V supply. The motherboard only requires about 18W at full tilt, so the PSU should be more than sufficient for his needs.

Schematics and board layouts are available for free on his site, if you are in the market for your own DIY low-power PSU.

Looking for more build to suit electronics?  Check out this DIY amp we featured just the other day.

[Thanks, Chris]

PC Case Using CNC Router And Home Building Products

[Reinventing Science] needed a project that he could use to test out his skills on a new CNC routing machine he recently acquire. He settled on building a PC case using easily obtained materials. What he ended up with is the clean-looking case seen above that was machined from materials you can pick up at the home store.

The bulk of the case is made from extruded PVC which is designed to perform like solid wood trim. He picked up one piece of the ‘lumber’ and cut out the front, back, top, bottom, and drive bay bezel. We expected the joints between the horizontal and vertical pieces to either be butt joints, or rabbits. But [Reinventing Science] wanted a cleaner look and managed to mill mortise and tenon joints. These are strong joints that leave a very nice finished look. Since the material is designed as a lumber replacement it shouldn’t be too surprising to see drywall screws used as the fasteners.

In addition to joinery, some other CNC tricks were used. The sides of the case were cut from clear acrylic, with a decorative bead milled in the surface. There’s also fan ports cut in the top and vents on the bottom, as well as some engraving with the name of the project just above the optical drive. The wood-grain embossing makes for an interesting final look; we’d like to see how this takes a few careful coats of paint.

If you’re interested in the CNC hardware used, take a look at the unboxing post that shares a few details.

DIY Digital Pinball Console Plays Hundreds Of Games

pinball_console

Pinball machines, while likely considered pretty retro technology by most, are still a fun and engaging way to waste a little time. The problem with pinball machines is that they take up a lot of space, making the hobby of collecting them pretty prohibitive unless you have tons of spare room in your house.

[tbarklay] loves pinball machines but doesn’t have to room for an elaborate collection. Rather than purchase one machine, he opted to build his own pinball table that can be used to play any number of games. He repurposed an old PC to power his table, connecting it to a 24″ LCD panel for the main display board. A custom cabinet was built to contain the large LCD panel as well as the computer. A 19″ LCD screen was mounted on top of the cabinet to serve as the backglass display. A set of arcade buttons were also added to the console to provide realistic paddle control.

While we don’t have a video of his particular table in action, check out this video we found of  a pinball machine that uses the same setup.

Continue reading “DIY Digital Pinball Console Plays Hundreds Of Games”

Mini SATA Power Adapter Does Away With HDD Docking Stations

sata_power_adapter

[Marc] is pretty unsatisfied with hard drive docking stations as a whole. He says they are typically slow and unreliable, causing him all sorts of grief while he is troubleshooting a questionable hard drive. He decided to take some of the mystery out of the troubleshooting equation and built a standalone SATA power module.

Aware that SATA drives require 5v and 12v for operation, he disassembled one of his docking stations to see how it provided both voltages. He discovered that it used a simple PWM buck converter and decided to replicate it in the smallest space possible. His plan was to use a standard 12v wall wart to power the circuit, passing that 12v straight to the drive. A simple voltage step-down circuit would be built to provide the required 5v.

[Marc] reports that the power adapter is performing nicely, and he is quite happy with the size as well. He says that one major benefit of this sort of adapter is that it can be used to power any SATA drive, not just hard drives. He does mention that if he built another one, he might consider regulating the 12v output as well, so that he can power the adapter with a laptop power supply instead of a separate dedicated wall wart.

Kinect Hacked To Work With Garry’s Mod Means Endless Hours Of Virtual Fun

garrys_mod_kinect

[John B] is a software engineer and had some spare time on his hands, so he started messing around with his Kinect which had been sitting unused for awhile. He wanted to see what he could create if he was able to get Kinect data into a virtual environment that supported real-world physics. The first idea that popped into his head was to interface the Kinect with Garry’s Mod.

If you are not familiar with Garry’s Mod, it is a sandbox environment built on top of Valve’s Source engine. The environment supports real-world physics, but beyond that, it pretty much lets you do or build anything you want. [John] found that there was no good way to get Kinect data into the software, so he built his own.

He used OpenNI to gather skeletal coordinate data from Kinect, which was then passed to some custom code that packages those coordinates inside UDP packets. Those packets are then sent to a custom Lua script that is interpreted by Garry’s Mod.

The result is just plain awesome as you can see in the video below. Instead of simply playing some random game with the Kinect, you get to design the entire experience from the ground up. The project is still in its infancy, but it’s pretty certain that we’ll see some cool stuff in short order. All of the code is available on github, so give it a shot and share your videos with us.

Continue reading “Kinect Hacked To Work With Garry’s Mod Means Endless Hours Of Virtual Fun”

On-the-go Desktop

Here’s a desktop you can take with you. [Rbean] built it at a hackerspace in Milwaukee, Wisconsin (go Badgers!) using very basic materials and techniques. The utilitarian construction of the wooden body reminds us of Cub Scout tool box projects. It features an open space in the top which house the keyboard and mouse during travel. The blue strap lets you sling all forty pounds over one shoulder, but we’d also love to see a thick dowel to go along with the toolbox concept we’ve got stuck in our mind.

The lower half of the case is removable, serving as the mounting area for what looks like a mini ITX motherboard, hard drive, and full-sized power supply. As you can see the LCD screen mounts to the side of the box which allows you to rest the unit on its side and protects the display if the whole thing were to be knocked over. [Rbean] mentions that he’d like to try another revision using aluminum instead of wood, but we like this version. The only thing we’d want to see added is a set of speakers mounted inside the case on either side of the monitor.

DIY Racing Sim Shift Box

diy_pc_racing_shiftbox

Ask anyone who has ever owned a car with a manual gearbox – in real life and in video games, nothing beats stick shift. Rather than shell out gobs of money to purchase a pre-made shift box, forum member [nikescar] built his own for about $20.

Using some scrap wood and a plastic cutting board, he went to work building a prototype. The “H” shift pattern was designed in CAD and laid over the cutting board, which was hand-cut with a Dremel. Using some tips found online, he constructed a simple shifting mechanism, then wired in a cheap USB game pad found on Ebay. Using safety pins as temporary micro switches, he ran a few laps, and was quite happy with the results. Once the switches arrived, they were fitted to the shift box and it was off to the races.

[nikescar] reports that the shifter works extremely well, allowing him to row through the gears with the greatest of ease, sans any fear of breaking things. Keep reading to get a better look at the shift box internals.

Continue reading “DIY Racing Sim Shift Box”