A footnote in the week’s technology news came from Linus Torvalds, as he floated the idea of abandoning support for the Intel 80486 architecture in a Linux kernel mailing list post. That an old and little-used architecture might be abandoned should come as no surprise, it’s a decade since the same fate was meted out to Linux’s first platform, the 80386. The 486 line may be long-dead on the desktop, but since they are not entirely gone from the embedded space and remain a favourite among the retrocomputer crowd it’s worth taking a minute to examine what consequences if any there might be from this move.
Is A 486 Even Still A Thing?
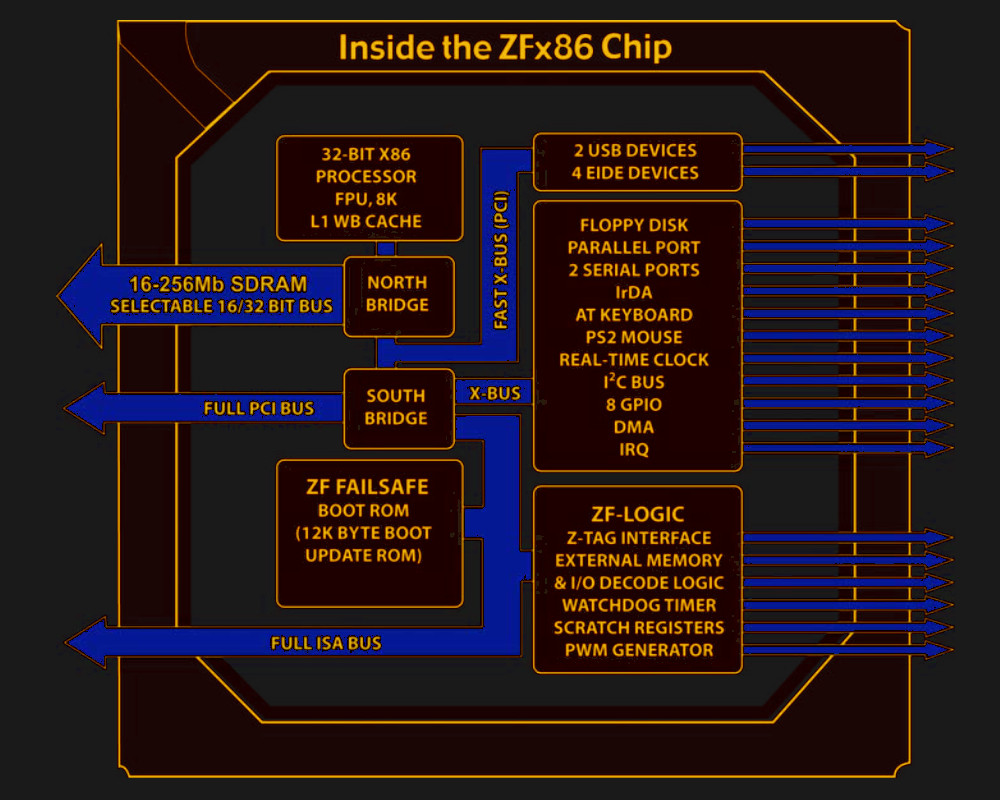
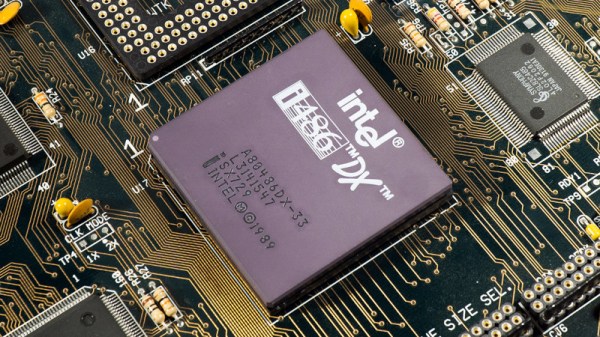
The Intel 80486 was released in 1989, and was substantially an improved version of their previous 80386 line of 32-bit microprocessors with an on-chip cache, more efficient pipelining, and a built-in mathematical co-processor. It had a 32-bit address space, though in practice the RAM and motherboard constraints of the 1990s meant that a typical 486 system would have RAM in megabyte quantities. There were a range of versions in clock speeds from 16 MHz to 100 MHz over its lifetime, and a low-end “SX” range with the co-processor disabled. It would have been the object of desire as a processor on which to run WIndows 3.1 and it remained a competent platform for Windows 95, but by the end of the ’90s its days on the desktop were over. Intel continued the line as an embedded processor range into the 2000s, finally pulling the plug in 2007. The 486 story was by no means over though, as a range of competitors had produced their own take on the 486 throughout its active lifetime. The non-Intel 486 chips have outlived the originals, and even today in 2022 there is more than one company making 486-compatible devices. RDC produce a range of RISC SoCs that run 486 code, and according to the ZF Micro Solutions website they still boast of an SoC that is a descendant of the Cyrix 486 range. There is some confusion online as to whether DM&P’s Vortex86 line are also 486 derivatives, however we understand them to be descendants of Rise Technology’s Pentium clone. Continue reading “Bye Bye Linux On The 486. Will We Miss You?”
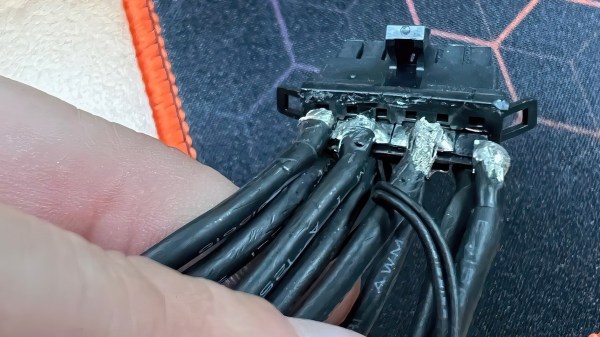
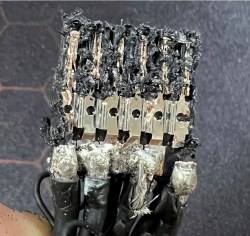 The metal pads in question seem to be far too thin and structurally unsound, as one can readily spot, their cross-section is dwarfed by the cross-section of cables soldered to them. This would create a segment of increased resistance and heat loss, exacerbated by any flexing of the thick and unwieldy cabling. Due to the metal being so thin, the stress points seem quite flimsy, as one of the metal pads straight up broke off during disassembly of the connector.