Recently, I stumbled upon a cool write-up by [DHowett], about reprogramming a Framework laptop’s Embedded Controller (EC). He shows us how to reuse the Caps Lock LED, instead making it indicate the F1-F12 key layer state – also known as “Fn lock”, AKA, “Does your F1 key currently work as F1, or does it regulate volume”. He walks us through adding custom code to your laptop’s EC firmware and integrate it properly into the various routines the EC runs.
The EC that the Framework uses is a MEC1521 chip from Microchip, and earlier this year, they open-sourced the firmware for it. Now, there’s a repository of microcontroller code that you can compile yourself, and flash your Framework laptop’s motherboard with. In a comment section of HackerNews, a Framework representative has speculated that you could add GPIOs to a Framework motherboard through EC firmware hacking.
Wait… Microcontroller code? GPIOs? This brings us to the question – what is the EC, really? To start with, it’s just a microcontroller. You can find an EC in every x86 computer, including laptops, managing your computer’s lower-level functions like power management, keyboard, touchpad, battery and a slew of other things. In Apple land, you might know them as SMC, but their function is the same.
Why have we not been reprogramming our ECs all this time? That’s a warranted question, too, and I will tell you all about it.
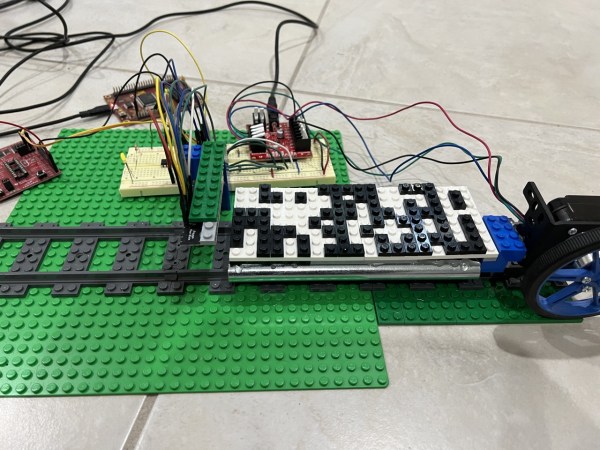
Those old enough to have encountered punch cards in their lifetime are probably glad to be rid of their extremely low data density and the propensity of tall stacks to tip over. But obsolete as they may be, they’re a great tool to show the basics of binary data storage: the bits are easily visible and can even be manipulated with simple tools. As an experiment to re-create those features in a more modern system, [Michael Kohn] made a punch card-like system based on LEGO bricks that stores machine code instructions for a 65C816 CPU, the 16-bit successor to the venerable 6502.
Bits are stored on a white 8×20 stud board, onto which small black pieces are placed. A white background stud encodes a logic “zero”, while a black stud encodes a logic “one”. The bits are read out by an array of reflectance sensors, which conveniently has the same 8 mm pitch as standard LEGO studs. A big wheel driven by a stepper motor slides the data card under the readout circuit along a short stretch of LEGO train tracks.
The optical sensors are read out by an MSP430 series microcontroller, which also drives the motor through a stepper motor driver. Once the data is read out, the bytes are transferred into a WDC W65C265SXB board, which executes them as machine code instructions on its 65C816 CPU. In the video below, you can see a program being loaded that blinks an LED.
The community of Hackaday readers is diverse and talented, and supplies us with plenty of motivation, feedback, knowledge, and of course cool stuff to show you. There are many interest streams within it, but it’s safe to say that we’re more directed towards the hardware scene here. One of those parallel streams which has much overlap is the demoscene, that area in which programming, art, and music come together and push computer hardware to the limit of its abilities in pursuit of the most eye-catching works. I took a road trip with a friend to Outline, a small demo party held on a farm in the eastern Netherlands, to take a look at the world of demos up-close as a hardware-focused outsider.
Like A Hacker Camp, But The Music’s Better
A still from Thrive, a 256 byte demo for the TIC-80 fantasy console.
If I wanted to sum up the flavour of Outline, I’d describe it as very similar to a small hacker camp, but with better music and partying. The hackerspaces are replaced by demo groups and awesome graphics take the place of robots and electronics, but the vibe of people with a passionate interest in the low-level understanding of technology is exactly the same. Even some of the same faces make an appearance. On the benches sit modern high-spec PCs alongside classic consoles and microcomputers, on the projector screen are live coding shaders or some of the most recognisable demos past and present, and in the air is an eclectic mix of live-DJ EDM and chiptunes.
As an outsider at a first demoscene event it’s difficult to appreciate the work from a comparative perspective, while like most of us I’m familiar with quite a few demos that have become popular I’m not well-equipped enough to talk about the code and techniques behind them But I can run through the various sections of the competition, and since everything is online I can link to a few of them. The competition is split up into several sections, which are loosely for all-out technology-no-object demos, space-limited 256 byte and 128 byte demos, and old-school demos for retrocomputing hardware. Each is a test of the programmer’s skill in fitting the most into the least of resources, and for those who appreciate such things it’s the cleverness of the technique which produces the demo that’s as much a draw as the look of the thing. I don’t think I have ever exercised such mastery over any of the computers I have owned. So browse the entries, and marvel at their ingenuity. My personal aesthetic favourites were Thrive by [Agenda] for the TIC-80 fantasy console and It’s about time by [Guideline] for Windows, but you may have different tastes.
Don’t Forget The Hardware
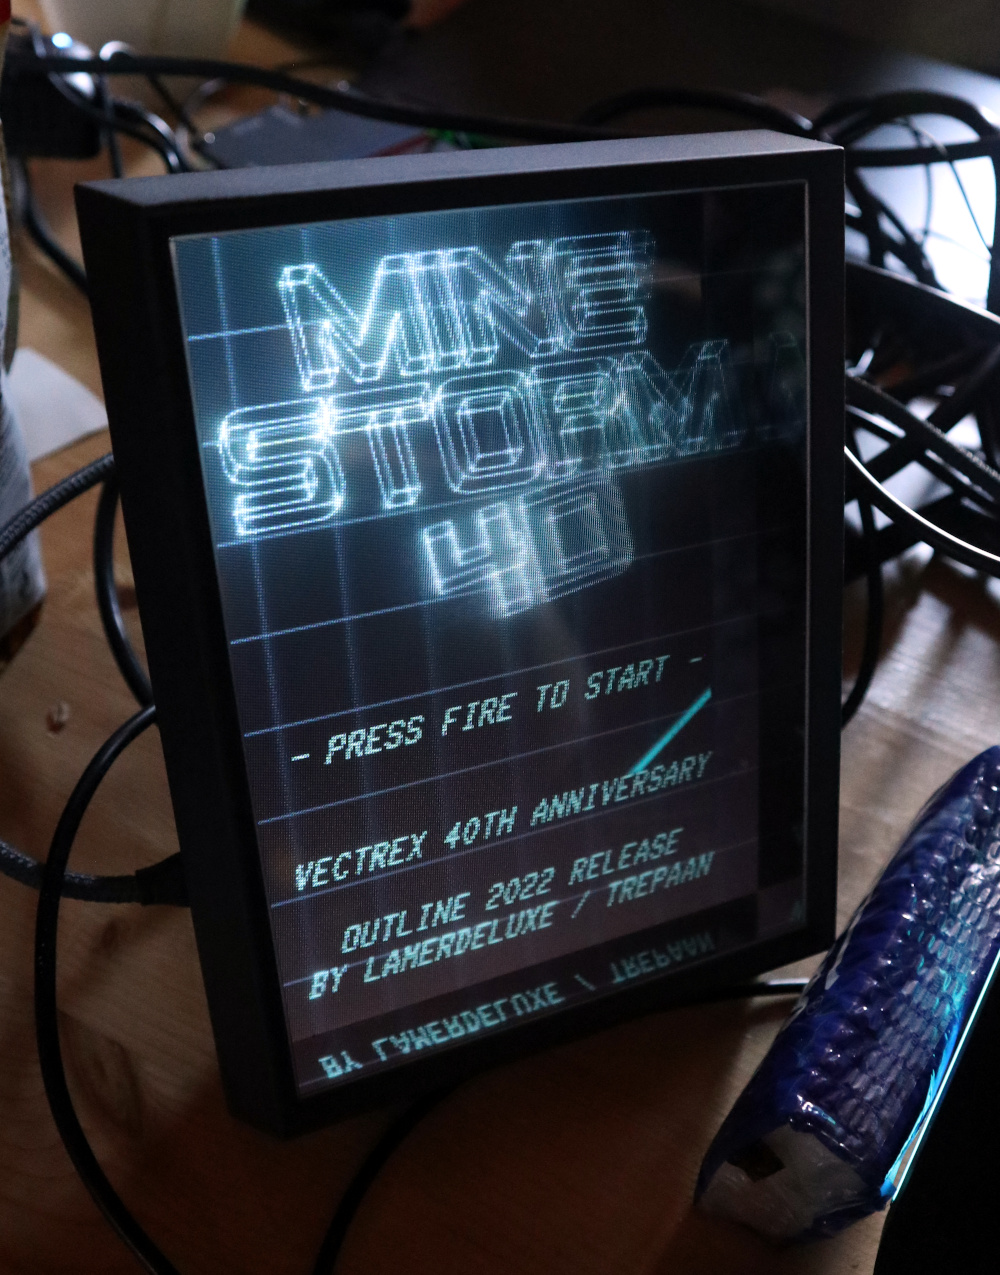
Mine Storm 4D, on a lenticular holographic display.
Beyond the atmosphere and the demos themselves, there was a bit of hardware for the retrocomputer enthusiast. The Atari Falcon and Jaguar were neither destined to set the world on fire when they appeared, but there they were for those of us who drooled over them back in the day to lust for once more.
If the original hardware wasn’t enough then there was some newly minted retrocomputing hardware making a showing, with a couple of minimig Amiga FPGA boards showing Workbench. Star of the hardware show though went to Mine Storm 4D, a version of the classic Vectrex game Mine Storm running on a PC, for the Looking Glass Factory holographic portrait display. With my visual superpower I didn’t quite get a 3D effect, but I definitely got the holographic effect when moving my head.
Having never been to a demo party I didn’t know quite what to expect, but I can safely say I had a fantastic time, saw a lot of really cool stuff, and made some friends along the way. If you’ve never been to a demo party because it’s not quite your scene then all I can say is that you should give it a go. Every hardware hacker should go to a demo party!
RAM upgrades for the original XBox have been a popular mod — you could relatively easily bump your RAM from 64MB to 128MB. While it wouldn’t give you any benefit in most games written to expect 64MB, it does help with emulators, game development, and running alternative OSes like Linux. The XBox PCB always had footprints for extra RAM chips, so RAM upgrades were simple – just get some new RAM ICs and solder them onto the board. However, in the hardware revision 1.6, these footprints were removed, and RAM upgrades on v1.6 were always considered impossible.
[Prehistoricman] brings a mod that makes RAM upgrades on v1.6 possible using an old trick from the early days of home computers. He’s stacking new RAM chips on top of the old ones and soldering them on in parallel. The overwhelming majority of the RAM lines are shared between chips, which is what makes this mod possible – all you need to connect to the extra chips is magnet wire for extra RAM chip select lines, which are, thankfully, still available on the board. He shares a tutorial with plenty of illustrations, so it should be easier for you to perform this mod, in case you’re stuck with a newer console that doesn’t have the RAM chip footprints left onboard.
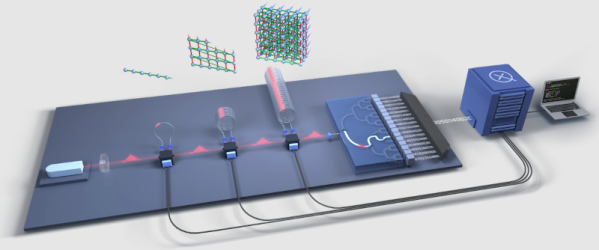
There are a few ways to access real quantum computers — often for free — over the Internet. However, most of these are previous-generation machines that have limited capabilities. Great for learning, perhaps, but not something you could do anything practical with. Xanadu, however, has announced what they claim to be a computer capable of reaching quantum advantage that is free for anyone to use, within limits. Borealis — the computer in question — uses photonic states and has the capability of working with over 216 squeezed-state qubits.
The company is selling time on the computer, but the free tier includes 5 million free shots on Borealis and 10 million shots on an earlier series of quantum computers. You can also buy pay-as-you go service for about $100 per million shots on Borealis.
While a few million shots may sound like a lot, we noticed that the quickstart demo consumes 10,000 shots and that’s presumably something simple. That’s still about 500 runs of that on Borealis — not bad for free on a state-of-the-art quantum computer. You will be wanting to debug with a simulator, though.
We presume the developers are Beatles fans given that you use software called Penny Lane and Strawberry Fields to access the machines. Your job is controlled by Python and there is a cloud simulator to save your shots.
We won’t pretend to understand all there is about squeezed light qubits and the Borealis architecture. But you can get some general practice in our series on quantum computing. Or there are a few lectures around including one that aims at different levels of experience.
In the world of PC graphics, the early standards followed the various video cards of the day. There was MDA, familiar through the original text-based DOS prompt, CGA, then EGA, and the non-IBM Hercules along the way. Finally in 1987 IBM produced the VGA, or Video Graphics Array standard for their PS/2 line of computers, which became the bedrock on which all subsequent PC graphics cards, even those with digital outputs, have been built. It’s interesting then to read an account from [Dave Farquhar] of the other now-forgotten video standard that made its debut with the PS/2, MCGA, or Multicolor Graphics Array. This was intended as an entry-level graphics system to compete with the more multimedia-oriented home computers of the day such as the Commodore Amiga and Atari ST.
Offering 320×200 graphics at 256 colors but only two colors at 640×480 it’s difficult to see how it could have been a viable competitor to the Amiga’s 4096-color HAM mode, but it did offer the ability to drive an RGB monitor through its VGA-like socket. The story goes that IBM intended it to provide an upgrade incentive for PS/2 customers to buy a more powerful model with VGA, but in the event a host of third-party VGA-compatible cards emerged and allowed more traditional ISA computers from third parties to retain a competitive edge and eventually sideline the PS/2 line entirely.
We called time on VGA back in 2016, and it’s fair to say that it’s disappeared from PC hardware since then even if much of its technologies still lurk within. It’s pleasing to see though that it remains a stalwart of hacked-together display interfaces, with efforts such as this 7400-based VGA card continuing to impress us.
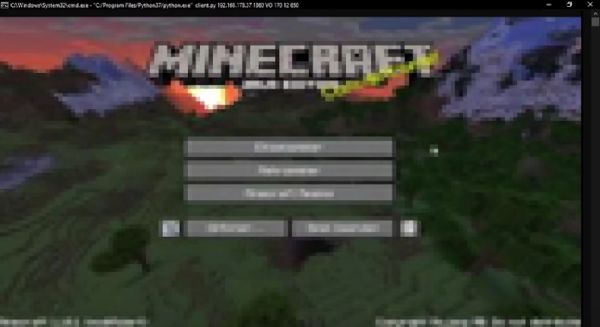
Have you been slowly falling down a rabbit hole of Stallman-like paranoia of computers ever since installing Ubuntu for the first time in 2007? Do you now abhor anything with a GUI, including browsers? Do you check your mail with the command line even though you’re behind seven proxies? But, do you still want to play Minecraft? If so, this command-line-only screen viewer might just be the tool to use a GUI without technically using one.
This remote screen viewer is built in Python by [louis-e] and, once installed, allows the client to view the screen of the server even if the client is a text-only console. [louis-e] demonstrates this from within a Windows command prompt. The script polls the server screen and then displays it in the console using the various colors and textures available. As a result, the resolution and refresh rate are both quite low, but it is still functional enough to play Minecraft and do other GUI-based tasks as long as there’s no fine text to read anywhere.
The video below only shows a demonstration of the remote screen viewer, and we can imagine plenty of uses beyond this proof-of concept game demonstration. Installing a desktop environment and window manager is not something strictly necessary for all computers, so this is a functional workaround if you don’t want to waste time and resources installing either of those components. If you’re looking for remote desktop software for a more specific machine, though, take a look at this software which enables remote desktop on antique Macs.