Kitchen Timer Makes Mario Your Sous-chef

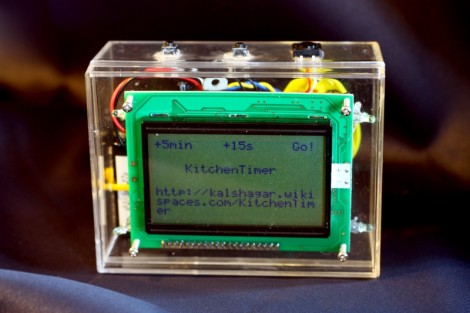
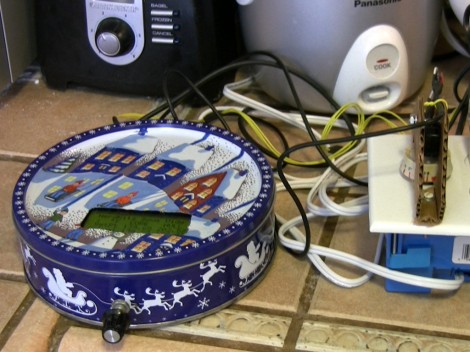
[Alan] was unimpressed by the cheap ticking egg timers that grace many of our kitchens. He decided this was an execllent opportunity to ply his skills with microcontrollers. He built this kitchen timer complete with an enclosure and audible alarm.

The device is Arduino based, which makes driving the graphic LCD quite easy thanks the libraries associated with that platform. As you can see above, his user interface makes use of virtual buttons – three tactile switches whose function is listed at the top of the display.

But we think the alarm sound really earns this a place in his kitchen. He used the same hardware as that that Super Mario Bros. Toilet project to play classic video game sounds when your soufflé needs come out of the oven. We haven’t come across them ourselves, but apparently there’s a line of key chains for sale in Japan (yes, we need to plan a trip there!) that have the tunes programmed into them. They’re easy to crack open and it beats dealing with a speaker and amp circuit.

A USB-controlled Solder Reflow Oven

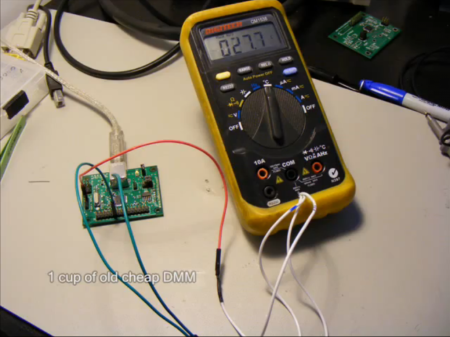
[Joel] of [Helion Microsystems] is at it again with his USB controlled solder reflow oven.  You may remember him from his crazy twitter-enabled Ewok model. Although these two projects are quite different, they both use the HU-320 USB breakout board that he’s in the process of getting funding for via [Pozible], or Australian Kickstarter for Yanks.

The reflow oven works using a thermocouple-enabled RS-232 voltmeter to output the temperature to the HU-320 board. [Joel] has been nice enough to provide us with the C# code to interface with many multimeters if you want to implement a similar project.  Temperature is controlled with a mechanical relay for what would appear to be a poor man’s PID controller.

Sadly, Fluke meters don’t seem to be listed, but your place of work probably wants their meter back anyway!  For another toaster reflow oven implementation, check out this [HAD] article.  Be sure to check out the video after the break for a video of the setup! (heat treat engineers may find the “recipe” format humorous).

Continue reading “A USB-controlled Solder Reflow Oven”

Espresso Upgrade Gives You More Data With Your Caffeine

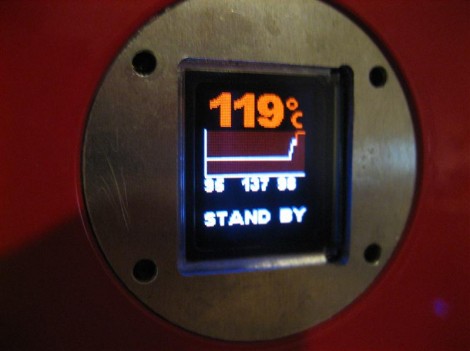
Whether you take it as a single shot or a double, a great Barista want’s to know the details on what’s happening with the espresso machine. [Tobi] was happily generating the morning cup when he realized that the needle-thermometer on his machine wasn’t working any longer. Instead of shelling out a lot of money for a direct replacement, he built his own display and controller for this espresso machine (translated).

He had a few goals with this hack. Obviously he needed to replace the temperature meter, but he also wanted a colorful display and some timing options. He was able to get his hands on a nice little OLED display that would fit in the vacated opening and it only cost a few bucks. He’s got his own mini-mill which came in handy when fabricating a board to host the ATmega16 which drives add-on, but he also used it to make a bracket for the screen replacement.

Now his machine is fixed, looks a bit more modern, and it has more features which are shown off in the video after the break. If you’re looking to add some custom circuitry to your coffee ritual you may also take some inspiration from this similar espresso machine hack. Continue reading “Espresso Upgrade Gives You More Data With Your Caffeine”

Freeze Drying Astronaut Ice Cream

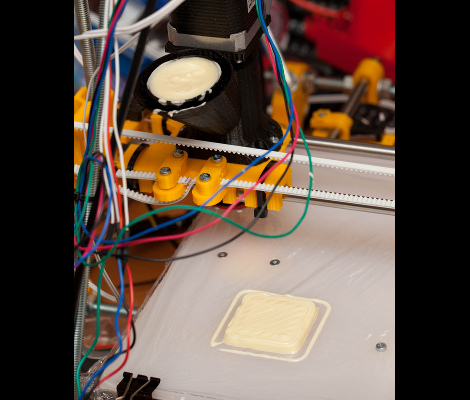
In our younger and more vulnerable years nothing was greater than visiting a museum, going to the gift shop, and badgering our parents to buy a pack of astronaut ice cream. Freeze dried ice cream leaves a taste of nostalgic chalky sweetness in our mouths, so we’re very excited to see that [Ben Krasnow] is now making his own astronaut ice cream.

The basic principle of freeze drying is simple. All you have to do is reduce the pressure and temperature of the food below the triple point of water and pump the sublimated water vapor out. For [Ben], this meant he needed to cool his Neapolitan Klondike bar to -30° C in a bath of chilled ethanol and pump out the air with a vacuum pump.

Interestingly, [Ben] found it necessary to heat his ice cream while under vacuum to extract more water vapor. This makes sense; at the pressures he was dealing with, [Ben] would never come across water in a liquid state. The entire process took about 18 hours. [Ben] admits this may have been a little longer than necessary, but it’s a small price to pay for reliving childhood memories.

Bang-banging Your Way To A Perfect Cake

bang-bang-oven-control

[Rob Spanton’s] house is equipped with a rather cheap oven, which was discovered while his roommate tried using it to bake part of a wedding cake. If someone took a shower during the baking process, a large portion of unit’s gas pressure was diverted to the boiler, causing the oven to shut off completely. This is obviously not a good situation for baking cakes, so the housemates decided to construct a makeshift controller to keep temperatures in line.

They started by installing a pulley on the oven’s knob, which is connected to a small motor via a long rubber belt. The other end of the belt connects to a small motor, which is controlled by a Pololu 18v7 motor controller. A K-type thermocouple monitors the oven’s temp, feeding the data through a MAX6675 converter to (presumably) [Rob’s] computer.

Since they were in a bit of a time crunch, [Rob] and his roommate [Johannes] decided the best way to keep the oven at a steady temperature was via bang-bang control. While you might imagine that cranking the gas knob between its minimum and maximum settings repeatedly wouldn’t be the ideal way to go about things, their solution worked pretty well. The cake came out perfectly, and the maximum temperature swing throughout the entire baking process was only 11.5°C – which is pretty reasonable considering the setup.

Securing Your Keurig With RFID

keurig-hacking

[Andrew Robinson] and his co-workers are lucky enough to have a Keurig coffee maker in their office, though they have a hard time keeping track of who owes what to the community coffee fund. Since K-Cups are more expensive than bulk coffee, [Andrew] decided that they needed a better way to log everyone’s drinking habits in order to know who needs to cough up the most cash at the end of the month.

He started by tearing down the Keurig B40, making note of the various PCBs inside while identifying the best way to go about hacking the device. The coffee maker is controlled by a PIC, and rather than try to re-engineer things from the bottom up, he left the core of the machine intact and focused on the control panel instead.

He disconnected all of the unit’s buttons from the control board, routing them through an Arduino before reconnecting them to the machine. This essentially rendered the machine inoperable unless triggered by the Arduino, giving [Andrew] control over the brewing process. He wired in an RFID reader from SparkFun, then got busy coding his security/inventory system. Now, when someone wants coffee, they merely need to swipe their office access card over the machine, which enables the use of its control panel.

As you can see in the video below the system seems to work well. If we were to offer some constructive criticism, we would suggest ditching the laptop and rolling the RFID reading/verification into the Arduino instead – other than that, we think it’s great.

Continue reading “Securing Your Keurig With RFID”

Smelting Metal In Your Microwave Oven

Grab some scrap metal and a microwave oven and you’ll be casting your own metal parts in no time. [Mikeasaurus], who is known for doing strange things like making Silly Putty magnetic or building his own spray paint bottles, doesn’t disappoint this time around. He read about microwave smelting in Popular Science and is giving it a shot himself.

The image above shows him pouring an ingot. He build an insulated brick enclosure inside of the microwave oven, then set it to go ten minutes for a 50/50 lead/tin mixture, or fifteen minutes for silver. This will vary based on the power rating of your microwave. You can see in the video after the break that the setup gave him some trouble shortly after pouring. It wasn’t a problem with the molten metal, but spontaneous combustion of the rigid foam insulation that did him in. We shouldn’t say ‘I told you so’, but that insulation says right on it that it’s flammable!

This isn’t the first time we’ve looked at casting metal melted in a microwave. Check out this other version posted back in 2005. Continue reading “Smelting Metal In Your Microwave Oven”