Design A Gingerbread House In CAD, Then Cut Pieces With A Laser

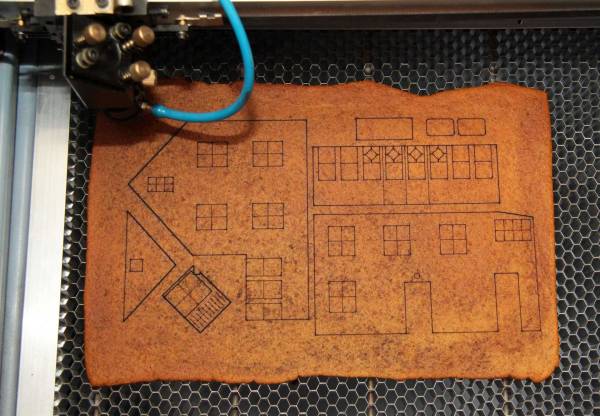
This is one of those ideas that’s so simple we can’t believe we haven’t heard of it before now. [Johan von Konow] is upping his holiday decorating game this year by designing his Gingerbread House in CAD and cutting it out on a laser cutter. If designed well this will easily allow you to increase the complexity of your design by orders of magnitude.

We remember making Gingerbread Houses with mom when we were little. She would bake a sheet of gingerbread, then pull out stencils she had made from file folders to carefully cut the walls and roof of the houses. But these were the homesteading equivalent of candy construction — one room consisting of four walls and two roof pieces. [Johan’s] design uses roofs with multiple pitches, dormers, and an entryway off the front of the main building. Quite impressive!

He mentions a few things to keep in mind. The gingerbread should be an even thickness for best results. You’re also going to want to plan for ventilation during cutting and give up the idea that you might eat the house when the holidays are over. The cutting process creates quite a stink and leaves a horribly burnt taste in the baked goods. Of course you could always cut out templates and use a knife when working with food.
Skittles Sorting Machine Sorts Skittles, Keeps The Band Happy

In 1982, Van Halen had the biggest stage show around. Their rider – a document going over the requirements for the show – reflects this. In the middle of the requirements for the lighting and sound rigs, Van Halen placed a rather odd request; one (1) bowl of M&M, (ABSOLUTELY NO BROWN ONES). The theory being if the request for no brown M&Ms wasn’t followed, the lighting and sound rigs probably weren’t up to spec either.

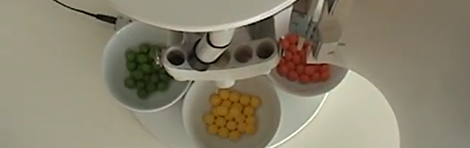
It’s not M&Ms this time (they wouldn’t fit in the machine), but [egenriether] came up with a seriously clever solution for sorting Skittles by color. Why? We have no idea, other than, ‘just because.’

The build details are a little scant, but we know [egenriether] used a BASIC Stamp 2 for the electronics portion of the build. To sort the Skittles by color, a TAOS RGB color sensor reads the red, green, and blue values for each Skittle and actuates a servo that guides each piece of candy into its respective bowl.

It’s a very, very cool, if completely useless build. Still, we’re thinking it could be put to use if [egenriether] is ever backstage setting up before the band arrives.

Videos after the break. Thanks [Andrew] for sending this one in.

Continue reading “Skittles Sorting Machine Sorts Skittles, Keeps The Band Happy” →

Automate Your Tea Time

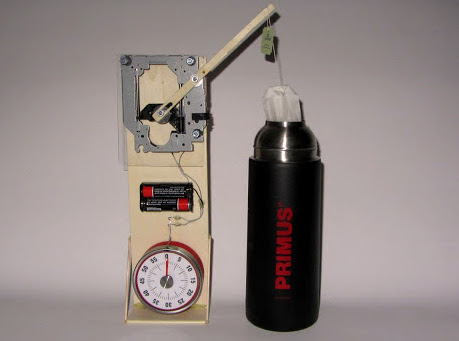
There are a couple of things that go into a great cup of tea. One is to have the water at the correct temperature, the other is to steep for just the right amount of time. This offering solves the latter by extracting the tea bag after a carefully timed steep.

It’s hard to imagine how this could be more simple. The timing mechanism is a cheap egg timer which has been modified to include a paperclip which moves with the minute hand. When the timer hits zero that paper clip contacts a stationary electrode, which powers the motor. That motor is the laser sled from a dead CD-ROM drive. Since these usually die because of the lens (not the mechanism) this is a great re-use of the internals. The sled zips to one side until it hits a limiting switch which kills the power. At the same time, this motion uses the wooden lever to extract the tea bag. All of this is explained in the clip after the jump.

Since the egg timer already has its own bell, you’ll even be alerted that it’s tea time!

Continue reading “Automate Your Tea Time” →

Red-bullet: Cooking Stove From Cans, Fueled By Gas Additive

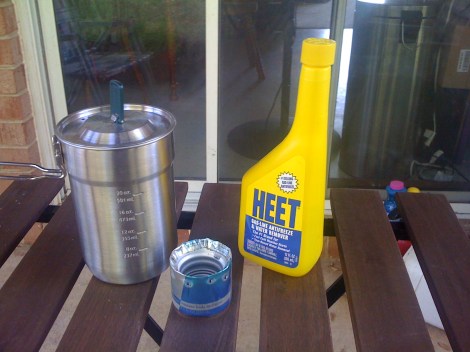
A couple of beverage containers and a little bit of fuel additive bring together this aluminum can stove project. When lit it shoots flames out each of those holes around the top to heat the vessel resting upon it. [Peter Geiger] calls it the Red-Bullet because one of the stove pieces started as a Red Bull can and the other piece was a Coors (aka silver bullet).

This is basically an alcohol stove. We remember seeing a very well designed version of the penny stove several years back. This is different as it uses a side burner so the stove itself functions as the kettle stand. [Peter] started by cutting the Red Bull can just a bit taller than the final height. He then inserted the top portion of one of those aluminum beer cans that are shaped like glass bottles. The neck was lopped off and inverted. It is joined with the other can base using JB weld and by rolling the aluminum in on itself. After that has dried the holes are added and it’s filled with HEET from a yellow bottle. This gasoline additive is meant to sequester water and keep your gas line from freezing. The yellow bottle is mainly alcohol, the red is methanol so make sure you use the right one!

Building A Better PID Smoker Controller

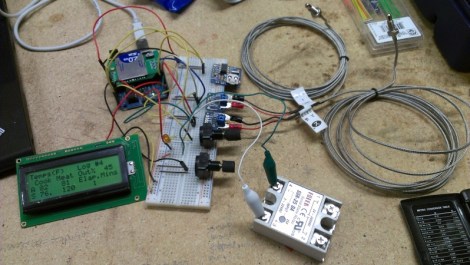
[Matt] wanted to have more control over his meat smoker so he built this advanced PID smoker controller. It uses the solid state relay seen in the bottom-right of this image to switch the smoker’s heating element. But all of the other goodies that are included add several features not usually found in these builds.

This is a replacement for the commercial PID unit he used on the original build. That monitored the temperature in the smoker, using predictive algorithms to maintain just the right heat level. But this time around [Matt] is looking for extra feedback with a second sensor to monitor meat temperature. Using an Arduino with an SD shield he is able to data log the smoking sessions, and his custom code allows him to specify temperature profiles for resting the meat after it has hit the target temperature. It kind of reminds us of a reflow oven controller… but for food.

How To Make That Old Satellite Dish Cook All Your Meals

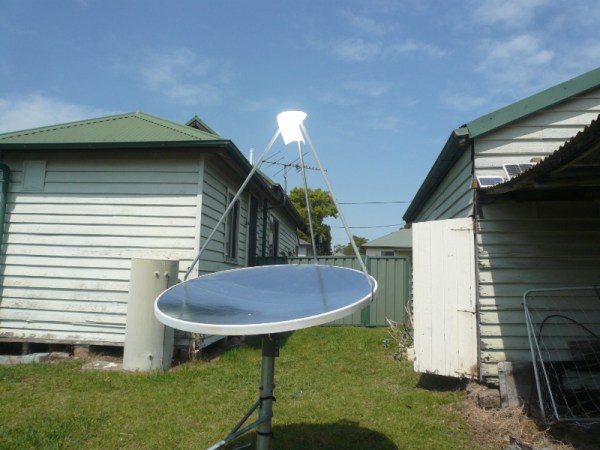
Grab that old satellite dish out of the dark corner of you garage and get those hot dogs ready. [Share alike license] is going to show us how to turn the dish into a solar cooker.

Harnessing the sun’s power requires a reflective surface. Although the image above makes it look like a mirror finish, this is really just covered in foil tape. This is what’s used to seal duct work and can be had for a few bucks at any home store. You’ll notice the dish is pointed up quite a bit more than it would have been when receiving satellite television. The mount on the back of the dish has been turned 180 degrees to allow for this. You want the rays to be focused on the bottom of the cooking area instead of the side and this will do the trick. A small grate was added just below the pinnacle of the receiver tripod. For now it has only been used to boil a pot of water. We’d like to see it grilling up some dogs but you’ll have to figure out a way to catch the drippings. We wonder if a transparent baking pan would block too much of the heat energy?

This is a great way to add purpose to neglected equipment. But if you’re serious about solar cooking you need something more along these lines.

Quacking Egg Timer

[Tom] managed to build a geeky, quirky digital timer for the kitchen. Where most would have used a few seven segment displays along with some buttons and called it done, he found a way to make it a lot more fun. The plush addition on top is a yellow ducky with an orange beak. When time runs out the duck will quack, call you back to the kitchen.

As you can see in the video after the break, [Tom’s] got his hands full with the family. This project was quick enough for him to fit it in during what dwindling free time he manages to hold onto. He used one of the chips that came with his MSP430 Launchpad. Since this family of processors offer extremely low-power modes when asleep they’re perfect for this type of battery-powered application. As for the duck, it’s a toy that had a couple of watch batteries and a small PCB inside. Some poking around led him to a pad that activates the quacking when grounded.

Continue reading “Quacking Egg Timer” →