Bring Out The Fine Detail In Small Objects With This Coaxial Lighting Rig

All things considered, modern photography is pretty easy. It’s really just a matter of pointing the camera at the thing you want to take a picture of and letting the camera do the rest. But that doesn’t mean good photographs are easy to make, especially when fine detail is required. And that’s the reason this 3D printed coaxial lighting setup was built — to make quality photographs of small objects a snap.

The objects of [Peter Lin]’s photographic desire are coins, no doubt of the collectible variety. Since the condition of a coin is essential to determining its value, numismatic photographers really need to be meticulous about the quality of their work. The idea here is to keep the incoming light parallel to the optical axis of the camera, for which purpose ring lights around the camera lens are often used. But they can result in lighting artifacts, and can be awkward to use for such smaller subjects.

So for this setup, [Peter] essentially built a beam-splitter. The body is a printed block that’s painted matte black to keep reflections down; a little self-adhesive flocking paper helps with that too. The round aperture on the top is for the camera lens, with the square window on the side admitting light. The secret is a slot oriented at 45 degrees to both of those openings, into which the glass element from a cheap UV filter is inserted. The filter acts like a beam splitter which reflects light down onto the coin on the bottom of the block and lets it pass up into the camera lens directly above the coin, parallel to the optical axis. Genius!

The video below shows it in use with both DSLR and smartphone cameras, and the image quality is amazing. While most of us probably aren’t photographing coins, we do enough high-resolution photography of small objects that this seems applicable. In a way, it reminds us of [Big Clive]’s “TupperCam” method of high-res PCB photography (final item).

Continue reading “Bring Out The Fine Detail In Small Objects With This Coaxial Lighting Rig”

Taking (Good) Pictures Of PCBs

Snapping pictures is not technically difficult with modern technology, but taking good photographs is another matter. There are a number of things that a photographer needs to account for in order to get the best possible results, and if the subject matter isn’t particularly photogenic to start with it makes the task just a little more difficult. As anyone who’s posted something for sale online can attest, taking pictures of everyday objects can present its own challenges even to seasoned photographers. [Martijn Braam] has a few tricks up his sleeve for pictures like this in his efforts to photograph various circuit boards.

[Martijn] has been updating the images on Hackerboards, an online image reference for single-board computers and other PCBs, and he demands quality in his uploads. To get good pictures of the PCBs, he starts with ample lighting in the form of two wirelessly-controlled flashes in softboxes. He’s also using a high quality macro lens with low distortion, but the real work goes into making sure the image is sharp and the PCBs have well-defined edges. He’s using a Python script to take two pictures with his camera, and some automation in ImageMagic to composite the two images together.

While we’re not all taking pictures of PCBs, it’s a great way of demonstrating the ways that a workflow can be automated in surprising ways, not to mention the proper ways of lighting a photography subject. There are some other excellent ways of lighting subjects that we’ve seen, too, including using broken LCD monitors, or you can take some of these principles to your workspace with this arch lighting system.

Telnet Gets Stubborn Sony Camera Under Control

According to [Venn Stone], technical producer over at LinuxGameCast, the Sony a5000 is still a solid option for those looking to shoot 1080p video despite being released back in 2014. But while the camera is lightweight and affordable, it does have some annoying quirks — namely an overlay on the HDMI output (as seen in the image above) that can’t be turned off using the camera’s normal configuration menu. But as it so happens, using some open source tools and the venerable telnet, you can actually log into the camera’s operating system and fiddle with its settings directly.

As explained in the write-up, the first step is to install Sony-PMCA-RE, a cross-platform suite of tools developed for reverse engineering and modifying Sony cameras. With the camera connected via USB, this will allow you to install a program on the camera called Open Memories Tweak. This unlocks some developer options on the camera, such as spawning a telnet server on its WiFi interface.

With the a5000 connected to your wireless network, you point your telnet client to its IP address and will be greeted by a BusyBox interface that should be familiar to anyone who’s played with embedded Linux gadgets. The final step is to invoke the proper command, bk.elf w 0x01070a47 00, which sets the specific address of the camera’s configuration file to zero. This permanently disables the HDMI overlay, though it can be reversed by running the command again and setting the byte back to 01.

As you might expect, the Sony-PMCA-RE package is capable of quite a bit more than just unlocking a telnet server. While it might not be as powerful as a firmware modification such as Magic Lantern for Canon’s hardware, those looking for a hackable camera that won’t break the bank might want to check out the project’s documentation to see what else is possible.

Continue reading “Telnet Gets Stubborn Sony Camera Under Control”

A slide carousel with a DSLR attached to its lens output

Digitize Your Slide Deck With This Arduino-Powered Slide Carousel

If you’re above a certain age, you probably remember the atmosphere of a pre-Powerpoint 35 mm slide show. The wobbly screen being unrolled, the darkened room, the soft hum of the projector’s fan, the slightly grainy picture on the screen and that unmistakable click-whoosh-clack sound as the projector loaded the next slide. Nowadays you’ll be hard pressed to find anyone willing to set up a screen and darken the room just to watch a few photos, so if you still have any slides lying around you’ll probably want to digitize them. If you’ve also kept your projector then this doesn’t even have to be that difficult, as [Scott Lawrence] shows in his latest project.

[Scott] made a setup to directly connect a DLSR, in this case a Nikon D70, to a Kodak 760 slide carousel. The attachment is made through a 3D-printed adapter that fits onto the Nikon’s macro lens on one side and slides snugly into the carousel’s lens slot on the other. The adapter also holds an IR transmitter which is aimed at the camera’s receiver, in order to trigger its remote shutter release function.

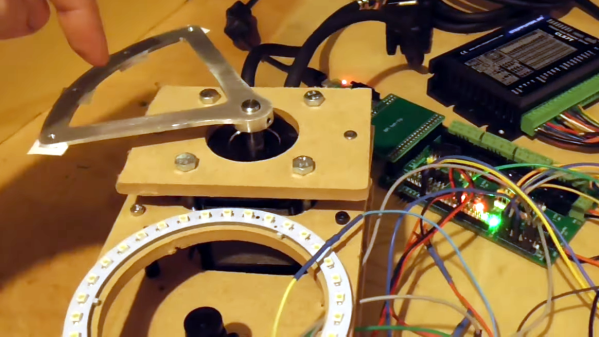
The carousel’s original light source was replaced with a compact LED studio light, which allows for precise brightness control and of course remains nice and cool compared to the original incandescent bulb. The light, camera and carousel motor are all controlled through a central user interface driven by an Arduino Leonardo which can automatically advance the carousel and instruct the camera to take a picture, thereby taking the hard work out of digitizing huge stacks of slides.

[Scott] plans to make the software and STL files available on GitHub soon, so anyone can go ahead and turn their projector into a digitizer. If you’ve misplaced your projector however, a simple 3D-printed slide adapter for your camera also works for small slide decks.

Continue reading “Digitize Your Slide Deck With This Arduino-Powered Slide Carousel”

Automatic Lens Cover Helps Cameras Cover Space Launches

Shooting space launches often requires the use of remote cameras for safety reasons. However, that means there’s no photographer on hand to wipe lenses down if they happen to get condensation from the prevailing weather conditions. [Michael Baylor] was having issues with atmospheric moisture interfering with his launch shots, so built a custom automatic lens cap to help solve the issue. 

The design is simple, consisting of a large shutter that pivots to cover the camera lens when photos aren’t being taken, controlled by an impressively-beefy servo. Not only does the automatic cap protect the lens from condensation prior to the moment of launch, it also closes to cover the lens as the rocket leaves the frame. This protects the lens from all the dust and debris flying its way, kicked up by the rocket exhaust on takeoff.

[Michael] found that the lens cap easily outperformed his usual anti-condensation solution. While his camera with the auto-cap shot mostly-clean pics, another camera fitted with 18-hour handwarmers suffered significantly from condensation. The plan is to add just a little heat to the auto-cap setup to stave off condensation for good, even when shooting at pads like Vandenburg, California.

Details on the build are slim, but the basic concept is all there. Throw together a servo with some 3D-printed components and a microcontroller and you can build a setup custom-tailored to your own rig and use case. If you find yourself needing a capable long-range camera remote, too, we’ve seen those before as well! Video after the break.

Continue reading “Automatic Lens Cover Helps Cameras Cover Space Launches”

Pieca Is A Pi Camera With Some Very Nice Lenses

The advent of the high-quality version of the Raspberry Pi camera has given experimenters a good-enough quality camera system that they can use it to create better devices than mere snapshot cameras. It’s been used by experimenters for some exciting projects, but so far, very few of them have broken away from the Pi camera’s C-mount lens system. [Tom Schucker]’s Pieca is an interesting departure then, because it takes the Pi HQ camera into new territory by using Leica rangefinder lenses.

There are enough Pi camera projects that by now the process of setting one up should be pretty well known. This one is a bit different in its use of a focal length reducer, mounted inside a 3D-printed Leica lens mounting plate. The result is that the Leica lens is better matched to the much smaller size of the Pi camera sensor compared to a 35mm frame.

The camera’s aesthetic design is on the chunky side, probably because of the choice of a Pi 4 rather than a Pi Zero. It remains very usable though, and produces photographs with a distinctive feel. You can see more in the video below the break. Meanwhile if you aren’t lucky enough to own a stable of Leica lenses, perhaps you could think about adapting more common optics? We’ve seen it before with the original Pi camera.

Continue reading “Pieca Is A Pi Camera With Some Very Nice Lenses”

Trinocular Lens Makes Digital Wigglegrams Easier To Take

Everyone likes a good animated GIF, except for some Hackaday commenters who apparently prefer to live a joyless existence. And we can’t think of a better way to celebrate moving pictures than with a 3D printed trinocular camera that makes digital Wigglegrams a snap to create.

What’s a Wigglegram, you say? We’ve seen them before, but the basic idea is to take three separate photographs through three different lenses at the same time, so that the parallax error from each lens results in three slightly different perspectives. Stringing the three frames together as a GIF later results in an interesting illusion of depth and motion. According to [scealux], the inspiration for building this camera came from photographer [Kirby Gladstein]’s work, which we have to admit is pretty cool.

While [Kirby] uses a special lenticular film camera for her images, [scealux] decided to start his build with a Sony a6300 mirrorless digital camera. A 3D printed lens body with a focusing mechanism holds three small lenses which were harvested from disposable 35 mm film cameras — are those still a thing? Each lens sits in front of a set of baffles to control the light and ensure each of the three images falls on a distinct part of the camera’s image sensor.

The resulting trio of images shows significant vignetting, but that only adds to the charm of the finished GIF, which is created in Photoshop. That’s a manual and somewhat tedious process, but [scealux] says he has some macros to speed things up. Grainy though they may be, we like these Wigglegrams; we don’t even hate the vertical format. What we’d really like to see, though, is to see everything done in-camera. We’ve seen a GIF camera before, and while automating the post-processing would be a challenge, it seems feasible.

Continue reading “Trinocular Lens Makes Digital Wigglegrams Easier To Take”