Rooting Your AT&T U-verse Modem

Unhappy with the performance of his U-verse modem [Jordan] decided to dig in and see if a bit of hacking could improve the situation. Motorola makes this exclusively for AT&T and there are no other modems on the market which can used instead. Luckily he was able to fix almost everything that was causing him grief. This can be done in one of two ways. The first is a hardware hack that gains access to a shell though the UART. The second is a method of rooting the device from its stock web interface.

We think the biggest improvement gained by hacking this router is true bridge mode. The hardware is more than capable of behaving this way but AT&T has disabled the feature with no option for an unmodified device to use it. By enabling it the modem does what a modem is supposed to do: translate between WAN and LAN. This allows routing to be handled by a router (novel idea huh?).

LiPo Internal Resistance Measurement Tool

lipo-internal-resistance-meter

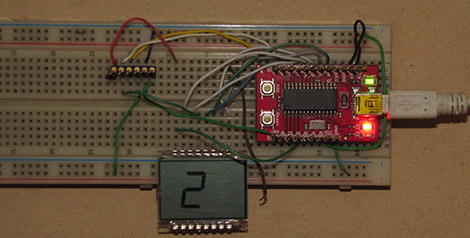
This is a scratch-build meter for measuring the internal resistance of Lithium Polymer cells. [Bleuer Csaba] uses the LiPo cells for RC vehicles and thet take quite a beating from the motors  they’re supplying. This means that he only gets about 100-200 cycles out of each cell. To figure out where one is in its life cycle you can measure the internal resistance where a rising resistance indicates greater age. [Bleuer] mentions that you can buy a meter to do this for you, but what fun is that?

Since he’s rolling his own tool he defined his own parameters for the readings. After experimenting with different loads driven for different test periods he was able to extrapolate an equation that estimates the resistance measurement. As you can see in the clip after the break, this happens very fast. All he has to do is connect the cell and press one button. The measurements are made and various data points are displayed on the quartet of 7-segment displays.

Continue reading “LiPo Internal Resistance Measurement Tool”

Breadboard Friendly FPGAs

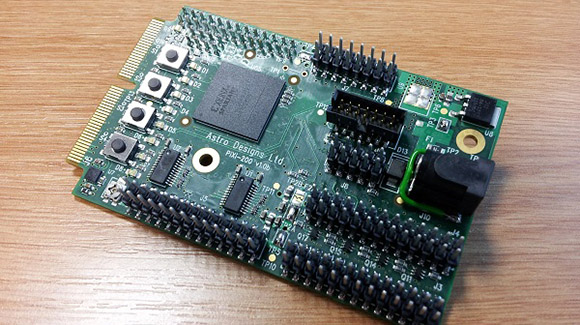
Regular Hackaday readers will be familiar with all the cool things you can do with FPGAs; emulating old video game consoles, cracking encryption protocols, and DIY logic analyzers become relatively simple projects with even a modest FPGA dev board on your workbench. Many FPGA boards aren’t geared towards prototyping, though, and breadboard friendly devices are hard to come by. Here’s a pair of breadboardable FPGAs we’ve found while searching for some related hardware over the past few days

First up is the Mercury FPGA Module. Packaged in a DIP-64 format, the Mercury features a Spartan-3A FPGA with the equivalent of 200k logic gates. Elsewhere on the board is 512kB of RAM and 128kB of Flash storage. There are enough GPIO pins for nearly any project, but sadly only a 10-bit ADC – the same resolution you’d find in an AVR or PIC ‘micro.

Of course the Mercury isn’t the only breadboard-friendly FPGA dev board out there. There’s also the slightly more capable XuLA2 board powered by a Spartan-6 with 32 MB of RAM, 1MB of Flash. Unlike the Mercury, the XuLA2 can also fit in one of those ‘half-sized’ solderless breadboards.

Yes, it’s a different form factor than the commonly recommended Papilio One or the DE0. If you can suggest any other ‘beginners’ (i.e. doesn’t cost an arm and a leg) FPGA boards, leave a note in the comments and we’ll summarize them in another post.

Building A Spectrum Analyzer With Parallel Processing

fft

It’s the end of the semester for [Bruce Land]’s microcontroller design class at Cornell, and the projects coming off the workbench this semester look as awesome as any before. For their final project, [Alexander Wang] and [Bill Jo] designed an audio frequency spectrum analyzer using two microcontrollers in a parallel setup.

This spectrum analyzer takes an audio signal from an iPod, phone, or CD player through a 3.5 mm jack and displays the level for dozens of frequency bands much like an audio visualizer in iTunes or a nice car stereo display. To display these frequency bands, the spectrum analyzer first needs to perform a Fast Fourier Transform on the incoming audio signal. While FFT is extremely fast, the calculations are rather hardware intensive; calculating the frequencies and displaying them on a TV would be a bit much even for the ATMega1284 used in the project.

To graph the audio signal on their small display, [Alexander] and [Bill] broke the build up into two parts – one to do the math on the audio, and another to generate the NTSC video signal for the display.

As seen in the video after the break, the spectrum analyzer works wonderfully, and even though it only functions up to 4kHz, it’s more than enough to see what’s going on in most music.

Continue reading “Building A Spectrum Analyzer With Parallel Processing”

$250,000 Hard Drive Teardown

worlds-most-expensive-hard-drive-teardown

Have you ever seen hard drive platters this big before? Of course you haven’t, the cost of this unit is way beyond your pay grade. But now that it’s decades old we get a chance to post around inside this beast. [Dave Jones] — who we haven’t seen around these parts in far too long — takes a look inside this $250,000 storage device.

In this episode of the EEVblog [Dave] is tearing down a late 1980’s IBM hard drive. This an IBM 3390. It stores either 1.78GB or 3.78GB. These days we’d never use a mechanical drive for that little storage as flash memory is so much cheaper. But this was cutting edge for servers of the day. And that’s why you’d pay a quarter of a million dollars for the thing.

[Dave] does what he’s known for in the video after the break. He energetically pours over every aspect of the hardware discussing function and design choices as he goes.

Continue reading “$250,000 Hard Drive Teardown”

The Story Behind Developing The Sifteo From An Engineer’s Perspective

how-the-sifteo-was-developed

The video game industry must be one of the most secretive sectors when it comes to developing the electronic hardware used in the gaming consoles. The big guys don’t want to give anything away — to the competition or to the hackers who will try to get around their security measures. But it seems Sifteo doesn’t share those secretive values. We had a great time reading about the bumpy ride for the developers bringing the gaming system from concept to market. [Micah Elizabeth Scott] wrote the guest post for Adafruit Industries. She was brought on as an engineer for the Sifteo project just after the first version of the interactive gaming cube was released. From her narrative it seems like this was the top of the big hill on the roller coaster ride for the company.

What’s seen above is one gaming cube. The system developed in [Beth’s] story puts together multiple cubes for each game. The issue at hand when she joined the company was how to put more power in the hardware and rely less heavily on a computer to which it was tethered. She discusses cost of components versus features offered, how to deliver the games to the system, and all that the team learned from studying successful consoles that came before them like the long line of Nintendo hardware. It’s a fascinating read if you’re interesting in how the sausage is made.

Teaching The Speak & Spell Four (and More) Letter Words

ss

Before it became the darling of circuit benders the world over, the Speak & Spell was a marvel of modern technology. Complete with a microprocessor and voice synthesizer, the Speak & Spell was able to speak a limited vocabulary that [Furrtek] thought should include words such as, “al qaeda”, “necrosis”, and “butt”. The Speak & Spell included an expansion port for cartridges containing a larger vocabulary, and with a huge amount of effort [Furrtek] created his own Speak & Spell carts that allow it to talk like a sailor.

The Speak & Spell ROMs were stored on a very strange memory chip; instead of a parallel or serial interface, the chip reads five nybbles at a time before returning the saved data. At first, [Furrtek] thought he could get an ATtiny microcontroller, but the way this memory chip is set up made it impossible to send and receive data even on a 400kHz I2C bus.

The project eventually found some decent hardware in the form of a CPLD-based cartridge that was more than fast enough to interface with the Speak & Spell. After that, it was only an issue of converting words into something the speech synth can understand with some old Windows 3.1 software and finally burning a ROM.

The end result is a Speak & Spell with a perverse vocabulary and is much, much more interesting than a circuit bent piece of hardware with a few wires crossed. Check out the video after the break.

Continue reading “Teaching The Speak & Spell Four (and More) Letter Words”