[Jer Schmidt] needed a way to put a lot of M8 bolts into a piece of square steel tubing, but just drilling and tapping threads into the thin steel wouldn’t be strong enough. So he figured out a way to reliably weld nuts to the inside of the tube, and his technique works even if the tube is long and the inside isn’t accessible.
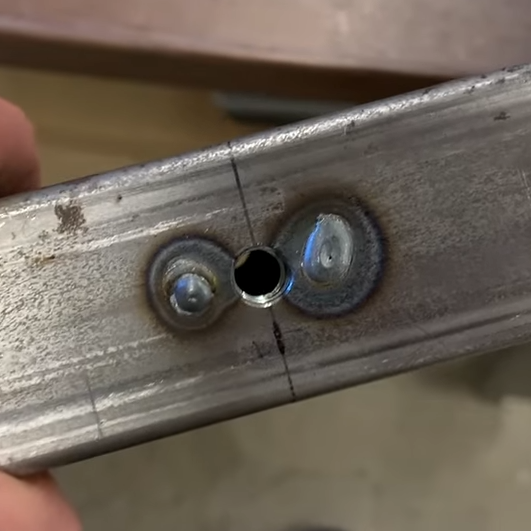
Essentially, one drills a hole for the bolt, plus two smaller holes on either side. Then one welds the nut to the tubing through those small holes, in a sort of plug weld. A little grinding is all it takes to smooth out the surface, and one is left with a strong threaded hole in a thin-walled tube, using little more than hardware store fasteners.
The technique doesn’t require access to the inside of the tube for the welding part, although getting the nut back there in the first place does require a simple helper tool the nut can slot into. [Jer] makes one with some scrap wood and a table saw, just to show it doesn’t need to be anything fancy.
Another way to put a threaded hole into thin material is to use a rivnut, or rivet nut (sometimes also used to put durable threads into 3D prints) but welding a plain old nut to the inside was far more aligned with what [Jer] needed, and doesn’t rely on any specialty parts or tools.
[Jer]’s upcoming project requires a lot of bolts all the way down long tubing, which is what got him into all of this. Watch it in action in the video below, because [Jer] has definitely worked out the kinks, and he steps through a lot of tips and tricks to make the process painless.
Thanks [paulvdh] for the tip!
Continue reading “Welding Nuts Inside Metal Tubes, Painlessly”