An Open Hardware Laser Engraver For Everyone

Right now, you can get a diode laser engraver on eBay for around $100 USD. That sounds like a deal, but it’ll probably use some arcane proprietary software, won’t be terribly accurate, and the laser itself will almost certainly be fully exposed. Of course there’s no shortage of DIY builds which improve upon this situation greatly, but unfortunately the documentation and instructions to replicate them yourself often leave a lot to be desired.

To get a safe and accurate laser platform into the hands of hackers everywhere, we need more well documented open source designs that are actually built with community in mind. Projects like the Engravinator from [Adam Haile]. This isn’t a one-off design with documentation thrown together after the fact, it’s a fully open hardware engraver with a concise assembly guide that’s built from 3D printed parts and readily available components. You’re free to source and print the parts yourself or, eventually, purchase everything as a kit.

Pen-equipped Engravinator

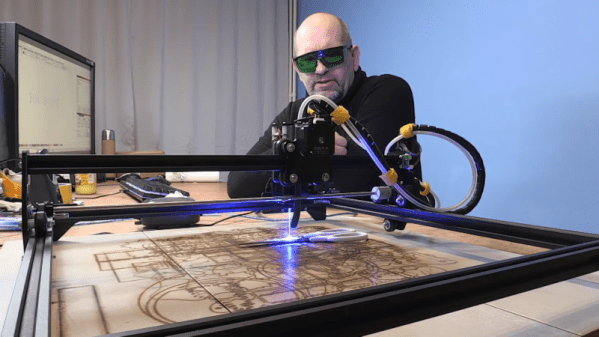
The microwave-sized Engravinator is built from standard 2020 aluminum extrusion, and offers a workable area of 130mm x 130mm. There’s a hatch on the front of the enclosure for objects that are small enough to fit inside the machine, but the open bottom and handles on the top also allow the user to place the Engravinator directly onto the work surface. [Adam] says this feature can be especially useful if you’re looking to burn a design into a tabletop or other large object.

Outside of the aluminum extrusion and miscellaneous hardware that make up the frame, most of the other parts are 3D printed. Released under the CERN Open Hardware License v1.2 and distributed as both STL and STEP files, the printable parts for the Engravinator are ripe for modification should you be so inclined. The same goes for the DXF files for the enclosure panels, which will need to be cut out of orange acrylic with a CNC or (ironically) a laser.

Continue reading “An Open Hardware Laser Engraver For Everyone”

Laser-Based Audio Injection On Voice-Controllable Systems

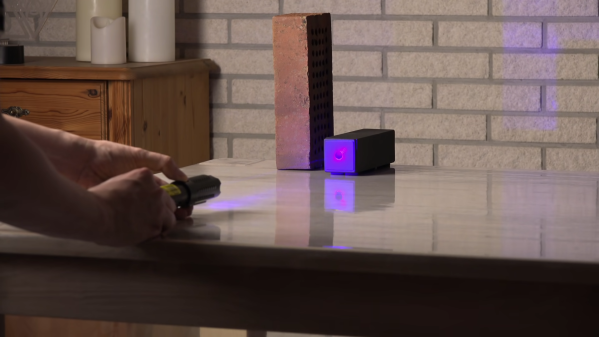
In one of the cooler hacks we’ve seen recently, a bunch of hacking academics at the University of Michigan researched the ability to flicker a laser at audible sound frequencies to see if they could remotely operate microphones simply by shining a light on them. The results are outstanding.

While most Hackers will have heard about ‘The Thing’ – a famous hack where Russian KGB agents would aim a radio transmitter at the great seal in the US embassy,  almost none of us will have thought of using lasers shined in from distant locations to hack modern audio devices such as Alexa or Google Assistant. In the name of due diligence, we checked it out on Wikipedia: ‘The Photoacoustic Effect’ , and indeed it is real – first discovered in 1880 by Alexander Bell! The pulsing light is heating the microphone element and causing it to vibrate along with the beam’s intensity. Getting long range out of such a system is a non-trivial product of telescopes, lasers, and careful alignment, but it can be made to work.

Digging deeper into the hack, we find that the actual microphone that is vulnerable is the MEMS type, such as the Knowles SPV0842LR5H. This attack is relatively easy to prevent; manufacturers would simply need to install screens to prevent light from hitting the microphones. For devices already installed in our homes, we recommend either putting a cardboard box over them or moving them away from windows where unscrupulous neighbors or KGB agents could gain access. This does make us wonder if MEMS mics are also vulnerable to radio waves.

As far as mobile phones are concerned, the researchers were able to talk into an iPhone XR at 10 metres, which means that, very possibly, anybody with a hand held ultra violet / infra red equipped flashlight could hack our phones at close range in a bar, for example. The counter-measures are simple – just stick some black electrical tape over the microphone port at the bottom of the phone. Or stay out of those dodgy bars. Continue reading “Laser-Based Audio Injection On Voice-Controllable Systems”

A CNC Hacked Together In Pajamas

Sometimes you just gotta sit down and hack something together. Forget the CAD and the cool software toys; just hammer away until you have something working. That’s how [bobricus] ended up with this cute little laser engraver anyway.

For under $300 US of parts and a few nights working in his pajamas, the aptly named, pajama micro laser engraver is a pretty nice little machine for its class. Not having the space for a full size machine and not necessarily needing its capabilities he aimed to produce something compact.

The frame is aluminium extrusion, the movement is core-XY an H-bot on linear rails, and it appears to just be a grbl board with a Chinese laser module on it. He took a bit of care to make the frame a cube which allows him to easily vent the fumes from the little unit. There’s even a small air pump to blow the off-gas from the cutting away from the laser.

All in all a nice little hack useful for all sorts of things from solder masks to cutting wood veneers. You can see it zipping around in the video after the break.


Continue reading “A CNC Hacked Together In Pajamas”

Building A Laser Head With High Speed, High Resolution

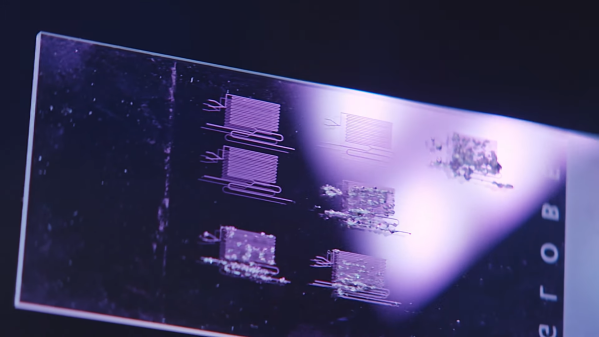
A test exposure on cyanotype paper shows off the prototype’s resolution, around 100 microns.

Typically, when it comes to scanning a laser, it’s done with galvos or a rotating mirror assembly. However, these methods can be slow and cumbersome, or restricted due to existing patents. [Rick] aimed to find an alternative solution with the Hexastorm project, using a rotating prism to build a high speed, high resolution laser head.

The project currently uses a Beaglebone for the brains, with a polygon motor sourced from a photocopier used to rotate the prism at over 20,000 rpm. The project aims to be a proof of concept for rotating prism technology, which can then be adapted to specific tasks. With the promise of high speed and high resolution, the system could be used in fields as diverse as PCB manufacture, 3D resin printing, and even virtual reality displays. [Rick] explores these potential markets in a pitch deck, comparing to existing solutions in the marketplace.

If you’re interested in high performance optical systems, [Rick]’s work makes compelling reading. It’s not the first time we’ve explored cutting edge laser hacks, either. Video after the break. Continue reading “Building A Laser Head With High Speed, High Resolution”

Lighting The Way For The Visually Impaired

The latest creation from Bengali roboticist [nabilphysics] might sound familiar. His laser-augmented glove gives users the ability to detect objects horizontally in front of them, much like a cane or pole is used by the visually impaired to navigate through a physical space.

As a stand in for the physical cane, he uses the VL53L0X time-of-flight (TOF) sensor which detects the time taken for a laser source to bounce back to the sensor. Theses are much more accurate than IR distance sensors and have a much finer focus than ultrasonic sensors for excellent directionality.

While the sensors can succumb to interferences from background light or other time-of-flight sensors, the main advantages are speed of calculation (it relies on a single shot to compute the distances within a scene) and an efficient distance algorithm that simplifies the measurement of distance data. In contrast to stereo vision, which requires complex correlation algorithms, the process for extracting information for a time-of-flight sensor is entirely direct, requiring a small amount of processing power.

The glove delivers haptic feedback to the user to determine if an object is in their way. The feedback is controlled through an Arduino Pro Mini, powered remotely by a LiPo battery. The code is uploaded to the Arduino from an FTDI adapter, and works by taking continuous readings from the time-of-flight sensor and determining if the object in front is within 450 millimeters of the glove, at which point it triggers the vibration motor to alert the user of the object’s presence.

Since the glove used for the project is a bicycle glove, the form factor is straightforward — the Arduino, motor, battery, and switch are all located inside a plastic box on the top of the glove, while the time-of-flight sensor sticks out to make continuous measurements when the glove is switched on.

In general, the setup is fairly simple, but the idea of using a time-of-flight sensor rather than an IR or sonar sensor is interesting. In the broader usage of sensors, LIDARs are already the de facto sensor used for autonomous vehicles and robotic components that rely on distance sensing. This three-dimensional data wouldn’t be much use here and this sensor works without mechanical moving parts since it doesn’t rely on the point-by-point scan from a laser beam that LIDAR systems use.

Homebrew Oscillator Is In A Glass By Itself

Great things happen when we challenge ourselves. But when someone else says ‘I bet you can’t’ and you manage to pull it off, the reward is even greater. After [WilkoL] successfully made a tuning fork oscillator, his brother challenged him to make one out of a wine glass. We’ll drink to that!

First, [WilkoL] needed to find a way to make the wine glass vibrate continuously without having to stand there running a moistened finger around the edge. A piezo speaker mounted close by did the trick. Then he had to detect the sound waves, amplify them, and feed them back in.

After toying with the idea of making a laser microphone, and tossing aside the idea of a regular microphone (because squealing feedback), he settled on using light. LEDs didn’t work, probably because the light is too divergent. But he found out that by aiming a laser just right, the curve of the wine glass modulates the light, and the waves can be detected with a phototransistor.  Then it was just a matter of amplifying the the sound and feeding it back to the piezo.

In the demo video after the break, you can see the vibrations in the glass manifest once he pours in some water. As anyone who’s ever played the water glasses can tell you, this also changes the frequency. [Editor’s note: I expected a much larger change in pitch. Not sure what’s going on here.]

Speaking of, here’s a steampunky glass armonica that uses an old turntable motor to rotate the wine glass, and a pneumatic cylinder to raise and lower the water level.

Continue reading “Homebrew Oscillator Is In A Glass By Itself”

Another Way To Make PCBs At Home

One of the more popular ways of rolling out your own custom PCB is to simply create the model in your CAD program of choice and send it off to a board manufacturer who will take care of the dirty work for you. This way there is no need to deal with things like chemicals, copper dust, or maintaining expensive tools. A middle ground between the board manufacturer and a home etching system though might be what [igorfonseca83] has been doing: using an inexpensive laser engraver to make PCBs for him.

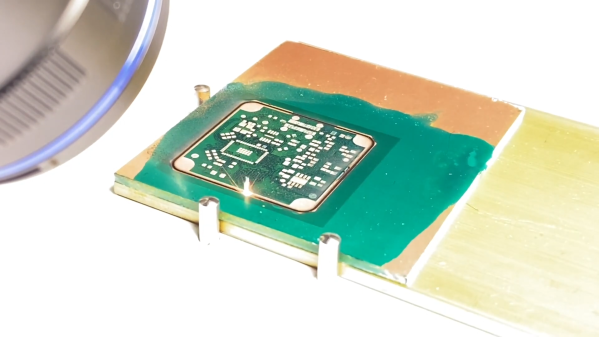
A laser engraver is basically a low-power laser CNC machine that’s just slightly too weak to cut most things that would typically go in a laser cutter. It turns out that the 10W system is the perfect amount of energy to remove a mask from a standard PCB blank, though. This in effect takes the place of the printer in the old toner transfer method, and the copper still has to be dissolved in a chemical solution, but the results are a lot more robust than trying to modify a printer for this task.

If you aren’t familiar with the days of yore when homebrew PCBs involved a standard desktop printer, many people still use this method, although the results can be mixed based on printer reliability. If you want to skip the middleman, and the need for a chemical bath, a more powerful laser actually can cut the traces for you, too.

Continue reading “Another Way To Make PCBs At Home”