Lasers are such a fundamental piece of technology today that we hardly notice them. So cheap that they can be given away as toys and so versatile that they make everything from DVD players to corneal surgery a reality, lasers are one of the building blocks of the modern world. Yet lasers were once the exclusive province of physicists, laboring over expansive and expensive experimental setups that seemed more the stuff of science fiction than workhouse tool of communications and so many other fields. The laser has been wildly successful, and the story of its development is an intriguing tale of observation, perseverance, and the importance of keeping good notes.
After a longish hiatus, we were pleased to see a new video from [Afroman], one of the most accessible and well-spoken teachers the internet has to offer. If you’re new to electronics, see the previous sentence and resolve to check out his excellent videos. The new one is all about servos, and it culminates in a simple build that provides a foundation for exploring robotics.
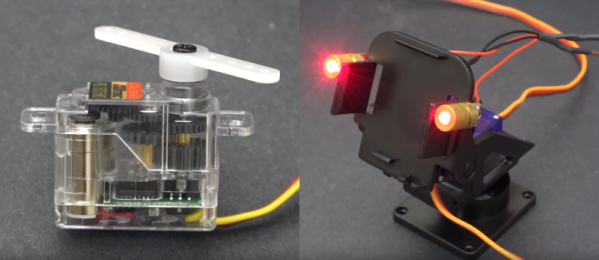
[Afroman] leaves no gear unturned in his tour de servo, which is embedded after the break. He explains the differences between open vs. closed loop motor systems, discusses the different sizes and types of servos available, and walks through the horns and pigtails of using them in projects. Finally, he puts this knowledge to use by building a laser turret based on a pan-tilt platform.
The Arduino-driven turret uses two micro servos controlled with pots to move by degrees in X/Y space. Interestingly, [Afroman] doesn’t program the board in the Arduino IDE using wiring. Instead, he uses an open-source microcontroller language/IDE called XOD that lets you code by building a smart sort of schematic from drag-and-drop components and logic nodes. Draw the connections, assign your I/O pin numbers, and XOD will compile the code and upload it directly to the board.
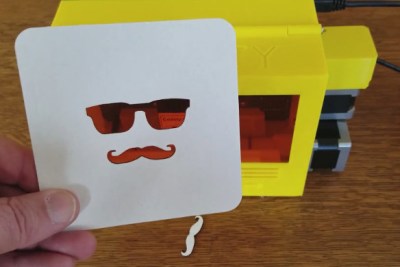
Whether or not you feel the need to laser cut custom drink coasters, you have to be impressed by the amount of thought that went into Coasty.
They say that justice is blind, and while we can’t promise you anything at your next court date, we can at least say with confidence that we’re not the kind of people who will turn down a good hack just because it’s held together with rubber bands and positive vibes. If it works it works, and it doesn’t matter what it looks like. Having said that, we’re blown away by how incredibly finished this particular project is.
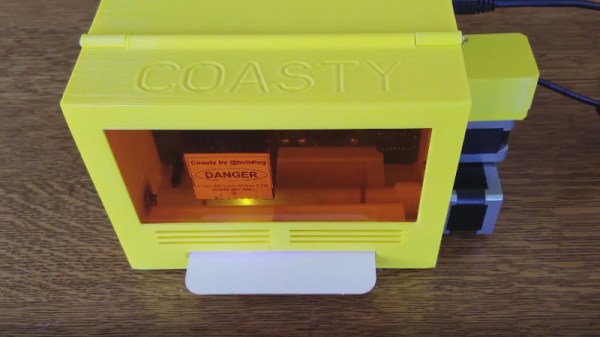
Coasty, designed and built by [Bart Dring] is one of those projects that elevate a hack into something that looks like it could be a commercial product. It takes in a common pulpboard coaster and laser cuts any design you want. It’s just the right size, with just the right components because this is Coasty’s purpose. It has a slot to feed in the coaster, and uses this as one of the axes during the laser cutting process, with the laser’s left to right movement as the other. This method makes for a smaller overall footprint and means you never need to open the protective enclosure for normal operation.
Coaster cutting example from the video found below
Rear view. Note air filter and modular stepper drivers.
One of the most striking elements of Coasty is how much of the hardware is 3D printed. If it isn’t a motor, smooth rod, or other mechanical component, it’s printed. We’re used to seeing 3D printed parts as brackets or mounts, but rarely do you see an entire chassis printed like this. Not only does it take a serious amount of forethought and design, but the print time itself can be quite prohibitive.
But by designing and printing the majority of Coasty, it really gives it a professional look that would have been harder to achieve if it was a bundle of aluminum extrusions.
The back of Coasty features an exposed PCB “motherboard” with a dizzying array of plug-in boards. Hardware like the stepper drivers, Bluetooth radio, and laser power supply are separate modules for ease of maintenance and development. There’s a few neat hardware features integrated into the motherboard as well, like the IR sensor for detecting the edge of the coaster.
The printed filter is an especially nice touch. Containing a scrap of commercially available carbon cloth intended for home air filters, Coasty is able to cut down on the smoke that is invariably produced when blasting cardboard with a 3W 450nm laser.
Most of us would probably like to have an arcade cabinet at home, but it’s hard to justify the space they take up. Sure it’s an awesome conversation starter when friends are over, and you might even play it regularly, but at some point you’ll look over at the corner and realize there’s probably something more practical you could be doing with that particular section of the room.
Perhaps the solution is to just make a smaller one. You could do one at half scale, or even desktop sized. But why stop there? Why not make one so small that you could put the thing in a drawer when you don’t need it? While it might be more of an academic experiment than a practical entertainment device, [RedPixel] has managed to create just such an easily concealable arcade cabinet out of a Pi Zero and laser cut wood. At only 83 mm high, this may well be the smallest functional arcade cabinet ever made (at least for now).
All of the cabinet parts were drawn in Inkscape and cut out of 3 mm plywood. The buttons and joystick are wired directly to the Pi Zero’s GPIO pins and configured with Adafruit-retrogame. The display is a SPI ILI9163, which [RedPixel] previously documented on his site.
The Pi is running the ever-popular RetroPie, which allows this tiny arcade cabinet to emulate 1000’s of console and arcade games, assuming you can deal with the controls anyway. While [RedPixel] has uploaded a video of his lilliputian cabinet running an emulator, there’s no video of him actually playing the thing. While we don’t doubt that it functions as advertised, gameplay on such a tiny array of inputs must be very difficult.
In the past half-century, lasers have gone from expensive physics experiments using rods of ruby to cheap cutting or engraving tools, and toys used to tease cats. Advances in physics made it all possible, but it turns out that ruby lasers are still a lot of fun to play with, if you can do it without killing yourself.
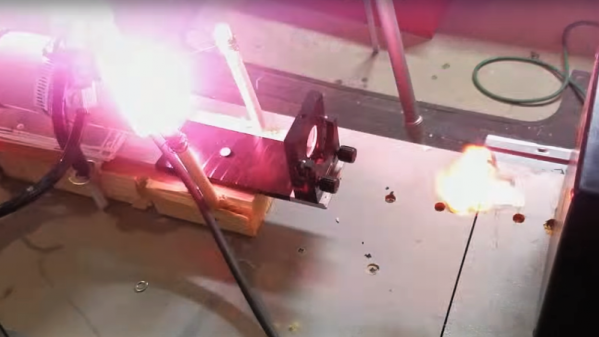
With a setup that looks like something from a mad scientist movie set, [styropyro]’s high-powered laser is a lot closer to the ray gun of science fiction than the usual lasers we see, though hardly portable. The business end of the rig is a large ruby rod nestled inside a coiled xenon flash lamp, which in turn is contained within a polished reflector. The power supply for the lamp is massive — microwave oven transformers, a huge voltage multiplier, and a bank of capacitors that he says can store 20 kilojoules. When triggered by a high-voltage pulse from a 555 oscillator and an old car ignition coil, the laser outputs a powerful pulse of light, which [styropyro] uses to dramatic effect, including destroying his own optics. We’d love to hear more about the power supply design; that Cockcroft-Walton multiplier made from PVC tubes bears some exploration.
Whatever the details, the build is pretty impressive, but we do urge a few simple safety precautions. Perhaps a look at [Ben Krasnow]’s 8-kJ ruby laser would help.
Yes, laser cutters that come off the slow boat from China are more affordable than ever, and with some tweaks and hacks they can turn out some decent results. But if you just want a laser lightshow that’ll draw boxes on your living room ceiling, this simple X-Y laser scanner might be a good platform to build.
Let’s say right up front that there are more than a few safety issues with [ThingEngineer]’s 3D-printed two-axis scanner. He’s well aware of these potential retina-cooking issues and duly notes that a good pair of laser safety goggles is a must and that the cheap anti-lawsuit glasses that laser module manufacturers often include with their products don’t count.
[Editor’s Note: Glasses are really only intended for alignment operations. Pros enclose lasers beyond a certain power to prevent anyone going blind. Know where your beam terminates, kids.]
With that in mind, there’s a lot to be said for this poor man’s scanner build. Yes, it would be faster with real galvos and low-mass mirrors, but time is money, and the steppers and craft store mirror discs do the job, albeit slowly. We like that everything is so simple, even the method for turning a regular mirror into a front-surface mirror.
[ThingEngineer] proves you don’t need galvanometers to have some simple laser fun. And if steppers don’t do it for you, you can try little brushed DC hobby motors or even 3D-printed cams.
A lot of the DIY laser engravers and cutters we cover here on Hackaday are made with laser diodes salvaged from Blu-ray drives and projectors, which are visible lasers in the 400 – 450nm range (appearing as violet or blue). Unfortunately there is an upper limit in terms of power on visible diode lasers, most builds max out at 5W or so. If you need more power than that, you’ll likely find yourself looking at gas laser cutters like the K40. While the K40 is a great starting point if you’re looking to get into “real” lasers, it’s a very different beast from the homebrew builds using visible lasers.
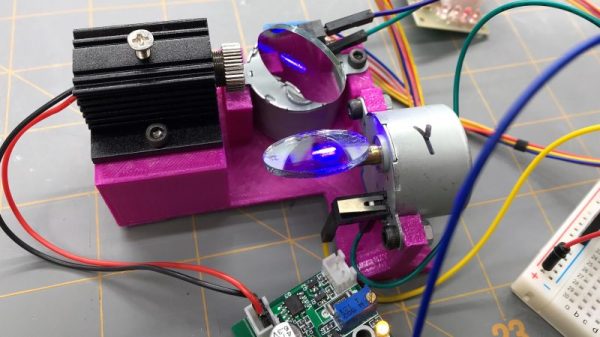
With a gas laser the beam itself is invisible, making it much more difficult to align or do test runs. One solution is to add a visible laser to the K40 which can be used to verify alignment, but making sure it’s traveling down the same path as the primary laser usually requires an expensive beam combiner. Looking to avoid this cost, [gafu] wanted to see if it was possible to simply move the visible laser into the path of the primary beam mechanically.
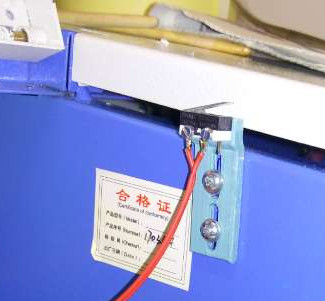
An adjustable microswitch detects when the lid has been opened.
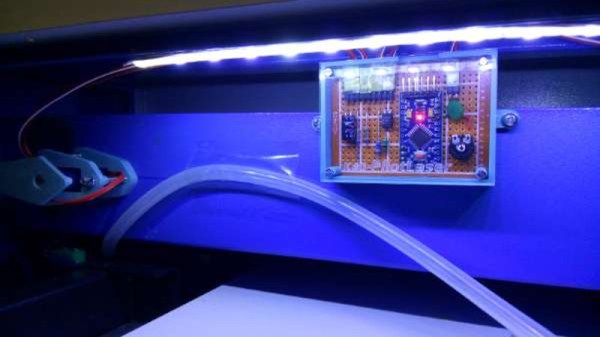
In the setup that [gafu] has come up with, a cheap laser module (the type from a handheld laser pointer) is moved into the path of the primary laser on an arm that’s actuated by a simple hobby servo. To prevent the primary and visible lasers from firing at the same time, an Arduino is used to control the servo given the current state of the K40’s lid. If the lid of the K40 is open, the primary laser is shutoff and the visible laser is rotated into position so the operator can see where the primary laser’s beam would be hitting. Once the lid is closed, the visible laser rotates out of the way and the primary is powered back up.
Running the cutting or engraving job with the lid of the K40 machine open now let’s [gafu] watch a “dry run” of the entire operation with the visible laser before finally committing to blasting the target with the full power beam.