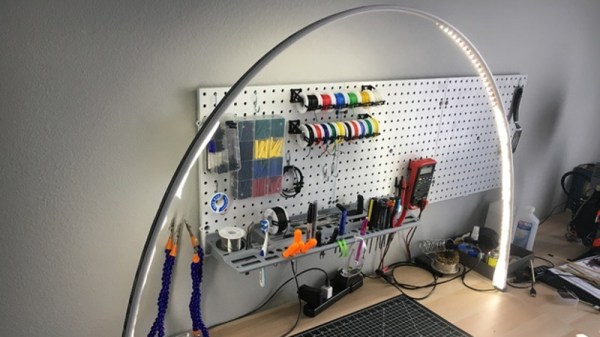
A light arch is exactly what it sounds like: an arch fitted with LED strips that can evenly illuminate the area below. They are becoming very popular in the miniature and model making communities as they put a lot of light where you need it without the shadows that you can get with purely overhead lighting. Those same characteristics make it excellent for electronics work as well, so while we haven’t seen many light arches come our way yet, we expect it won’t be long before they start tricking in.
 [Spencer Owen] recently wrote in to tell us about his LED light arch that’s exceptionally easy and cheap to build. Whatever excuse you had before about not trying a light arch over your bench is probably out the window once you check this build out.
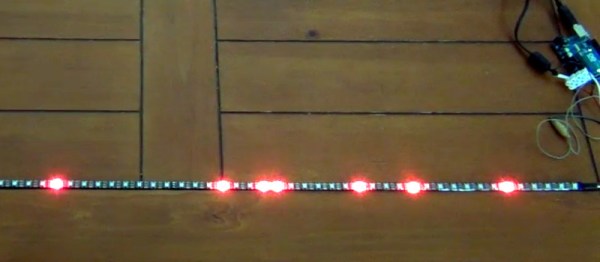
The heart of the arch is a length of plastic tile edging, which you can pick up from any big box home improvement store. LED strips are then attached to the inside face of the tile edging, and a suitable power supply wired into one end. [Spencer] mentions he’s strategically wrapped some sections of the arch with a diffuser, which may or may not be necessary for your particular application.
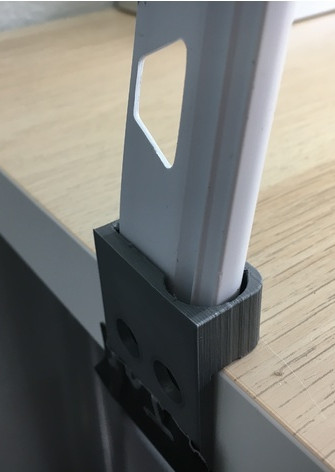
At this point the astute reader may have realized that this doesn’t make an arch, and would just give you a floppy light stick thing. Right you are. The real magic of this design are the 3D printed anchors. All you need to do is bend the tile edging, insert the ends in the anchors, and you’ve got a perfectly formed arch.
The hole in the anchor matches the profile of the tile edging closely, though might need to be adjusted to match a different brand of edging from what [Spencer] has. The tension of the plastic will be enough to hold the arch up without the need for glue or fasteners. As an added bonus, the arch can be taken down by just pulling the edging out and letting it return to its original shape.
Using your newly arisen arch to light up the bench is all well and good, but why stop there? Why not use it as clock, or to play a dungeon crawler?