Wireless Microcontroller/PC Interface For $3

uc

Sending data from a microcontroller to a PC usually requires some sort of serial connection, either through fiddly on-chip USB, FTDI chips, or expensive radio ICs. [Scott] didn’t want to deal with this when creating a network of wireless temperature sensors, so he hacked up a few cheap 433 MHz radio transmitters and receivers to transmit data to a PC for about $3.

After sensor data is collected on a microcontroller and sent over radio, there’s still the issue of getting it into a PC. For this, [Scott] piped the data into the microphone port of a cheap USB sound card. We’ve seen this trick before both in the world of microcontrollers and loading programs onto a Commodore 64 via a cassette interface.

Once the data is sent into the sound card, it’s decoded with a a small Python app. Given the range and quality of the RF transmitters and receivers  [Scott] says it’s not an extremely reliable way to send data to a PC. It is cheap, though, and if you need to read sensors wirelessly on a budget, it’s hard to do much better.

Check out [Scott]’s demo of his creation below.

[youtube=http://www.youtube.com/watch?v=GJHFldPwZvM&w=580]
Microcontroller Enumerates As USB Printer — Can Be Programmed By Printing

avr-programming-by-printing

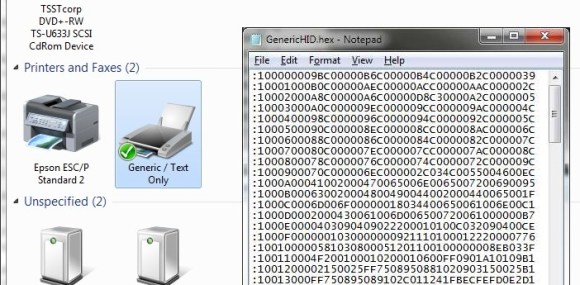
This is a fascinating concept. We’re not sure of its usefulness, but it definitely stands on its own just for the concept. [Dean Camera] just added a new HID class to the LUFA project that lets you flash AVR chips by printing to them. This means once you have a file like the one seen open in Notepad above, you can just click on File, then on Print, and the firmware will be uploaded to the chip.

[Dean] is the creator of the LUFA project and still likes to get his hands dirty hacking around with it. This idea came to him while he was exploring the concept of using the MIDI protocol to program a chip. That didn’t pan out because of the way Microsoft has handled MIDI in newer versions of Windows. But he did get the idea of making LUFA identify itself as a simple USB printer. He dug into the specification and figured out how to do that. Once Windows connects to the device it doesn’t really care what data gets sent to it. So [Dean] wrote a parser for the bootloader which could accept the incoming hex code and write it to the chip’s program memory.

Weather-O-Matic Displays Digital Weather On An Analog Face

SANYO DIGITAL CAMERA

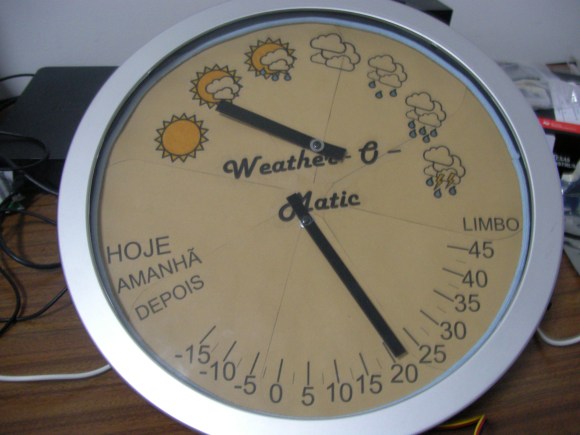
This clean-looking readout uses analog dials to display the weather. [Nuno Martins] calls it the Weather-O-Matic and after the jump he explains what went into the project.

The hardware is about as simple as it gets. Each hand has a servo motor attached to it. An MSP430 gets the weather via a serial connection to a computer (data is scraped by a Python script) and sets the dials accordingly. The microcontroller also takes user input in the form of a single button on the side of the frame. The words on the left side of the dial are Portuguese for Today, Tomorrow, and After (meaning the day after tomorrow). Pressing the button multiple times will scroll through these three words, followed by the forecast temperature high and low for that day being displayed.

The nice thing about this is that the servo motors will stay in place if you cut the power to them. We bet if he wanted to make this a permanent fixture in his house he could get it to run well on batteries by using the sleep function of the microcontroller and adding an RF transceiver to communicate with the server.

Continue reading “Weather-O-Matic Displays Digital Weather On An Analog Face” →

Bluetooth Stepper Motor Driver

bluetooth-stepper-motor-driver

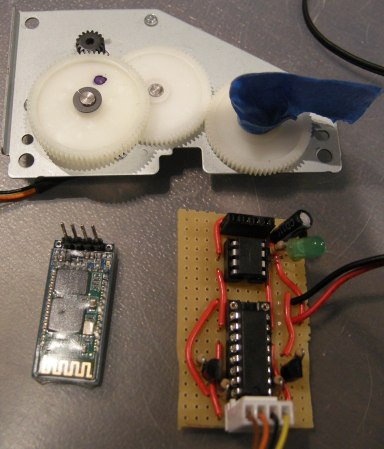
[Dan] salvaged some parts from an old printer a while back and finally found some time to play with them. One of the things he was most interested in is the geared stepper motor seen above. He was able to get it running with an Arduino in no time so he decided to take the project a little bit further. What he ended up with is a stepper motor driver which can be controlled over Bluetooth.

The motor can’t be driven directly, but with a simple motor driver like the L293 chip [Dan] used it’s not hard to interface them with your control hardware of choice. From there he added an ATtiny85 which will take care of the stepping protocol necessary to move the motor. The Bluetooth module he’s using functions as a serial device, making it really simple to interface with the uC. [Dan] uses a pin header to connect the module, so switching to a different type of serial device in the future will be quick and painless.

After the break you can see him sending step commands to the driver board.

Continue reading “Bluetooth Stepper Motor Driver” →

GUI Window Manager On An AVR Chip

avr-window-manager-gui

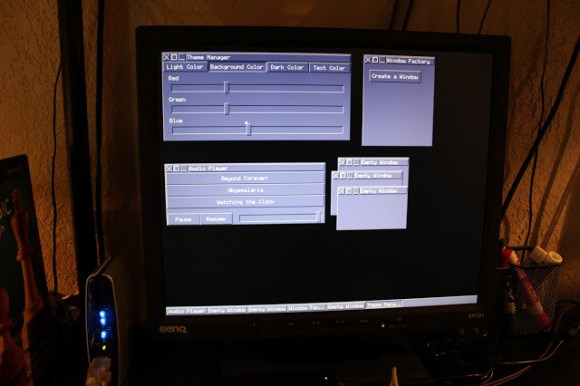
This project is reminiscent of the old days when window managers were an amazing new idea. The difference is that this window-based GUI is running on an ATmega1284 microcontroller. But the behavior and speed of the interface is pretty much exactly what you’d expect if working on an early 90’s home computer. It even uses a mouse as input.

So how is this even possible? The key to the project is a serial to VGA module which handles the heavy lifting involved with generating a VGA signal. We featured one of [Andrew’s] past projects which used an AVR chip to generate the VGA signal. But that doesn’t leave nearly enough cycles to implement something like a window manager, not to mention the fact that it got nowhere near the resolution shown here.

He uses a serial mouse with an RS-232 converter chip to interact with the windows. This is best shown in his video after the break. He’s able to generate and interact with new windows. He even implemented a set of rudimentary controls which allow him to adjust the theme of the windows and drive the audio playback feature included on that VGA controller he’s using.

Continue reading “GUI Window Manager On An AVR Chip” →

Asynchronous Fireflies Use Few Parts

led-firefly

[Karl Lunt] wrote in to share his LED firefly project. His goals for the project were to develop a low-power, low parts count module that can sense when it’s dark and then mimic the blinking patterns you’d associate with its biological namesake.

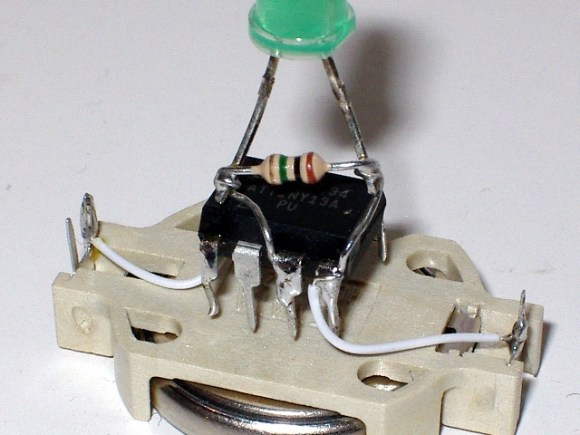
We like his design which uses a coin cell battery holder as the chassis for the project. The ATtiny13 driving the hardware is held in place by the two power wires. This lets him flash new firmware by rotating the chip and plugging in a little adapter he build. The LED connection might look a bit peculiar to you. It has a resistor in parallel, which doesn’t satisfy the normal role of a current limiting resistor. That’s by design. [Karl] is driving the LED without any current limiting, which should be just fine with the 3V battery and short illumination time of the diode. The resistor comes into play when he uses the LED as a light sensor. Past firefly projects included light dependent resistors to detect light and synchronize multiple units. [Karl] is foregoing the LDR, using the LED with a resistor in parallel to combat the capacitive qualities of the diode. As we mentioned, this senses ambient light, but we’d love to see an update that also uses the LED to synchronize a set of the devices.

Upgrade A Toy Keyboard’s Tone Production

hacking-a-toy-keyboard

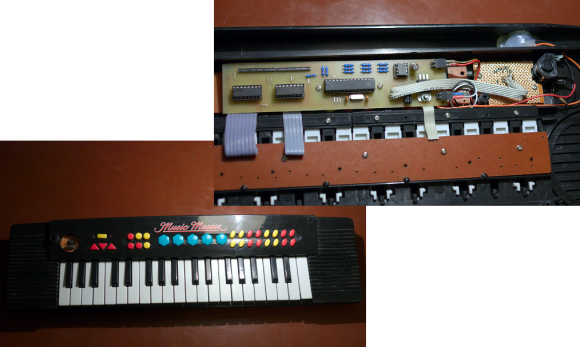
[Jan] was given this toy keyboard and decided to make it the subject of his next project. In addition to having three octaves of keys it’s got a ton of buttons used to select different modes. He gave it an upgrade by installing his own tone production circuitry seen in the upper right.

His preliminary investigation of the stock components yielded a mystery uC encased in a blob of black epoxy. He wasn’t going to be getting anywhere with that, so he started by figuring out how to use 4051 multiplexers to read all of the keys. Outputs for that were routed to a 20 pin header for easy connection to the synthesizer board he would build in the next part of the project. He based it around an ATmega8, which we know can produce some killer chiptunes audio. Once he had everything working he laid out a circuit board in Kicad to ensure the transplanted circuitry would hold up inside of the toy keyboard. You can hear all of different effects it’s capable of in the clip after the break.

Continue reading “Upgrade A Toy Keyboard’s Tone Production” →