[CNLohr]’s Microscope Slide Linux AVR Minecraft… Thing

We’ve been following [CNLohr]’s process of creating an AVR-powered microscope slide running Linux and interfacing redstone circuits in Minecraft to real world electronic for a while now, but we’re really at a loss for words on how it works. Well, now there’s a video explaining everything you want to know about this amazingly complicated and overwrought thing.

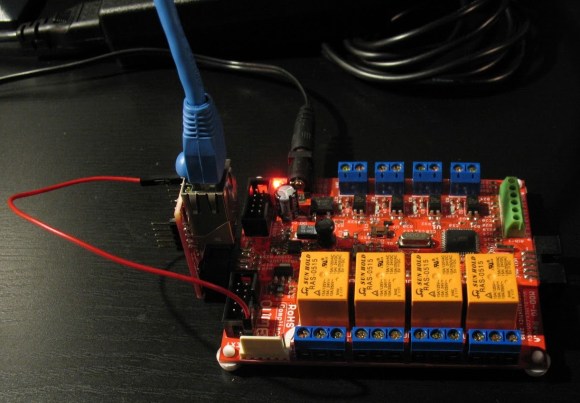
The device is powered by an AVR microcontroller and Ethernet controller running [Fabrice Bellard]’s JSLinux in a browser. [CNLohr] added a few bits to JSLinux allowing him map the x86 IO ports emulated inside JSLinux to the AVR’s IO ports. This allows him to query the status – both analog and digital – using just a browser. Very cool, but [CNLohr] can also run his Minecraft server optimized for 8-bit devices on this microscope slide server to create a bridge between real electronics and redstone circuits.

To sum up what’s going on here, [Bellard] created an x86 emulator in JavaScript, and put Linux on it. [CNLohr] is serving this from a microcontroller attached to a circuit built on a microscope slide so he can blink an LED from within Minecraft. It’s the most beautifully over engineered and useless thing we’ve ever seen, basically.

In the video after the break, you can see [CNLohr]’s overly convoluted walk through of what’s going on with this microscope slide server. As a little bonus, you can also catch a glimpse of Hackaday at 00:20 in [CNLohr]’s most visited / new tab thingy in Firefox. We’re honored, really.

Continue reading “[CNLohr]’s Microscope Slide Linux AVR Minecraft… Thing”

Giant Resistor-shaped Ohmmeter

resistance-measuring-resistor

The fun of having a giant resistor-shaped Ohmmeter is that it reads back the resistance by displaying the color code. If you’re not too hot with decoding those bands there’s a helper band to the right which will display the value numerically.

All of the electronics are housed in the opaque part of the resistor, making for a nice low-profile base. The bent leads are hollow and allow [Sebastian] and his friend to run power and measurement leads through to the power connector on the back and the pair of banana jacks near the front. Each translucent ring houses an RGB LED, except for the one on the right which has four 7-segment display modules embedded in it. An ATmega168 takes the measurements using its Analog to Digital Converter (ADC) to read the value from a voltage divider. You can see a quick demo of the Ohmmeter in the video after the jump.

This would be a fun thing to pair with that giant breadboard.

Continue reading “Giant Resistor-shaped Ohmmeter”

Digging Deeper Into The Apollo Saturn V LVDC

LVDC-NAND-proto

[Fran] went all-out with her reverse engineering of the Apollo Saturn V LVDC board. Regular readers will remember that she was showing of the relic early this year when she took the board to her Dentist’s office to X-ray the circuit design. Since then she’s been hard at work trying to figure out how the thing functions using that look inside the board and components. When we say ‘hard at work’ we really mean it. Not only did she explore many different theories that resulted in dead ends, she also built her own version of the circuits to make sure they performed as she theorized. Above you can see her version of the NAND/AND gates used on the hardware.

We find her explanation of how the logic devices were originally fabricated to be very interesting. They started with a ceramic substrate and used additive processes to form the traces and add the gates. We’ve embedded her video explanation after the jump.

Continue reading “Digging Deeper Into The Apollo Saturn V LVDC”

Gas Sensor Suite Built With Gadgeteer Modules

gadgeteer-gas-sensor-suite

[Blake] just finished a gas sensor suite built from Gadgeteer parts. The three sensors are the cylindrical towers along the left hand side of the assembly. The one at the top (with the orange ring) is an alcohol sensor. The middle one senses ammonia and the lower sensor measures air quality. Also rolled into the mix are temperature and humidity sensors.

You can collect a lot of data with this type of setup. To keep it organized [Blake] used the ThingSpeak interface. Using the NIC in the upper right he uploads the measurements for real-time graphing. The setup is explained in detail in the video after the break, including a test with some cleaning ammonia.

We haven’t tried out the Gadgeteer system for ourselves yet. But you’ve got to admit that the ribbon cable connector system the family of parts uses really helps to keep a rather complicated setup like this one nice and tidy.

Continue reading “Gas Sensor Suite Built With Gadgeteer Modules”

The Keypad Contest

Keypad

What can you do with ten buttons and ten lights? A lot.

[Andrew] and [Nathan] found a collection of Hale Research keypads being thrown out, and decided to host the Keypad Contest. The goal of the contest was to create something nifty using the ten buttons and ten lights on the keypad, and an ATtiny2313 that replaced the original 8051-compatible microcontroller in the device.

[Andrew] wanted to try making PCBs with his home-built CNC machine, so he milled out USBtinyISP programmers for the ATtiny2313. Then he gave out eleven development kits to a group, and explained how to develop on the hardware.

After a month of hacking, seven people completed projects. The winner was an internet radio controller, which had the keypad sending serial data to a TP-Link WR703N router. The router used a USB sound card and OpenWRT firmware to stream music. The runner up was a timing game called “Capture”.

The contest write up has details on all seven projects. [Andrew] and [Nathan] were successful in getting software engineers to try hardware with this contest, resulting in some neat hacks. After the break, check out a video demo of the internet radio controller.

Continue reading “The Keypad Contest”

Portable Gaming Console Uses SSD1289 And Propeller

building-a-portable-video-game

[Samir] dabbles in hobby electronics and decided to put his skills to the test by building this portable gaming console (Note: this site uses an HTTPS address which cannot be used through Google Tranlator. It does work for the Chrome browser translator). The image above is a screenshot from his Breakout-style game. The paddle at the bottom is controlled with the touchscreen. You move it back and forth to keep the ball from traveling past the bottom edge (it bounces off of the red borders on the sides and top).

The main PCB is larger than the 3.2″ LCD footprint, but [Samir] made sure to include a lot of peripherals to make up for it. The board sports a Parallax Propeller chip to run the games. It interfaces with the SSD1289 screen (this is a cheap and popular choice) but that really eats up a lot of the IO pins. To control the game the touchscreen can be used as we’ve already mentioned. But there are two other options as well. There is an expansion port which uses a shift register (74HC165) to serialize the input. For prototyping this allowed [Samir] to use an Atari joystick. He also rolled a Bluetooth adapter into the project which we would love to see working with a Wii remote. Rounding out the peripherals are an SD card slot, audio jack for sound, and an RTC chip for keeping time.

There are several videos included in the post linked above. After the break we’ve embedded the game-play demo from which this screenshot was taken.

Continue reading “Portable Gaming Console Uses SSD1289 And Propeller”

Pinoccio – An Ecosystem For The Internet Of Things

pinoccio-lead-scout-labelled

[Pinoccio] is currently an Indeigogo crowd-sourced project that aims use the real-world programmability of the Arduino through the internet using a wifi connection. One could rightly point out that this can already be done through the use of a wifi shield. Before ruling this device out, just “shush your shussins” and consider that it’s designed specifically for interfacing with “things” over the internet. This can replace several components (see 1:10 in the video after the break) and should be less of a hassle.

Additionally, with a shield on one of these devices, several other [Pinoccio] boards can communicate with the Internet using this as a hub in a mesh network. This is similar to how the many “smart” electrical meters work, with a grid router being a central hub for communications. Additionally, this board has a built in temperature sensor and a RGB (instead of a single-color) LED, so you can do some interesting stuff with it right out of the box. Assuming this project gets funded, which seems likely at this point, we’re excited to see the projects that get built using it! Continue reading “Pinoccio – An Ecosystem For The Internet Of Things”