Building A 1980s Microcomputer With A Parallax Propeller

The folks over at Gadget Gangster put up an Instructable to build a retro 80s 8-bit microcomputer. Even though they’re using modern components, it still hearkens back to a time when 10 year olds learned 6502 assembly, PEEKing and POKEing was the best way to program, and using a mouse was a novelty.

The build uses a Parallax Propeller dev board to provide an amazing amount of horsepower for a simple microcontroller. After hooking the Propeller up to a TV via an RCA jack and adding an infrared keyboard, Gadget Gangster had a simple computer that can load programs off an SD card.

Because a microcomputer is useless if you can’t program it, Gadget Ganster ported BASIC  to the Propeller. With VGA and sound output, along with the ability to add a PS/2 keyboard and Wii controller, this modern take on a classic paradigm is more powerful than dozens of Commodore 64s.

As a small aside, we don’t see nearly enough builds using a Propeller. A parallel processing microcontroller having 10 times the computational ability of a low-end ARM processor is interesting to say the least; we’re honestly puzzled by the dearth of Propeller projects. If you’ve got a Propeller project, send it into the tip line.

Bossy Calendar Tells Visitors When To Go Away

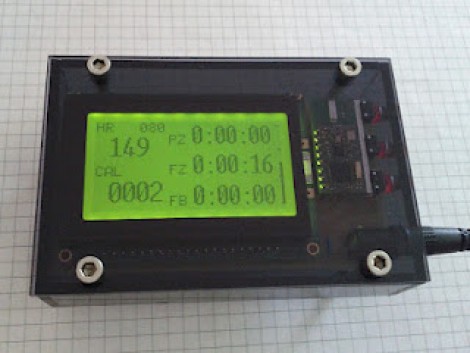
So here’s the scenario. You’re the boss and everyone needs to kiss up to you speak with you about important project details. You need a receptionist, or a creative employee who will build a calendar display the lets people check if you’re free to chat. It works by querying a Microsoft Exchange server for the guy’s calendar. The hardware within doesn’t deal directly with the full Exchange API, but relies on a server-side script that feeds it info on request. This is a nice touch since you can do a lot of filtering on the server and keep it simple with the embedded electronics

Speaking of embedded hardware, this uses Gadgeteer modules. You probably don’t remember, but these are Microsoft’s electronic modules aimed at C# and .NET programmers. It uses the main board, and LCD, USB host, and Wifi modules. This is the first project we remember seeing since the hardware was announced.

We wonder if this will change the boss’ behavior? Will he start scheduling creatively so that he gets more time without interruption?

New STM32 Discovery Board Can Now Be Programmed On Linux

Last Wednesday I posted a video review of the new STM32F0-Discovery board which is built around an ARM Cortex-M0 chip. I speculated that it should work with the open source project aimed at programming these discovery boards. I tested it out and a connection could be made, but no code could be flashed. So I spent a few hours over the weekend and added support.

My updates are already in the stlink repository. After cloning the code, you can use three commands to compile the software (./autogen.sh, ./configure, make). That’s assuming you have all of the necessary dependencies (I had to install libusb-1.0-0-dev) and that you add the udev rule suggested in the documentation (also found in the repository). The program st-util connects to the board and provides a listening port for an ARM debugger (I’m using arm-none-eabi-gdb from CodeSourcery G++ Lite).

When I first started testing, the chip id was reporting as 0. It turns out the register address polled for this information was wrong. After finding that in the almost-900 page reference manual I went through the painstaking process of finding the hex values necessary to properly memory map the device. From there I also updated the blink example to generate an ELF file compatible with the Cortex-M0 chip. So out of the gate you should be able to use an ARM cross compiling toolchain to compile the example, connect to the board with this utility, then use the debugger from the toolchain to connect and flash that example to RAM.

There’s lots more to be done. To fully utilize the chip it is necessary to use a startup file and linker script when compiling. I’ve done nothing in this area, but I hope to work on some tutorials as I get further along. Of course if you have your own successes developing for this board using a Linux machine we want to hear about it!

Data Logging Directly To Google Docs (Google Drive)

[Emanuele] is using Google Docs to log his temperature sensor data automatically (translated). We can see a few benefits gained by using this system. One is that you don’t have to visit the site of the logging hardware to harvest the data, another is that Google will automatically graph the data for you. Of course this means you need some way to connect your logger to the Internet, but we’ve seen buckets of different techniques for doing so. In this case, [Emanuele] is using PIC hardware that has a NIC on the board. But the technique could be used from a computer just as easily as from a microcontroller.

The meat and potatoes of the hack is sniffing out the HTTP header and syntax for writing to cells on a Google Docs (soon to be Google Drive) spreadsheet. After making a new spreadsheet and copying the URL and key from the address bar, he loads up the page using a header-viewer web service. With all the pertinent info in hand he crafts about a dozen lines of code to assemble the HTTP packet, and rolls the timestamp and temperature reading into it dynamically. See the system in action after the break.

Continue reading “Data Logging Directly To Google Docs (Google Drive)”

Using Spy-Bi-Wire With The MSP430 Launchpad

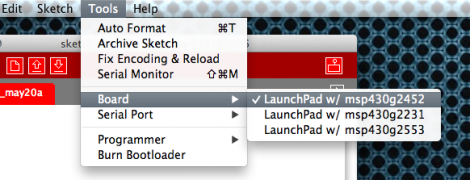
[Suraj] has been working with some larger MSP430 chips with won’t fit on the Launchpad board. But that’s okay because he built a shield and wrote a guide about using the Spy-Bi-Wire protocol for programming the chips.

SBW is a four-wire interface. In the past we’ve used all of the board’s programming connections for in circuit programming, but the chips that support SBW only need a connection to the SBW and TEST pins (of course the other two connections are for voltage and ground). This shield brings the four pins together into one male pin header. In the image above [Suraj] is using the technique to program an MSP430F4152. His guide is Windows-based, but looking back, [Sprite_TM] shows how to use SBW when debugging in Eclipse.

Making An Audio Spectrum Analyzer With A Microcontroller

While [Vinod] says he’s not an expert in this sort of thing, we really like his audio spectrum analyzer build from a simple microcontroller and LCD display.

It is a well-studied fact that every audio waveform – a recording of your voice, for instance – is just the sum of many, many sine waves. These sine waves can be plucked out using Fourier analysis, using a Discrete Fourier transform. This is the principle that spectrum analyzers operate under; [Vinod] wrote a bit of code using DFT to take apart audio captured from a microphone and output their frequency on an LCD display.

To output the spectrum on his LCD, [Vinod] stacked horizontal bars up into 8 custom characters in his display. Like [Vinod]’s previous audio on an ATMega32 experiment, an LM324 amplifier is connected to the ATMega through an analog pin. [Vinod] has a very clever build on his hands with his spectrum analyzer, and a great answer to the perennial ‘how do I build a guitar tuner’ questions we’re constantly asked.

After the break, you can see [Vinod]’s spectrum analyzer in action. Be forewarned; you may want to turn down the volume.

Continue reading “Making An Audio Spectrum Analyzer With A Microcontroller”

Making Capacitive Touch Sensors With Pencil And Paper

capacitive-touch-sensor

There are few things more frustrating than being in the middle of working on a project and realizing that you are missing some crucial component that ties the whole thing together. According to Murphy’s Law, this sort of thing will only happen when parts are completely impossible to procure.

If you’re ever hunting for a touch sensor but can’t get your hands on one, [Alan Chatham’s] tutorial on simple DIY capacitive touch sensors might be just what you need to keep things moving along.

[Alan’s] sensors rely on the conductive properties of graphite, which is easily found in just about any pencil on the market. The sensors are created by simply drawing on a piece of paper with a pencil, then wiring the images or text up to your favorite microcontroller via some paperclips and a couple of resistors.

Paper and pencil might not make for the most durable means of input, but we’re pretty sure that [Alan’s] capacitive touch sensors would be very helpful in a pinch. He doesn’t have video of the sensors in action just yet, though he says he’ll put something together here shortly.