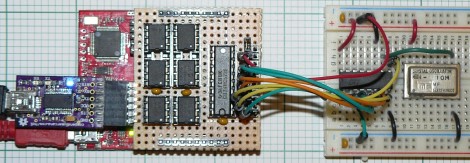
Making A Digital Delay From A Simple Microcontroller

If you’d like to start experimenting in DSP, or just want to build a guitar pedal, here’s the project for you. It’s an audio echo using just a microcontroller from the fruitful workshop of [Vinod].

For his circuit, [Vinod] fed the output of a small electret microphone into a small amplifier, and then into the ADC of an ATMega32. Inside the microcontroller, [Vinod] set up a circular array which writes the voltage from the microphone and sends it out to a speaker. Because the array is circular (i.e. it loops around when it gets to the end), [Vinod] has a digital version of a loop of magnetic tape, perfect for recording sounds and playing back echos.

Because [Vinod] is using an ATMega32, he only has a limited amount of RAM to record audio samples. The delay time could be lengthened with a more capable microcontroller, or even the addition of a large RAM chip. With his setup, [Vinod] can do some really interesting experiments with audio and DSP, so we wouldn’t be surprised if an enterprising musician used this project as the basis for a digital delay stomp box.

You can check out [Vinod]’s demo of his echo machine after the break.

Continue reading “Making A Digital Delay From A Simple Microcontroller”

Salvaged LCD Screen Hacking

You can find all kinds of LCD screens in broken electronics. But it’s often a chore to figure out how they are controlled if you don’t have a working device that can be used to sniff the communications protocol. [Justin] grabbed this character LCD screen from an old Brother printer and decided to see if he could reuse it in his own projects. Luckily the driver card still worked so he patched into the LCD’s control lines and sniffed the signals when the printer is powered on.

He used the OpenBench Logic Sniffer for this project. It easily captured the data, and also provided analysis tools. The SPI analyzer managed to decode the command signals and message of “Please wait” that pops up at power up. After a bit of folly with the pin out of the display, he is now able to control it thanks to an Arduino library which he wrote. Check out the demo after the break to seem him scrolling through a bunch of different functions for the device.

Continue reading “Salvaged LCD Screen Hacking”

Bananaphone Lets You Use Fruit And Other Things As Switches

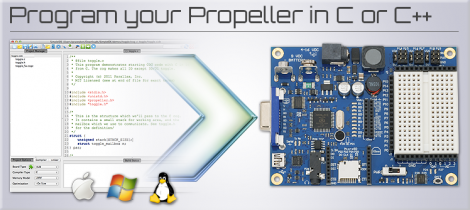
We’re used to [Sprite_TM] rolling out his own hacks hot on the heels of new concepts. Now we’re glad to see that [Jeff Ledger] is doing the same thing here. He was inspired by a Kickstarter project which vows to let you use fruit, clay, and a number of other common (but weird for this use) substances to interface with electronic projects. The mess you see above is the Bananaphone, a synthesizer played with touch sensitive bananas. Think of them as keys on a piano.

The interface works by measuring R/C decay. Each banana is connected to its own input pin on the Propeller board. The capacitance of the bananas rise when you touch them, and this results in a longer R/C decay measurement. Calibrate the target decay period, and you’ve got a reliable capacitive touch sensor which also happens to be delicious. Check out the results which [Jeff] achieves in the video after the break.

Continue reading “Bananaphone Lets You Use Fruit And Other Things As Switches”

Controlling A TV With A Microcontroller

Here’s two builds that print text to a TV with only two pins:

Still Alive with an Arduino

After seeing all the builds that play Still Alive, [Bob] decided to take a 1972 amber monitor and recreate the cut scene at the end of PortalThe build uses the TVout library for Arduino. There were a few problems with running the Unix and Still Alive animations at the same time, so [Bob] flips a bit in the EEPROM at the end of the command line animation and restarts into GLaDOS’ report. You can check out the old school color monitor here

ATMega Video Text Generator

[Stian] didn’t think his build was good enough for Hackaday, but his friend [Mikael] thought otherwise. [Stian] wrote a library to generate an NTSC video signal in real time. It’s a text-based build with 37×17 character resolution and only requires about 3kB of RAM. As a bonus, it only takes up two pins on [Stian]’s ATMega128.

You can check out the videos for both these builds after the break.

Continue reading “Controlling A TV With A Microcontroller”

Morse Code Interpreter

[Sulaiman Habsi] and two classmates put together a Morse Code interpreter as a class project at Sultan Qaboos University. The system listens to a morse code signal using a microphone, then translates that input to text which is displayed on this character LCD.

The breadboarded circuit feeds an audio signal from the microphone, through an OpAmp, to the ADC of an ATmega8 microcontroller. The captured signal is stored as a byte in a special way. The three least-significant bits signify how many total dots or dashes are contained in the character, the remaining bits represent those dots and dashes with zeros and ones. A full description of this process is included in a PDF linked in the article above. As you can see in the video after the break, the hardware waits to process all of the signals once the full message has been received.

This would be a great add-on for a Morse Code practice keyer.

Continue reading “Morse Code Interpreter”

One Wire Reads The Keypad From The APRS Radio Mic

[Shane Burrell] decided to spend some time learning how the keypad on the his Kenwood TM-710A APRS radio mic works. It uses a different technique than you might think. Normally a grid of buttons is scanned as a matrix to detect keypresses, but this hardware actually counts pulses on a serial wire to take each reading.

The stock radio sends a steady digital pulse to the handset and with each pulse the mic pulls the line low. It then uses a 4017 decade counter to see what comes back. If the edge count matches it means nothing is pressed, but a change in the number of pulses returning to the base unit can be used to extrapolate which button has been pressed.

[Shane] went on to implement this control technique using an AVR chip in place of the  radio base unit. He used the data gained from measuring the pulse behavior using an oscilloscope to write the firmware for the project. He filmed a bit of a demo after the break which shows his findings.

We’re not quite sure how this would translate into your own home-brew projects, but the thought of scanning a keypad with two pins of a uC is quite desirable. Sure there is the 555-timer frequency technique, but we’re always down with new ideas.

Continue reading “One Wire Reads The Keypad From The APRS Radio Mic”

Level Conversion With Plenty Of Options

[Andy Brown] wanted one level converter to rule them all, so he set out to build his own which included plenty of options.

The chip at the top and center is a pretty neat little device. It’s an NXP 74ALVC164245DL. In addition to having an incredibly long and seemingly meaningless part number, it contains a pair of bi-directional octal ports. It runs very fast (about 333 MHz) and supports voltages up to 5V on one side, and up to 3.3V on the other. As long as you stay below those maximums you can choose your own target voltages. To do so, he included a couple of adjustable voltage LDOs which are set using jumpers.

But wait, [Andy’s] not finished quite yet. If the jumpers don’t offer the target voltage you’re looking for he also included breakout pins so that you may inject the voltage using an external source. He even included the option to use the LDOs on their own, without the level converter. How do you keep all of these configurations straight? He build a little web form that lets you set your desired parameters and it tells you which jumper should be connected.