Make Your Own Minimalist AVR ISP

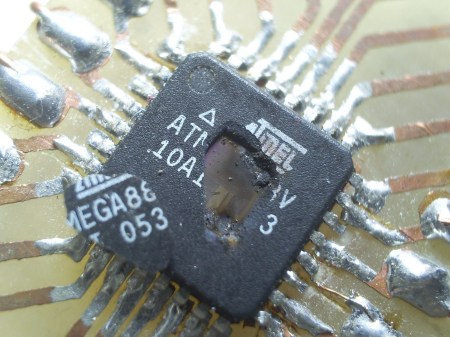
Giving a programmer is a great way to get people started in microcontrollers so If you want a cheap simple AVR programmer this might just be what you’re looking for. It combines the V-USB firmware, USBtiny software, a few resistors, and some zener diodes. An interesting trick using this programmer is if your trying to program another 8 pin ATtiny you can use some tape to isolate the USB data pins and then piggyback the target ATtiny on the programmer.

Unfortunately in order to flash the ATtiny for your programmer you need a working programmer so it’s somewhat of a catch-22.  Make sure your careful when setting the fuse bits because it will use the reset pin making it hard to reprogram without additional programming hardware. AVRs in general are a great way to start using microcontrollers so if your interested give out tutorials a go. You’ll find some tips to get started in addition to information about using an Arduino, or a DAPA cable to flash the firmware to this chip.

AVR HV Rescue Shield 2

[Jeff Keyzer] has a new version of the HV Rescue Shield available. This tool allows you to use an Arduino to reset the fuse bits on AVR microcontrollers. This is necessary if you make a mistake and disable the reset pin, or choose the incorrect clock settings (this will probably happen to you at some point). In order to bring the chip back to life you’ll need to use High Voltage Programming. The last version of the shield only worked with High Voltage Parallel Programming (HVPP) but this rendition can also use High Voltage Serial Programming (HVSP) for 8-pin chips that don’t have enough inputs for parallel communications.

As we talked about in our AVR Programming Tutorials this is no replacement for a high-end programmer like the STK500 or an AVR Dragon, but if you already have an Arduino a kit will only cost you $20 (or you can etch and build it yourself). We would have liked to see a breakout header for the HVP signals for off-board use. The absence of a breakout header doesn’t preclude this, but since you need the on board boost converter for the 12V signals, and because this shield can’t be used with a breadboard due to pin spacing, it’s hard to patch into signals for non-DIP use. We also think some clever firmware hacking and this could be used for HV programming, like we needed for that LED light bulb.

Using Analog Voltage References With Arduino

Little Bird Electronics posted an article about using an analog voltage reference with Arduino. This is a tool available when using an analog-to-digital converter. By setting up either an internal or external AREF, you can better use the ADC considering its resolution limitations. For instance, if you are measuring a signal that you know will always be below 2V, an external circuit, such as a voltage divider or an adjustable regulator, can give you a reference voltage just above that upper limit; say 2.5V. This way the 1024 divisions of resolution will be spread across your signal’s range, rather than just the lower half of the ADC readings.

Analog references are common to microcontrollers that have ADCs. Even if you’re not working with an Arduino, read through the article and use what you learn with your uC of choice.

Bluetooth Temperature Module

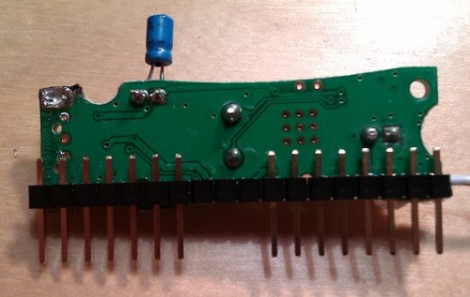
Wanting to know the outside temperature, [Jamie Maloway] built his own temperature sensor that can be read with a Bluetooth device. Let’s take a tour of the hardware above from right to left. There’s a linear voltage regulator with two filtering caps and a terminal block to attach a 9V battery or other power source. Next there’s an 8 MHz crystal and it’s capacitors, followed by a programming header on top and a 1-wire temperature IC, the DS18B20 we’re all familiar with hanging off the bottom. These both connect to the 8-pin PIC 12F675 that drives the system, and transmits using a Bluetooth module from Sure Electronics. Since this is using a serial protocol and transmitting ASCII data, it can be read using an automated script, or simply by using a terminal program.

Now, who’s going to be the first to get rid of the battery and leech off of the mains through inductance?

Ice Tube Clock, Meet The ChronoDot

[Alex] ramped up the precision of his timepiece by adding a ChronoDot to the Ice Tube Clock. These two items are among our favorites; the Ice Tube Clock for its old-style multi-digit display, and the ChronoDot for combining a DS3231, battery, and components into a nice small package.

There is a schematic link at the very bottom left of [Alex’s] writeup. He mentions that he depopulated the clock crystal and its capacitor pair from the board and patched into the clock input on the AVR. A 100K pull-up resistor is included in the wiring as called for in the DS3231 datasheet. Although not specifically referenced, we assume that [Alex] reprogrammed the ATmega168 clock select fuses to use an external clock signal.

Now he can sit back knowing that the clock will be within 10 seconds per year accuracy.

Composite Video With MSP430 Chip

[NatureTM] used part of the Thanksgiving holiday to get composite video output working with an MSP430 microcontroller. He’s using one of the chips that came with the TI Launchpad, which is a big hardware limitation because of the relatively small code memory and RAM. The chip displays one still image at a resolution of 192×40 pixels. Still, this is a great way to learn about composite video signals, as a lot of other projects use a TVout library to save you the headaches. All you’ll need is a TI Launchpad, a 16 MHz crystal oscillator, two resistors, and an RCA jack. Dig through the code and see what a great job [NatureTM] did of offloading as much work onto the chip’s peripherals as possible.

Make Your Own Solenoids, Then Play The Xylophone

Learn to manufacture your own solenoids and then use them to play the xylophone by watching the tutorial video after the break. [Humberto Evans] and the team at Nerd Kits do a great job of not only manufacturing the coils, but the xylophone itself. The bars are machined from some aluminum stock and they take you down the rabbit hole with they why’s and how’s of engineering the keys.

We’re unlikely to replicate this machining process but the solenoids are another story all together. Starting at about 3:30 you can learn about designing, building, and using these little marvels. They’re basically an electromagnetic cuff with a metal slug in the middle. The solenoid seen above uses a body milled from HDPE and wrapped with magnet wire. The slug in the center is steel, with a few rare-earth magnets at the top. When you run current through the coil it repulses the magnets on the slug, witch then strikes the xylophone key. Using a MOSFET and a protection diode, actuating them is as simple as sending a digital high from your microcontroller of choice.

We’ve seen solenoids used to play a vibrophone before, but those were commercial units. Making your own hardware is far more hardcore.

Continue reading “Make Your Own Solenoids, Then Play The Xylophone”