Getting Started With The Parallax Propeller

The folks at [gadget gangster] have been working on an excellent set of tutorials for getting started with the Propeller chip itself, the open-source Propeller Platform Modules and the Spin programming language that’s used to control things. All of the basics and a growing selection of more advanced topics are covered in gorgeous detail, with most of the tutorials containing helpful photographs and screen shots, source code listings and video walk-throughs to help you understand what the authors are talking about.

Parallax is not new to the microcontroller game. Almost two decades ago, their BASIC Stamp embedded microcontroller was the springboard for many tinkerers. The Parallax Propeller is an easy-to-use microcontroller that’s been gaining popularity for a while now. Several Propeller support modules have hit the market recently, providing power supply and interface functions to the Propeller similar to how the popular Arduino platform interfaces with AVR microcontrollers.

Christmas Light Controller

We get a lot of tips about Christmas light controllers but rarely do they contain the kind of juicy detail that [Vince Cappellano] included with his setup. His video explaining the controller he built is embedded after the break and it’s not to be missed.

We think there’s a lot of good design invovled in this porject. First off, he’s got eight physical channels, each with optisolation and a triac for 256 levels of power control. But he was able to double the control to sixteen virtual channels if you’re using LED lighting. That’s because on those strings half of the LEDs are reverse biased compared to the rest. By adding sensing circuitry to the incoming AC, he can switch the triacs to only send positive or negative voltage through the LED strands, which produces the additional virtual channels. And did we mention that he did all this using wire wrapping and point-to-point soldering?

Continue reading “Christmas Light Controller”

Reading NAND Flash Chips Without Removing Them

Here’s an interesting method of reading data off of a NAND flash chip. Often we see these chips desoldered in order to read and write data, but not this time. This method uses hacked adapters to match the pin pitch of the various chips. Above you see parts of a breakout board cut down to use as wedges. These are drag soldered to the pins of the chip, then the appropriate breakout pins were connected to a Smartmedia card reader, which can read NAND chips. There is also an example showing the flexible connector cable for a DVD rom used as the adapter to solder to a smaller chip. We still looks pretty tricky, but it might be less labor intensive than relocating the flash chip like we saw on that Sega Game Gear hack, as long as you only need to read or write the data once.

[Thanks Laurdy]

External RAM For An ATmega128

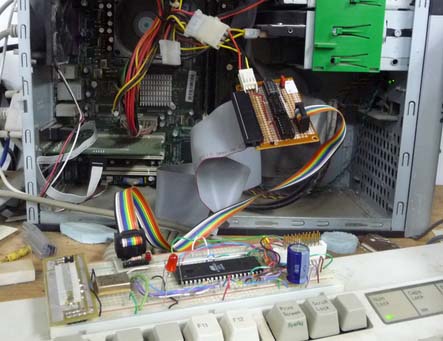
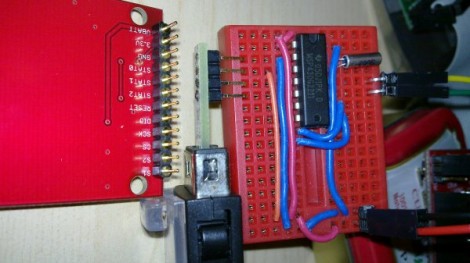
Those who are familiar with Atmel’s line of 8-bit AVR microcontrollers should already know that some of them have support for external RAM. But have you ever actually used this feature? We haven’t. Now you can learn how it’s done by reading through this guide. It touches on all of the hardware, but doesn’t dwell on it. Instead, you’ll get the background you need on how to write to, read from, and test an external module like the one sticking up in the image above. The test routine shows how to make sure everything’s working correctly with your memory mapping before you begin developing firmware around this increased capacity.

[Thanks Spman]

Reading A Digital Caliper With A Microcontroller

[Maris] wanted a way to read measurements from a digital caliper electronically. He ended up using the TI Launchpad to accomplish this, but not all of the necessary hardware is seen above. The calipers cost him about $7 on eBay, and they have four interface pins which made this hack quite a bit easier. After a bit of probing he established their purpose; voltage, ground, clock and data. A bit of scoping proved that data was being sent in 24-bit burst in packets that are quite easy to decode.

From there it’s just a matter of interfacing with a microcontroller. The chip he’s using is an MSP430G2231 that runs at 3.3V, but the caliper’s logic high is only 1.5v. By constructing an adapter using a pair of transistors, the data and clock from the calipers are able to pull pins on the MSP430 low. This is collected and analyzed by [Maris’] firmware and can be read on a PC using a terminal program.

[Thanks Chris]

Falling Sand Game On An FPGA

This falling sand game runs on a field-programmable gate array. The Altera Cyclone II resides at the heart of that development board, running the game which was written in Verilog. [Skyler Schneider] modeled his project after a Java version of the game called Pyro Sand Game. He treats each pixel of the 640×480 VGA screen as its own cell, following a set of rules to change the cells around it. This is very similar to Conway’s Game of Life, except that there are different categories of cells that behave uniquely (oil, water, plant, fire, etc.) and gravity is a key factor. Of particular interest to us were the rules for each cell, and the method [Skyler] used to feed and sync the VGA output. After the break you can see his demonstration videos, which walk through all of the features including the Troll button.

Continue reading “Falling Sand Game On An FPGA”

Developing A Sega Game Gear Flash Cartridge

[Gerry O’Brien] tackled his most recent project, designing a flash ROM cartridge for the Sega Game Gear, with great success. Above you can see the test rig he used to reverse engineer the communications between an original ROM chip and the circuit board that it came on. He removed the chip, soldered a ZIF socket to the pads, then used a DIP socket as an adapter for that chip. Connected to each pin is a test lead for a logic analyzer. That’s a heck of a lot of channels to decipher!

It turns out that the cartridges use Integrated Mapping (does anyone have a link explaining this?) so dropping in a flash memory chip is not an option; you need a memory bank controller. [Gerry’s] solution to this issue is twofold: you can etch your own board with a controller chip and ZIF socket for the flash chip, or you can modify a Sega Master System cartridge to use as an adapter board. We’ve got pictures of both methods after the break, as well as his five instructional videos walking us through the fabrication process.

This isn’t [Gerry’s] first time working with flash cartridges. We looked at his work with Game Boy ROMS earlier in the year.

Continue reading “Developing A Sega Game Gear Flash Cartridge”