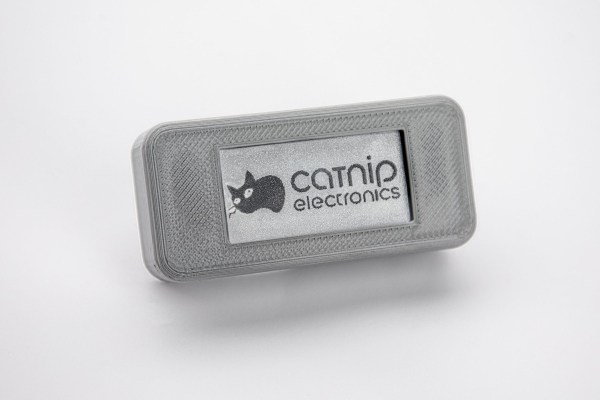
Pretty Petite Picolibc Powers Processors

Many times when someone tells you that language X is “better” at something they really mean that it has better built-in libraries for that task. Java is a great example. The language isn’t all that different from C++ outside of garbage collection and multiple inheritance, but the standard libraries are super powerful, especially for networking.  Even C relies on a library to provide a lot of functions people think of as part of the language — printf, for example. That’s not really part of the C language, but just part of the standard library. When you are writing for a tiny processor, the choice of library is critical and [Keith Packard] offers you one choice: picolibc.

The library has its genesis from two other diminutive libraries: Newlib and the AVR version of libc. It provides support for ARC, ARM, i386, m68k, MIPS, MSP430, Nios II, PPC, RISC-V, Sparc64, x86_64, and the ESP8266/ESP32.

Continue reading “Pretty Petite Picolibc Powers Processors”

Screenshot of the Arduino Lab for MicroPython

Arduino Brings A MicroPython IDE

Both Arduino and MicroPython are giants when it comes to the electronics education area, and each one of them represents something you can’t pass up on as an educator. Arduino offers you a broad ecosystem of cheap hardware with a beginner-friendly IDE, helped by forum posts explaining every single problem that you could and will stumble upon. MicroPython, on the other hand, offers a powerful programming environment ripe for experimentation, and doesn’t unleash a machine gun fire of triangle brackets if you try to parse JSON slightly incorrectly. They look like a match made in heaven, and today, from heaven descends the Arduino Lab for MicroPython.

This is not an Arduino IDE extension – it’s a separate Arduino IDE-shaped app that does MicroPython editing and uploads code to your board from a friendly environment. It works over a serial port, and as such, the venerable ESP8266-based boards shouldn’t be be left out – it even offers file manager capabilities! Arduino states that this is an experimental effort – it doesn’t yet have syntax checks, for instance, and no promises are made. That said, it already is a wonderful MicroPython IDE for beginner purposes, and absolutely a move in the right direction. Want to try? Download it here, there’s even a Linux build!

High-level languages let you build projects faster – perfect fit for someone getting into microcontrollers. Hopefully, what follows is a MicroPython library manager and repository! We’ve first tried out MicroPython in 2016, and it’s come a long way since then – we’ve seen quite a few beginner-friendly MicroPython intros, from a gaming handheld programming course, to a bipedal robot programming MicroPython exploration. And, of course, you can bring your C libraries with you.

RFID Sticker On Bike Helmet Grants Garage Access

[Glen] might describe his project of opening his garage door by way of an RFID sticker on his bike helmet as simple, but some of the interfacing he needed to do was quite complex. He walks through the project from beginning to end, and there’s plenty to learn from.

When designing an RFID access control system, one has to decide what kind of reader and what kind of tags one wishes to use. They all function more or less the same way, but there are a lot of practical considerations to take into account such as cost, range, ease of use, and security options. After a lot of research, [Glen] decided on inexpensive sticker-style tags and a compatible reader supporting credentials with an ISO14443 UID that could be suitably mounted on a building’s exterior.

The actual opening of the door was the simple part, done by interfacing to a spare remote.

Breakout boards with ready-to-use code libraries exist for some RFID readers, but that wasn’t the case for the reader [Glen] had. He ended up rolling his own code to handle communication with the reader, with a Microchip PIC18F45K50 doing all the work of reading tags and performing access control. His code is on the project’s GitHub repository, and if you also find yourself needing to interface to a reader that uses the Wiegand protocol, you might want to give it a look.

Controlling the actual garage door was the easy part. All that took was soldering two wires across the switch contacts of a spare garage door opener remote, and using a relay to close the contacts. Simple and effective. You can see it in action in the short video, embedded below the break.

Overhead door access control might be a simple concept, but it comes in all shapes and sizes when enterprising hackers start looking for solutions. We’ve seen garage doors given the DIY IoT treatment, and even seen access controlled by a car’s headlamp flashes, which actually turned out to be more secure than it sounds.

Continue reading “RFID Sticker On Bike Helmet Grants Garage Access”

Trigger Your Home Automation Routines With Home Buttons

Home automation systems are all well and good, so long as the person who built it all is around to drive it. Let’s face it, they’re quite often a complex web of interconnected systems, all tied to the specifics of one’s home — and someone less familiar with it all could get a little irritated if, on a chilly day, the interface to the boiler is via a Python script, and something won’t work. Just saying. Home Buttons by [Matej Planinšek] over on Hackaday.IO is a nicely polished project, which aims to take some of the hackiness out of such automation by providing a sleek front end to those automation routines, enabling anyone to rock on over and set one in action without hassle.

Internal PCB shown in the foreground, with the complete unit behind.The PCB is based around the ESP32-S2-mini which deals with WiFi connectivity and integration with Home Assistant using the usual MQTT protocol. We expect integration with other flavors of home automation would not be difficult to achieve. The center of the unit holds a simple E-Ink display, for that low-standby power. Specifically, the unit chosen is a Good Display GDEY029T94 2.9″ which this scribe can confirm is easy to interface and pretty cheap to purchase from the usual Chinese online vendors. This was matched up with six clicky Alps SKRB-series low-profile tact switches, which sit on either side of the display, and corresponds to a flexure-type affair on the 3D printed front casing. Neat and simple.

The PCB design was provided in Altium format, which you can find on the project GitHub page. This shows a straightforward design, with a few nice little details here and there. The internally mounted 18650 cell is reportedly good for at least a year of operation, but when time, it can be charged via USB. A Xysemi XB8608AF (PDF) protection chip provides appropriate limiting for the 18650 cell, shielding it from the perils of overcharging, discharging, and whatnot. Not that that is likely in this current setup. A Sensiron SHTC3 humidity and temperature sensor is also in there, hanging off the I2C bus, which makes sense for this application.

Home Automation hacks are plenty on these pages, like this scroll-wheel interface, for instance. If all this stuff is looking quite overbearingly complicated to get into, how about starting with a Pico W?

$1 POV Display Goes Round And Round

You don’t need much to do a persistence of vision display. A few LEDs and a processor is all it really takes. [B45i] made a simple PC board with five LEDs and an ATtiny CPU. There’s a battery and it connects to a fan to spin around.

While the project is pretty simple, we liked two aspects of it. First, he provides very detailed explanations about how to use an Arduino to program the Tiny using the Arduino IDE.

Continue reading “$1 POV Display Goes Round And Round”

ESP8266 Web Server Saves 60% Power With A 1 Ms Delay

Arduino has a library for quickly and easily setting up a simple web server on an ESP8622-based board, and [Tomaž] found that power consumption on an ESP-01 can be reduced a considerable amount by simply inserting a 1 ms delay in the right place. The reason this works isn’t because of some strange bug or oddball feature — it’s really just a side effect of how the hardware operates under the hood.

[Tomaž] uses the “hello world” example from ESP8266WebServer to explain. In it, the main loop essentially consists of calling server.handleClient() forever. That process checks for incoming HTTP connections, handles them, sends responses, exits — and then does it all over again. A simple web server like this one spends most of its time waiting.

A far more efficient way to handle things would be to launch server.handleClient() only when an incoming network connection calls for it, and put the hardware to sleep whenever that is not happening. However, that level of control just isn’t possible in the context of the Arduino’s ESP8266WebServer library.

So what’s to be done? The next best thing turns out to be a simple delay(1) statement right after each server.handleClient() call in the main loop.

Why does this work? Adding delay(1) actually causes the CPU to spend the vast majority of its time in that one millisecond loop. And counting microseconds turns out to be a far less demanding task, power-wise, than checking for incoming network requests about a hundred thousand times per second. In [Tomaž]’s tests, that one millisecond delay reduced idle power consumption at 3.3 V from roughly 230 mW to around 70 mW — about 60% — while only delaying the web server’s response times by 6-8 milliseconds.

For simple web server applications, this is is for sure a good trick to keep in mind. There are also much more advanced techniques for saving power on ESP8266-based boards; from boards that barely sip a single microamp while sleeping, to coin-cell powered boards that go so far as to modify the TCP/IP stack to help squeeze every bit of power savings possible.

A baguette sits diagonally across a wooden cutting board. Above it sits an Arduino and an electronics breadboard.

Theremin Baguette Brings New Meaning To Breadboarding

Theremins are a bit of an odd instrument to begin with, but [AphexHenry] decided to put one where no theremin has gone before: into a baguette.

The “baguetophone” is a theremin and piezo-percussion instrument inside a hollowed-out baguette. Starting with a DIY theremin tutorial from Academy of Media Arts Cologne, [AphexHenry] added some spice with a piezo pickup inside the baguette to function as a percussion instrument. One noted downside of squeezing the instrument into such an unusual enclosure is that the antenna doesn’t respond as well as it might with a more conventional arrangement. Outputs from the piezo and antenna are run through Max/MSP on a computer to turn the bread into a MIDI controller. Like many DIY theremins, it appears that this build neglects the volume antenna, but there’s no reason you couldn’t add one. Maybe disguised as a piece of cheese?

Outside smuggling an instrument into a French café for a flash mob performance, this could also prove handy if you’re someone who gets hungry while playing music. We don’t recommend snacking on the Arduino even if it is ROHS compliant though.

If you want to learn more about how theremins work, check out Theremin in Detail. After that, you might want to browse all of our theremin articles or look at this project where they used a 555 instead.

Continue reading “Theremin Baguette Brings New Meaning To Breadboarding”