Finding out you’ve got a flat tyres halfway into a long ride is a frustrating experience for a cyclist. Maintaining the
correct tyre pressures is key to a good ride, whether you’re stacking up the miles on the road or tackling tricky single track in the mountains. [CaptMcAllister] has put together a device that makes keeping an eye on your tyres easy.
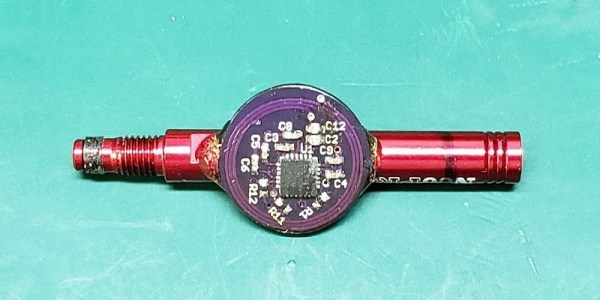
The device consists of an ultra low power microcontroller from Texas Instruments, paired with a pressure sensor. Set up for Near Field Communication, or NFC, it’s designed to be powered by the smartphone that queries the microcontroller for a reading. We featured a prototype back in 2015 which required mounting the device within the inner tube of the tyre itself. However, this required invasive installation and the devices tended to wear out over time due to flex damaging the delicate copper coil antenna.
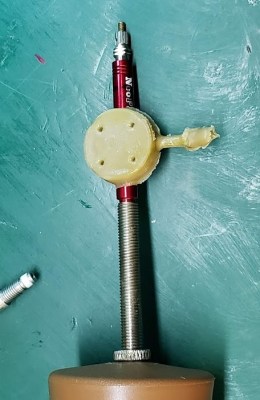
The new design consists of the same microcontroller hardware, but mounted in a modified valve extension that fits to the fill valve of the bicycle tyre. The PCB is directly epoxied on to the valve extension, ensuring air can’t leak out over time. The assembly is then overmoulded in an injection moulding process to provide further sealing and protection against the elements. This should help immensely in rough-and-tumble mountain biking applications.
The new device provides a simple screw-on solution for tire pressure monitoring that’s set and forget — no batteries required. [CaptMcAllister] is currently investigating options for a production run, and given the simple design, we imagine it couldn’t be too hard to rattle off a few hundred or thousand units. We could imagine it would also pair well with a microcontroller, NFC reader, and a display setup on the handlebars to give live readings where required. We look forward in earnest to seeing where this project goes next!