[Ben Krasnow] is at it again. This time he’s explaining a simple method for strengthening glass. As usual, he does a fantastic job of first demonstrating and explaining the problem and then following it up with a solution.
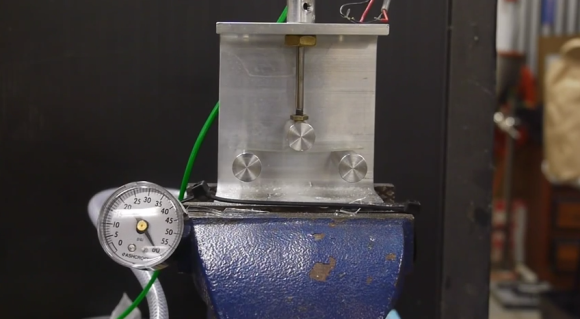
[Ben] first uses a simple rig to place a controlled amount of force against a glass microscope slide. His experiment shows that the slide shatters once about 30psi of force has been applied to the center of the slide.
[Ben] then goes on to explain that current methods for producing glass leave many tiny impurities, or cracks, in the glass. As the glass slide flexes, the inside edge is placed into a compression force while the outside edge is under tension. The glass is more easily able to handle the compression force. The tension is where things start to break down. The tension force eventually causes those tiny impurities to spread, resulting in the shattering glass.
One possible solution to this problem is to find a way to fill in those tiny impurities. According to [Ben], most glass has sodium added to it in order to lower the melting temperature. [Ben] explains that if you could replace some of these smaller sodium atoms with larger atoms, you could essentially “fill” many of the tiny impurities in the glass.
[Ben] does this himself by heating up a small vat of potassium nitrate. Once the powder becomes molten, he submerges the glass slides in the solution for several hours. During this time, some of the sodium atoms are replaced by potassium atoms due to the natural process of diffusion.
Once the slides have cooled down, [Ben] demonstrates that they become much stronger. When placed in the testing rig, the stronger slides do not break until the pressure gets between 60psi and 70psi. That’s twice as strong as the original glass. All that extra strength from such a simple process. Be sure to watch the full video below. Continue reading “The Science Of Strengthening Glass” →


 A few years ago, [Michele] built a mobile device with a touch screen, a relatively powerful processor, and a whole bunch of sensors. To be honest, the question of why he built this was never asked because it’s an impressive display of electronic design and fabrication.


