Researchers Create Synthetic Muscle 100 Times Stronger Than The Real Thing

synth-muscle-02-de

A team of researchers at the University of Texas at Dallas have come up with an ingenious way to make a low-cost, high strength, artificial muscle. Their secret? Fishing line. The study was just published today in the journal Science, and the best part is they describe how to recreate it at home.

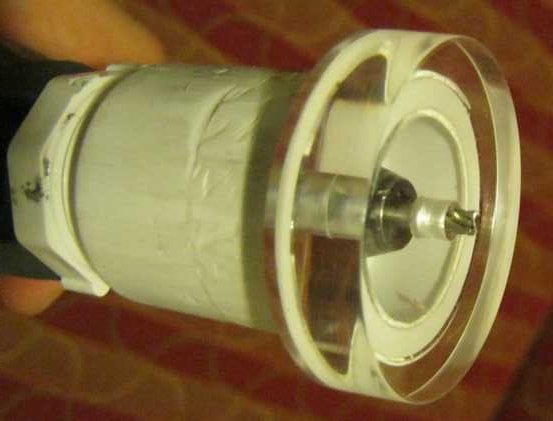
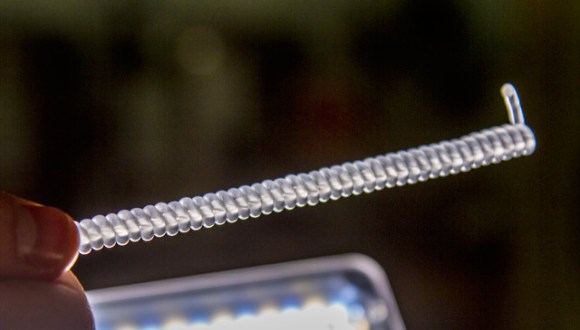
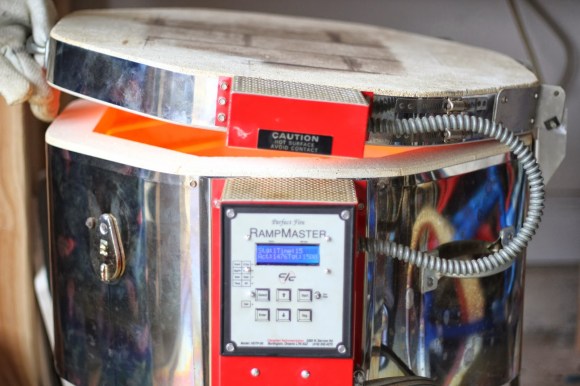
To create it, the researchers take regular fishing line (polyethylene or nylon string) and twist it under tension until it curls up into a tightly formed spring. It can then be temperature treated to lock in this position.

When heated again, the plastic tries to untwist — the peculiar thing is, this causes the entire coil to compress — think of it as Chinese finger-trap. Polyethylene and nylon molecules also contract lengthwise when heated. It can contract up to about 49%, with as much pulling power as 100 times its equivalent human muscle in weight. This equates to about 5.3 kilowatts of mechanical work per kilogram of muscle weight — similar to the output of a jet engine.

Stick around to see the video of how to make it — we’re excited to see what you guys think up for project applications!

Continue reading “Researchers Create Synthetic Muscle 100 Times Stronger Than The Real Thing”

Dual Color Extruder With A Single Stepper

extruder

Once you have a 3D printer able to build a few objects in a single color, the next logical upgrade is a dual extruder. A dual extruder allows for multiple color prints, and by adding a dissolvable filament, the ability to print object that would otherwise be impossible. Fitting a dual extruder on an existing 3D printer presents a problem: simply by using a second stepper motor, you reduce the print area of your printer significantly. That’s the problem Dglass 3D aims to solve with their extruder. It’s a dual filament extruder that uses only one stepper motor and takes up less space than some other single filament extruders.

This isn’t the first time the guys at Dglass 3D have tried Kickstarting a dual filament extruder; last year we saw a very similar mechanism that used a single stepper motor to feed two filaments. This older model lacked retraction, though, meaning two colored prints would range somewhere between messy, inaccurate, to impossible.

The new extruder uses a servo to ‘latch’ the filament and drive it into the hot end. This means retraction of the filament is possible and from the sample prints with this extruder, the results look pretty good.

Below You’ll see a few video demos of the dual color/retraction extruder printing an object in black and white filaments at the same time. It’s very cool, and with the addition of a dissolvable filament means very complex objects can be printed very easily.

Continue reading “Dual Color Extruder With A Single Stepper”

Meltinator 9000 Fuses Glass By Degrees

kiln[Richard]’s wife scored an Evenheat glass-fusing kiln, but the 20-year-old temperature controller was broken. He could have simply ordered a replacement controller, but that kind of problem solving doesn’t get you on Hack a Day. His wife wanted more control over the kiln and he convinced her that building their own was the way to go. Thus, the Meltinator 9000 was born.

[Richard]’s design uses an Arduino Uno and an Adafruit display shield, protoshield, and thermocouple reader board. He built a simple relay driver with a resistor, BJT, and a diode and connected it to pin 13 and its built-in indicator. To [Richard]’s delight, all of this fit in the original enclosure.

[Richard]’s software provides 25 fusing schedules with ten steps apiece. Each step has a target temperature,  rate of temperature change, and a hold time which can be increased on the fly. He ran a test program that heated the kiln to 1500°F at a rate of 2550°F/hour. He then cooled it to 500°F at a rate of 1000°F/hour, which took longer than he thought. The good news is that the kiln is well-insulated!  [Richard] has the software available on his GitHub.

Don’t have a glass kiln? Prefer to control beer-related temperatures? You could always hack your stove in the name of homebrewing.

Hacking The Linksys WRT120N Part 2

linksysjtag

[Craig Heffner] has been busy with his Linksys WRT120N router. When we last checked in on [Craig] he had reverse engineered the obfuscation techniques used in the router’s firmware. Since then, he’s re-enabled JTAG, cracked the “encryption” used for saving configuration backups, and now he’s devised a simple attack to change the admin password.  With the firmware unlocked, [Craig] went after the hardware JTAG. His first hurdle was a missing jumper connecting the TDI pin to the processor. With a solder blob making the connection, he then found the router would connect to his JTAG debugger, and immediately reset. TDI had been re-used as a GPIO in software, and assigned to the reset button on the back of the router. [Craig’s] JTAG pod was pulling the pin low and causing the reset. To make matters worse, the bootloader also redefined and checked for the reset button. If the button were pressed it would boot into a recovery mode. [Craig] patched the bootloader with a little help from IDA pro. He then desoldered the router’s flash and programmed it outside the system. The firmware required a similar patch. Rather than desolder the flash chip again, [Craig] created a firmware update the router would accept and flashed it via the router’s web interface.

Since he already was deep into the Linksys Firmware, [Craig] looked for any obvious attack vectors. He found a big one in the /cgi/tmUnBlock.cgi. Inside the firmware, the URL sent to the CGI would be sent through sprintf().  In plain english, it means that no input length checking was happening – so a URL longer than the firmware engineers expected (in this case 256 bytes) would overflow into areas of memory it wasn’t supposed to – in this case, the stack. For an astute attacker, that’s a wide open door.  [Craig] was able to use find some Return Oriented Programming (ROP) gadgets and created an input value that would cause the router to reset its own administrator password. After running the exploit, a quick trip to the router’s webpage proved his attack was successful.

If that wasn’t enough, [Craig] also spent some time looking at the patches to the router’s firmware. The release notes of one of the patches mentioned encrypting configuration files. The WRT120N, like many routers, allows the owner to download and save the configuration as a file. It turned out that the “encryption” scheme was nothing more than an exclusive OR with 0xFF. A pretty weak encryption scheme by any standards. To [Craig] we send our congratulations. To the WRT120N software engineers, we’d suggest taking one of [Craig’s] embedded device exploitation classes.

We’re Going To The Midwest RepRap Fest

One month from now, Goshen, Indiana – deep in the land of Dairy Queens – will become one of the premier sites for RepRapping, 3D printing and everything involving open source manufacturing. It’s the 2nd annual Midwest RepRap Festival to be held March 14-16. Oh, Hackaday will also be there, cavorting around, distributing some swag, and doing some live videos and posts of the event.

Highlights of the Festival include [Prusa] giving a talk on the state of open source printing, [Sonny Monicou] discussing the challenges of his RepRap workshops, a roundtable discussion of the RepRap project, [Nicholas Seward] and his creations – the Wally, Simpson, and Lisa, along with a few folks from Lulzbot and UltiMachine. Basically, the only way to go to a bigger RepRap convention would be to visit a Maker Faire, and even that would only add a few hundred 9-year-olds astounded by printed Minecraft figurines.

If you’re willing to make the drive, there’s no fee to attend; just register, show up, and you’ll get a table for all that up-til-midnight RepRapping. There’s also a waffle breakfast on Sunday, along with me walking around makin’ it rain Hackaday stickers.

QFN Breakout Is Easy On The Eyes, Wallet

What do you do when you have ATMega328s in QFN package burning a hole in your bug box, but you aren’t set up for SMD and have limited access to parts? You man up and do what [Djpanjan] did: make your own breakout board with solder, right angle header, and many tiny, beautiful wires.

[Djpanjan] says the process is a simple one that requires great concentration. Once he had it broken out, he covered the wires with hot glue to make sure they all stay in place. He programmed it using an Arduino as an ISP and he was able to run the blink sketch without issue. He blinked all the output pins to make sure there were no shorts.

[Djpanjan] says that if he can’t get a breakout for his LQFP-144, he’s going to make his own again. Good luck, [Djpanjan]. We’re all counting on you.

If you’re set up for SMD and etching, there’s always the surface mount breakout route. If not, you can always use magnet wire and protoboard.

DIY Router Base For Your Dremel

dremel-attachment-main

Dremel rotary tools are handy. Some of the attachments are convenient.  [vreinkymov] felt the convenience wasn’t worth the cost, so he decided to make a Router Base for his Dremel. These types of attachments are used to hold the Dremel perpendicular to the work surface.

Underneath the little nut/cover near the spindle of the Dremel, there is a 3/4″-12 threaded feature used to attach accessories. A quick trip down the hardware store’s plumbing aisle resulted in finding a PVC reducer with the correct female thread to fit the Dremel. Once on the rotary tool, the reducer threads into a PVC nipple that is glued to a piece of acrylic. The acrylic acts as the base of the router attachment.

Continue reading “DIY Router Base For Your Dremel”