Designing The Atom Smasher Guitar Pedal

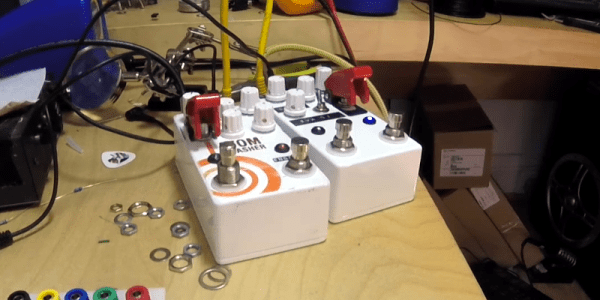
[Alex Lynham] has been creating digital guitar pedals for a while and after releasing the Atom Smasher, a glitchy lo-fi digital delay pedal, he had people start asking him how he designed digital effects pedals rather than analog effects. In fact, he had enough interest, that he wrote an article on it.

The article starts with some background on [Alex], the pedals he’s built and why he chose not to work on pedals full-time. Eventually, the article gets to the how [Alex] designed the Atom Smasher. He starts by describing the chip he used, the same one that many hobbyists, as well as commercial builders, use for delay based effects – the SpinSemi FV-1.

The FV-1 is a SMD chip used for digital delays and other effects that require a delay line – reverbs, choruses, flangers, etc. It’s programmed with an assembly-style language called SpinASM. [Alex] goes over some of the tools and references he used when designing for the pedal. He also has a list of tips for would-be effect pedal designers which work whether you’re designing digital or analogue effects.

[Alex] ends his article saying that, in the future, he might make the schematic and code available, but for the moment he’s not. The FV-1 is an interesting chip, and [Alex]’s article gives a nice high-level look at its features and how to develop for it. For some interesting guitar pedal related articles, check out this one using effects pedals to get better audio in your car, and here’s one about playing with DSP and designing a pedal with it.

Continue reading “Designing The Atom Smasher Guitar Pedal”

Meet The Video DJ Machine

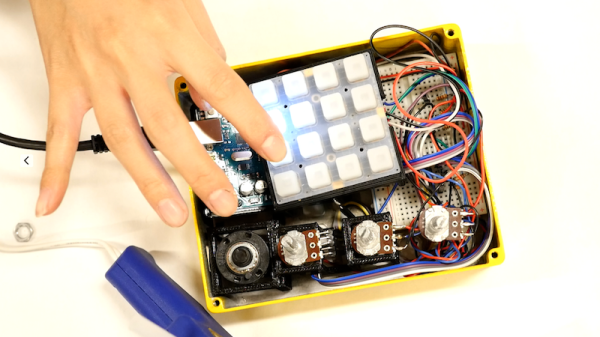
Have you ever wanted to perform as a DJ but found the equipment expensive as well as intimidating? Well, your prayers have been answered by [Dror Ayalon] who has designed Nomnom 2. It is an open source, music mixing project that uses up to 16 video clips to give you control of your next hit album.

You are given charge of a physical control panel that has 16 buttons and four knobs. Each button can be used to turn on or off a particular clip while the knobs control the repetition rate, volume, speed and playable length of each track. An Arduino sits under the buttons and is responsible for sending the information to an application that runs in your web browser. The browser app uses the NexusUI library to control playback of the audio clips and bring to life the entire experience.

[Dror Ayalon] has been busy polishing his project and there are some neat videos of him demonstrating it so check out the videos below. The code is available for down from GitHub and the BOM is available at the Hackaday.io project page. The web app can be ported to a desktop app using electron and a PCB can be designed for the controller for future versions.

For now, it is incredible to see hardware and software, come together in such a harmonious fashion. This may be the start of something wonderful but if you are just looking for a way to annoy the neighbors, check out the Midi Musical Siren instead. Continue reading “Meet The Video DJ Machine”

Play It Again, Arduino

[MrRedBeard] wanted to play a particular song from an Arduino program and got tired of trying to hand transcribe the notes. A little research turned up that there was a project to convert Music XML (MXL) files to the Arduino. However, [MrRedBeard] wasn’t a fan of the language it used, so he created his own means of doing the same thing. He learned a lot along the way and was willing to share it in a tutorial that will help you if you want to do the same thing. You can see a video of his results, below.

Continue reading “Play It Again, Arduino”

Radiohead’s Greatest Hits For The ZX Spectrum

We’ll admit that only a few of us here at Hackaday are Radiohead fans. However, we all couldn’t help but appreciate their new remastered release of OK Computer. The new release contains some bonus material. At the end of the bonus material is a strange noise that turns out to be a ZX Spectrum Basic program.[OooSLAJEREKooO] managed to find it, play it, and record it for all of us (see video below).

The two minutes of tones might sound unfamiliar to a modern computer user, but back in the day, audio tones were used to communicate over phone lines and to load and save programs via cassette tape recorders. You might be asking yourself: why the ZX Spectrum? Radiohead is from the UK, but that’s not the complete picture. Of all home computers, the ZX Spectrum had a higher effective bit rate when storing data on tape. Basically, it takes less time (and less tape) to put it on a Speccy than a C64 or Apple.

Continue reading “Radiohead’s Greatest Hits For The ZX Spectrum”

The Sound Of (Synthesized) Music

What’s an ADSR envelope generator? If you are a big music hacker, you probably know. If you are like the rest of us, you might need to read [Mich’s] post to find out that it is an attack-decay-sustain-release (ADSR) envelope generator. Still confused? It is a circuit used in music synthesis. You can see a demo of the device in the video below.

Before the Altair–which was sort of the first hobbyist computer you could actually buy–electronics magazines were full of music synthesizer projects that had a lot in common with the analog computers of old. A lot of people took that very seriously and then computers took over the collective consciousness and we found musical hackers started working with (digital) computer-based synthesizers. But the old analog synth designs just won’t die. [Mich’s] ADSR is based on an ancient design, and the amount of information and additions he provides makes it worth a read, even if you don’t fancy building one.

Continue reading “The Sound Of (Synthesized) Music”

[Daito Manabe] Interview: Shocking!

We’ve loved [Daito Manabe]’s work for a while now. Don’t know [Daito]? Read this recent interview with him and catch up. Is he a hacker’s artist, or an artist’s hacker?

My personal favorite hack of his is laser painting apparatus from 2011. The gimmick is that he uses the way the phosphors fade out to create a greyscale image. Saying that is one thing, but watching it all come together in time is just beautiful.

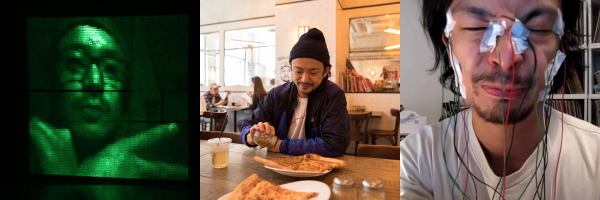
Maybe you’ve seen his facial-electrocution sequencer (words we never thought we’d write! YouTube link). He’s taken that concept and pushed it to the limit — setting up the same sequences on multiple people make them look eerily like the sacks of meat that they are, until everyone laughs at the end of the experiment and they’re all back to being human.

Anyway, if you didn’t know [Daito], check out the rest of his work. Have any other favorite tech artists that we’re missing? Drop us a line.

How To MIDI Interface Your Toys

There’s a great number toys in the world, many of which make all manner of pleasant or annoying noises for the entertainment of children. If you’re a musician, these toys may be of interest due to their unique or interesting sounds. However, due to their design being aimed at play rather than performance, it may be difficult to actually use the toy as a musical instrument. One way around this is to record the sounds of the toy into a sampler, but it’s not the only way. [little-scale] is here to demonstrate how to MIDI interface your toys. 

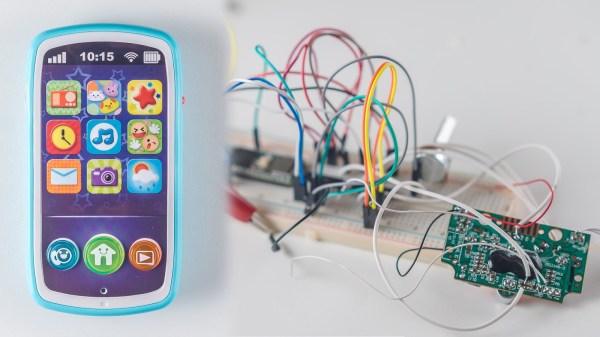
[little-scale] starts out by discussing the many ways in which one can interface with a toy. The article discusses how a simple button can be replaced with a relay, or a multiplexer, and be interfaced to all manner of other devices to control the toy. This is demonstrated by using a mobile phone toy which makes sounds when buttons are pressed.

A Teensy 3.6 is used to run the show, acting as a USB-MIDI interface so the toy can be controlled by music software like Abelton. It’s connected to the toy’s buttons through a multiplexer. The toy’s speaker is cut off and used as an audio output instead, allowing the toy to be easily connected to other audio hardware for performance or recording. It’s also fed through a digital pot so MIDI commands can control the volume. A resistor is used to control pitch in the toy, so this too was replaced with a digital pot as well, to allow sample pitch to be controlled.

The project is incredibly well documented, with [little-scale] first tearing down the toy and highlighting the points of interest, before stepping through each stage of interfacing the toy to the digital world. We’ve seen some of [little-scale]’s work before, too – namely, this MIDI DAC for controlling vintage synthesizers. Video after the break. Continue reading “How To MIDI Interface Your Toys”