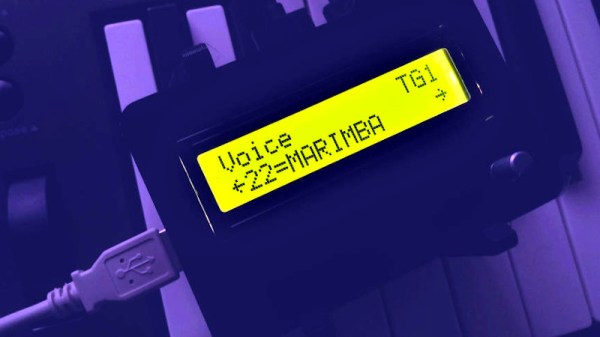
MP3 Is 25 Years Old!

In the streaming era, music is accessed from a variety of online services, ephemeral in nature and never living on board the device. However, the online audio revolution really kicked off with the development of one very special format. The subject of bitter raps and groundbreaking lawsuits, this development from Germany transformed the music industry as we know it. Twenty-five years on from the date the famous “.mp3” filename was chosen, we take a look back at how it came to be, and why it took over the world.

Continue reading “MP3 Is 25 Years Old!”

A Wearable That Jives To The Beat Of Your Heart

We’re always searching for the coolest biohacking projects all over the web, so imagine our excitement when we ran across [marcvila333’s] wearable biometric monitor on Instructables. This was a combined effort between [Marc Vila], [Guillermo Stauffacher], and [Pau Carcellé] as they were wrapping up the semester at their university. Their goal was to develop an integrated device that could modulate the wearer’s heart, and subsequently their mood and stress levels, using music.

Their device includes an LCD screen for user feedback, buttons for user input, an MP3 module, and a heart rate sensor module. The user can measure their heart rate and use the buttons to select the type of music they desire based on whether they would like to decrease or increase their heart rate. The science behind this phenomenon is still unknown, but the general sense is that different music can trigger different chemical signals in your brain, subsequently affecting your mood and other subtle physiological effects. I guess you can say that we tend to jive to the beat of our music.

It would be really cool to see their device automatically change the song to either lower or raise the user’s heart rate, making them calmer or more engaged. Maybe connect it to your tv? Currently, the user has to manually adjust the music, which might be a bit more inconvenient and could possibly lead to the placebo effect.

Either way; Cool project, team. Thanks for sharing!

Your Own Electronic Drum Kit

[Jake_Of_All_Trades] wanted to take up a new drumming hobby, but he didn’t want to punish his neighbors in the process. He started considering an electric drum kit which would allow him to practice silently but still get some semblance of the real drumming experience.

Unfortunately, electric drum kits are pretty expensive compared to their acoustic counterparts, so buying an electric kit was a bit out of the question. So, like any good hacker, he decided to make his own.

He found a pretty cheap acoustic drum kit on Craigslist and decided to convert it to electric. He thought this would be a perfect opportunity to learn more about electric drum kits in general and would allow him to do as much tweaking as he wanted to in order to personalize his experience. He also figured this would be a great way to get the best of both worlds. He could get an electric kit to practice whenever he wanted without disturbing neighbors and he could easily convert back to acoustic when needed.

First, he had to do a bit of restorative work with the cheap acoustic kit he found on eBay since it was pretty worn. Then, he decided to convert the drum heads to electric using two-ply mesh drum heads made from heavy-duty fiberglass screen mesh. The fiberglass screen mesh was cheap and easy to replace in the event he needed to make repairs. He added drum and cymbal triggers with his own DIY mechanism using a piezoelectric element, similar to another hack we’ve seen. These little sensors are great for converting mechanical to electrical energy and can feed directly into a GPIO to detect when the drum or cymbal was struck. The electrical signal is then interpreted by an on-board signal processing module.

All he needed were some headphones or a small amplifier and he was good to go! Cool hack [Jake_Of_All_Trades]!

While you’re here, check out some of our best DIY musical projects over the years.

Synthesizer Gets An External Touch Screen

Like other owners of the high-end Yamaha MODX, [sn00zerman] wasn’t happy with the synthesizer’s integrated touch screen. It’s a bit small, and not at a very good angle for viewing. So he made it his mission to find some way of adding a larger external touch screen without making any permanent modifications to the expensive instrument.

This might seem like a tall order, but he wasn’t starting from zero. It was already known that you could plug an external display into it if you used a USB to DVI/HDMI adapter; but without the touch overlay it wasn’t a particularly useful trick. He pondered adding an external connector for the device’s built-in touch screen overlay, but that broke his no modifications rule. Considering how much one of these things cost, we can’t blame him for not wanting to put a hole in the side.

Sometimes you just have to dig out the right parts.

So he started to look for a software solution to get him the rest of the way. Luckily the MODX runs Linux, and Yamaha has made good on their GPL responsibilities and released the source code for anyone who’s interested. While poking around, he figured out that the device uses tslib to talk to the touch screen, which [sn00zerman] had worked with on previous projects. He realized that the solution might be as simple as finding a USB touch screen controller that’s compatible with the version of tslib running on the MODX.

In the end, a trip through his parts bin uncovered a stand-alone touch screen controller that he knew from experience would work with the library. Sure enough, when plugged into the MODX, the OS accepted it as an input device. With the addition of a USB hub, he was able to combine this with an existing display and finally have a more comfortable user-interface for his synthesizer.

Now all he’s got to do is plug in a USB floppy drive, and he’ll have the ultimate Yamaha Beat Laboratory.

Continue reading “Synthesizer Gets An External Touch Screen”

Analog Noise Generator, Fighter Of Other Noises

A chaotic drone of meaningless sound to lull the human brain out of its usual drive to latch on to patterns can at times be a welcome thing. A nonsense background din — like an old television tuned to a dead channel — can help drown out distractions and other invading sounds when earplugs aren’t enough. As [mitxela] explains, this can be done with an MP3 file of white noise, and that is a solution that works perfectly well for most practical purposes. However he found himself wanting a more refined hardware noise generator with analog controls to fine tune the output, and so the Rumbler was born.

It’s a tight fit, but it does fit.

The Rumbler isn’t just a white noise generator. White noise has a flat spectrum, but the noise from the Rumbler is closer to Red or Brownian Noise. The different colors of noise have specific definitions, but the Rumbler’s output is really just white noise that has been put through some low pass filters to create an output closer to a nice background rumble that sounds pleasant, whereas white noise is more like flat static.

Why bother with doing this? Mainly because building things is fun, but there is also the idea that this is better at blocking out nuisance sounds from neighboring human activities. By the time distant music (or television, or talking, or shouting) has trickled through walls and into one’s eardrums, the higher frequencies have been much more strongly attenuated than the lower frequencies. This is why one can easily hear the bass from a nearby party’s music, but the lyrics don’t survive the trip through walls and windows nearly as well. The noise from the Rumbler is simply a better fit to those more durable lower frequencies.

[Mitxela]’s writeup has quite a few useful tips on analog design and prototyping, so give it a read even if you’re not planning to make your own analog noise box. Want to hear the Rumbler for yourself? There’s an embedded audio sample near the bottom of the page, so go check it out.

For a truly modern application of white noise, check out the cone of silence for snooping smart speakers.

DJing Without The Truckload Of Equipment; Secret Ingredient Is Raspberry Pi

There is a romance to notions of a byegone age of DJing — driving a pair of Technics 1200s dwarfed on either side by the stacks, pumping techno bass through the laser-tinged darkness into a hungry crowd. Even if the reality of early evening Saturday wedding parties playing inoffensive crooners for the 50-somethings didn’t really live up to it.

The trouble with DJing old-style was that it required extensive logistics to shift all that equipment not to mention a record collection, so the modern DJ for whom everything has gone digital is truly lucky in the scale of their operation. For some people even that is too much to carry, and [Dennisdebel] has minimised a DJ rig to the next level, by running the popular Mixxx DJing software on a Raspberry Pi hooked up to his DJ controller. You can see the result in the video below the break.

This is more of a HOWTO for installing a set of software packages on the Pi to achieve an aim rather than a special hardware hack, but as he points out the interest lies in regaining control of the process. The DJ space is dominated by commercial offerings increasingly laden with DRM and proprietary cloud offerings, so this represents a means of taking back control of the process. If it’s not hacky enough, you can always add a home-made DJ mixing station.

Continue reading “DJing Without The Truckload Of Equipment; Secret Ingredient Is Raspberry Pi”

A Baby Grand Gets MIDI

Like a lot of people, [Jacques] doesn’t think a big hunk of plastic light enough to carry under your arm is a piano, even if it does have 88 keys. A piano is supposed to be a hefty piece of furniture that you have to buy people pizza to help you move. So he bought a used baby grand piano. It wasn’t in very good shape, though, so while restoring it, he also added MIDI to it. You can see the finished result in the video below.

At $100, the price was right, although it cost more to move it. Between water damage, moth attacks, and storage in a garage, the piano — an old Zimmerman — needed a lot of tender loving care. When it came to MIDI, [Jacques] found a used Disklavier — a very expensive piece of kit — but it didn’t fit the Zimmerman or another piano at hand. The solenoids and optical sensors are set up for a particular piano, so what can you do? Easy! Rebuild the bar that holds the solenoids and sensors.

Continue reading “A Baby Grand Gets MIDI”