Hands On With The Raspberry Pi POE+ HAT

There’s a lot happening in the world of Pi. Just when we thought the Raspberry Pi Foundation were going to take a break, they announced a new PoE+ HAT (Hardware Attached on Top) for the Pi B3+ and Pi 4, and just as soon as preorders opened up I placed my order.

Now I know what you’re thinking, don’t we already have PoE HATs for the Pis that support it? Well yes, the Pi PoE HAT was released back in 2018, and while there were some problems with it, those issues got cleared up through a recall and minor redesign. Since then, we’ve all happily used those HATs to provide up to 2.5 amps at 5 volts to the Pi, with the caveat that the USB ports are limited to a combined 1.2 amps of current.

PoE vs PoE+
$20 for either of them. Choose wisely.

The Raspberry Pi 4 came along, and suddenly the board itself can pull over 7 watts at load. Combined with 6 watts of power for a hungry USB device or two, and we’ve exceeded the nominal 12.5 watt power budget. As a result, a handful of users that were trying to use the Pi 4 with POE were hitting power issues when powering something like dual SSD drives over USB. The obvious solution is to make the PoE HAT provide more power, but the original HAT was already at the limit of 802.3af PoE could provide, with a maximum power output of 12.95 watts.

The solution the Raspberry Pi Foundation came up with was to produce a new product, the PoE+ HAT, and sell it along side the older HAT for the same $20. The common name for 802.3at is “PoE+”, which was designed specifically for higher power devices, maxing out at 30 watts. The PoE+ HAT is officially rated to output 20 watts of power, 5 volts at 4 amps. These are the output stats, so the efficiency numbers don’t count against your power budget, and neither does the built-in fan.

Continue reading “Hands On With The Raspberry Pi POE+ HAT”

PlayStation Games On The GBA, With A Few Extra Steps

It might seem impossible, but what you’re looking at is a Sony PlayStation game being played on a Nintendo Game Boy Advance. The resolution is miserable and the GBA doesn’t have nearly enough buttons to do most 3D games justice, but it’s working. There’s even audio support, although turning it on will slow things down considerably.

How does it work? The trick is that creator [Rodrigo Alfonso] is actually emulating the PlayStation on a Raspberry Pi and simply using Nintendo’s handheld as an external display and controller. We say “simply”, but of course, it’s anything but. The GitHub page for the project goes into impressive detail on how the whole thing works, but the short version is that the video data is sent from the Linux framebuffer to a small program running on the GBA over the handheld’s serial port using SPI. In testing he was able to push 2.56 Mbps through the link, which is a decent amount of bandwidth when you’ve only got to keep a 240 × 160 screen filled.

Perhaps the best part is that you don’t even need a flash cart to try it at home. [Rodrigo] is using a trick we’ve seen in other GBA projects, where the program is actually transferred to the handheld over the link cable at boot time.

Nintendo introduced this “multiboot” feature so multiplayer games could be played between systems even if they didn’t all have a physical cartridge, but now that hackers have cracked the code, it means you can run arbitrary code on a completely unmodified console; though it does get wiped as soon as you power it off.

[Rodrigo] provides all the information and software you need to try it at home, you just need a Raspberry Pi, a Game Boy Advance, and Link Cable you don’t mind cutting up; far less hardware than is required by the similar project to run DOOM on the NES. Since he’s tied everything into the popular RetroPie frontend, we imagine it would even work when emulating earlier 2D consoles; which would be a much better fit for the GBA’s display and limited inputs.

Raspberry Pi Cameras Stand In For Stereo Microscope

Handling tiny surface mount components and inspecting PCBs is a lot easier with a nice stereo microscope, but because of their cost and bulk, most hobbyists have to do without. At best they might have a basic digital microscope, but with only one camera, they can only show a 2D image that’s not ideal for detail work.

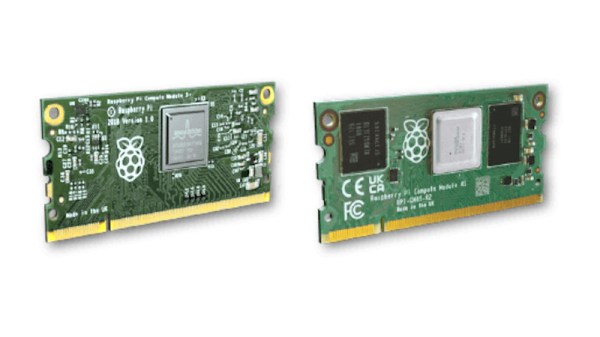
The team behind [Stereo Ninja] hopes to improve on the situation by developing a stereoscopic vision system that puts tiny objects up on the big screen in three dimensions. Utilizing the Raspberry Pi Compute Module, a custom carrier board that enables the use of both MIPI CSI camera interfaces, and a 3D gaming monitor, their creation combines the capabilities of a traditional stereo microscope with the flexibility of a digital solution.

With two Raspberry Pi cameras suspended over the work area, and the addition of plenty of LED light, Stereo Ninja is able to generate the 3D image required by the monitor. While the camera’s don’t have the same magnification you’d get from a microscope, they’re good enough for enlarging SMD parts, and looking at a big screen monitor certainly beats hunching over the eyepiece of a traditional microscope. Especially if you’re trying to show something to a group of people, like at a hackerspace.

Of course, not everyone has a large 3D gaming monitor on their workbench. In fact, given how poorly the tech went over with consumers the last time it was pushed on us, we’d wager more hackers have stereo microscopes than 3D displays. Which is why the team’s next step is to have the Raspberry Pi generate the signals required by the shutter glasses, allowing Stereo Ninja to show a three dimensional image on 2D monitors; bringing this valuable capability to far larger audience than has previously been possible.

Continue reading “Raspberry Pi Cameras Stand In For Stereo Microscope”

10 Gigabit Ethernet For The Pi

When people like Bell and Marconi invented telephones and radios, you have to wonder who they talked to for testing. After all, they had the first device. [Jeff] had a similar problem. He got a 10 gigabit network card working with the Raspberry Pi Compute Module. But he didn’t have any other fast devices to talk to. Simple, right? Just get a router and another network card. [Jeff] thought so too, but as you can see in the video below, it wasn’t quite that easy.

Granted, some — but not all — of the hold-ups were self-inflicted. For example, doing some metalwork to get some gear put in a 19-inch rack. However, some of the problems were unavoidable, such as the router that has 10 Gbps ports, but not enough throughput to actually move traffic at that speed. Recabling was also a big task.

Continue reading “10 Gigabit Ethernet For The Pi”

EMOJO Chatbot Will Be There For You

We all need someone to talk to sometimes, and the pandemic has only made matters worse when it comes to the number of people living with anxiety and depression. Exchanging the simplest of pleasantries can make you feel whole again, but the masks make it hard to engage with strangers and judge their emotions, so your big trip to the grocery store can make you feel lonely in a crowd.

So you go back home, still feeling lonely, and maybe you turn on the TV. Watching people interact is probably the next best thing to actual interaction, and it might even make you laugh. But have you ever wished you could talk to the people on TV? With [aniketdhole]’s EMOJO chatbot, you’ll feel as though you’re among friends. And technically you are — all the dialogue is from the TV show Friends.

In Castaway, Tom Hanks didn’t give that volleyball a frowny face, now did he? Nor does he have a dopey grin. Instead, he wears a wry smile that suggests depth of character and a grasp of the dire situation at hand. But now we have emoji, and they do a pretty good job of conveying and evoking emotion. EMOJO is a visual chatbot that uses voice and emoji to make easy, two-way conversation to help chase the loneliness away. It uses a Raspberry Pi and a TFT display to take voice input from a Bluetooth headset, convert it to text, and then respond in kind with both voice and text. It was a finalist in the rethink displays round of the Hackaday Prize, and we can’t wait to see how its character develops. Be sure to check out the demo after the break.

Continue reading “EMOJO Chatbot Will Be There For You”

A Custom Raspberry Pi Spotted In The Wild

Since the first Raspberry Pi came to market back in 2012 there have been a variety of models released. Some of them are rarer than others, and unusual boards can even be rather sought-after. This one spotted at a Thai junk vendor won’t be in the hands of many collectors though, and investigating it sheds a bit of light on some of the most unusual boards from the company.

The board is recognisably very similar to a Pi 3 with a BCM2837 SoC, but despite all that it has no Pi logo. On the underside there is an eMMC in place of the SD socket, and one pair of USB sockets has been replaced by a micro USB socket and a header. The source is reported to have been a washing machine, but given that this SoC is exclusive to the the Pi Foundation there’s no way it could easily have been manufactured by anyone else. The answer comes in the 2015 launch of a customisation service for industrial customers, which allowed manufacturers to have their own versions made of the fruity SBC.

From the point of view of an experimenter this board offers nothing that a standard device can’t do. But it’s an interesting glimpse of an unseen side to the Pi story, and it holds the prospect of other special versions being unearthed. If you find one on your travels, let us know!

This Horrifying Robot Is Here To Teach You A Lesson

No, despite what it might look like, this isn’t some early Halloween project. The creepy creation before you is actually a tongue-in-cheek “robot” created by the prolific [Nick Bild], a topical statement about companies asking their remote workers to come back into the office now that COVID-19 restrictions are being lifted. Why commute every day when this ultra realistic avatar can sit in for you?

OK, so maybe it’s not the most impressive humanoid creation to ever grace the pages of Hackaday. But if you’re looking to spin up a simple telepresence system, you could do worse than browsing through the Python source code [Nick] has provided. Using a Raspberry Pi 4, a webcam, and a microphone, his client-server architecture combines everything the bot sees and hears into a simple page that can be remotely accessed with a web browser.

Naturally this work from home (WFH) bot wouldn’t be much good if it was just a one-way street, so [Nick] has also added a loudspeaker that replays whatever he says on the client side. To prevent a feedback loop, his software includes a function that toggles which direction the audio stream goes in by passing the appropriate commands to the bot over SSH; a neat trick to keep in mind for your own, less nightmarish, creations.

If you’re looking for something a bit more capable and have some cardboard laying around, this DIY telepresence mount for your phone might be a good place to start.

Continue reading “This Horrifying Robot Is Here To Teach You A Lesson”