The Raspberry Pi finds a use in a huge variety of applications, and in almost any location you could imagine. Sadly those who use those machines might not be in the same place as the machines themselves, and thus there’s the question of providing a remote connection between the two. This may not be a huge challenge to those skilled with Linux and firewalls, but to many Pi users it’s a closed book. So the Pi folks have come up with a painless way to connect to your Pi wherever it is, and it’s called Raspberry Pi Connect.
To use the service all you need is a Pi running the latest 64-bit version of Raspberry Pi OS, so sadly that excludes base model Zeros and older models. Sign in to the Raspberry Pi Connect server, follow the instructions, and you’re on your way. Under the hood it’s the well-known VNC protocol at work, with the connection setup being managed via WebRTC. The Pi servers are intended to act simply as connection facilitators for peer-to-peer traffic, though they are capable of handling through traffic themselves. It’s a beta service with a single server in the UK at the time of writing, though we’d expect both the number of servers and the offering to evolve over time.
[Michael Lynch] has been a solo developer for over three years now, and has been carefully cataloguing his attempts at generating revenue for himself ever since making the jump to being self-employed. Success is not just hard work; it is partly knowing when the pull the plug on an idea, and [Micheal] has been very open about his adventures in this area. He shares the good news about a DIY project of his that ended up becoming a successful product, complete with dollar amounts and frank observations.
About a year ago, we covered a project he shared called TinyPilot, which is an effective KVM-over-IP device, accessible over the web, that could be built with about $100 worth of parts. [Micheal] found it to be a fun and useful project, and decided to see if he could sell kits. However, he admits he didn’t have high expectations, and his thoughts are probably pretty familiar to most hardware types:
I questioned whether there was a market for this. Why would anyone buy this device from me? It was just a collection of widely available hardware components.
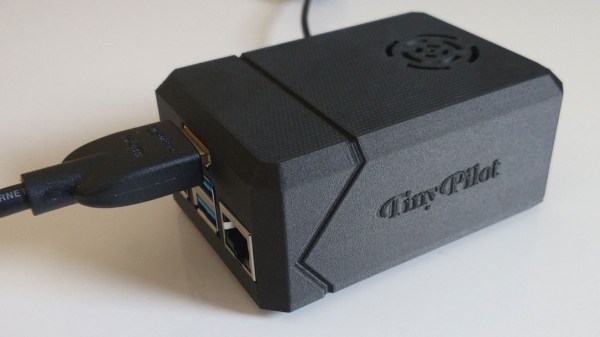
Well, it turns out that he was onto something, and the demand for his device became immediately clear. He’s since given TinyPilot more features, an attractive case, and even provides a support plan for commercial customers. This is an excellent reminder that sometimes, what is being sold isn’t the collection of parts itself. Sometimes, what’s being sold is a solution to a problem people have, and those people are time-poor and willing to pay for something that just works.
It’s great to see [Michael] find some success as a solo developer, but his yearly wrap-up covers much more than just the success of TinyPilot as a product, so be sure to check it out if you’re at all interested in the journey of working for yourself.
These days, we’re blessed with cellular data networks that span great swathes of the Earth. By and large, they’re used to watch TV shows and argue with strangers online. However, they’re also a great tool to use to interact with hardware in remote locations, particularly mobile ones where a wired connection is impractical.
In this series, we’re taking a look at tips and tricks for doing remote cellular admin the right way. First things first, you’ll need a data connection – so let’s look at choosing a modem.
Options Abound
When shopping around for cellular data modems, it can be difficult to wade through the variety of options out there and find something fit for purpose. Modems in this space are often marketed for very specific use cases; at the consumer level, many are designed to be a no-fuss home broadband solution, while in the commercial space, they’re aimed primarily to provide free WiFi for restaurants and cafes. For use in remote admin, the presence of certain features can be critical, so it pays to do your research before spending your hard earned money. We’ve laid out some of the common options below.
Consumer Models
The Sierra Aircard 320U is ancient now, with limited frequency bands available. Its flimsy flexible connector is also a drawback. However, its ease of configuration with Linux systems makes it a dream to use in remote access situations. Unlike many others, it acts as a Direct IP connection, not appearing as a separate router.
Many telecommunications providers around the world sell cheap USB dongles for connecting to the Internet, with these first becoming popular with the rise of 3G. They’re somewhat less common now in the 5G era, with the market shifting more towards WiFi-enabled devices that share internet among several users. These devices can often be had for under $50, and used on prepaid and contract data plans.
These devices are often the first stop for the budding enthusiast building a project that needs remote admin over the cellular network. However, they come with certain caveats that can make them less attractive for this use. Aimed at home users, they are often heavily locked down with firmware that provides minimal configuration options. They’re generally unable to be set up for port forwarding, even if you can convince your telco to give you a real IP instead of carrier-grade NAT. Worse, many appear to the host computer as a router themselves, adding another layer of NAT that can further complicate things. Perhaps most frustratingly, with these telco-delivered modems, the model number printed on the box is often not a great guide as to what you’re getting.
A perfect example is the Huawei E8327. This comes in a huge number of sub-models, with various versions of the modem operating in different routing modes, on different bands, and some even omitting major features like external antenna connectors. Often, it’s impossible to know exactly what features the device has until you open the box and strip the cover off, at which point you’re unable to return the device for your money back.
All is not lost, however. The use of VPNs can help get around NAT issues, and for the more adventurous, some models even have custom firmware available on the deeper, darker forums on the web. For the truly cash strapped, they’re a viable option for those willing to deal with the inevitable headaches. There are generally some modems that stand out over others in this space for configurability and ease of use. This writer has had great success with a now-aging Sierra Aircard 320U, while others have found luck with the Huawei E3372-607. As per earlier warnings though, you don’t want to accidentally end up with an E3372-608 – thar be dragons.
Remote access is great, but if the machine stops booting, ceases to connect to the network, or needs low-level interaction like BIOS settings or boot management, remote access is worthless because it’s only available once the host computer is up and running. The usual solution is to drag a keyboard and monitor to the machine in question for physical access.
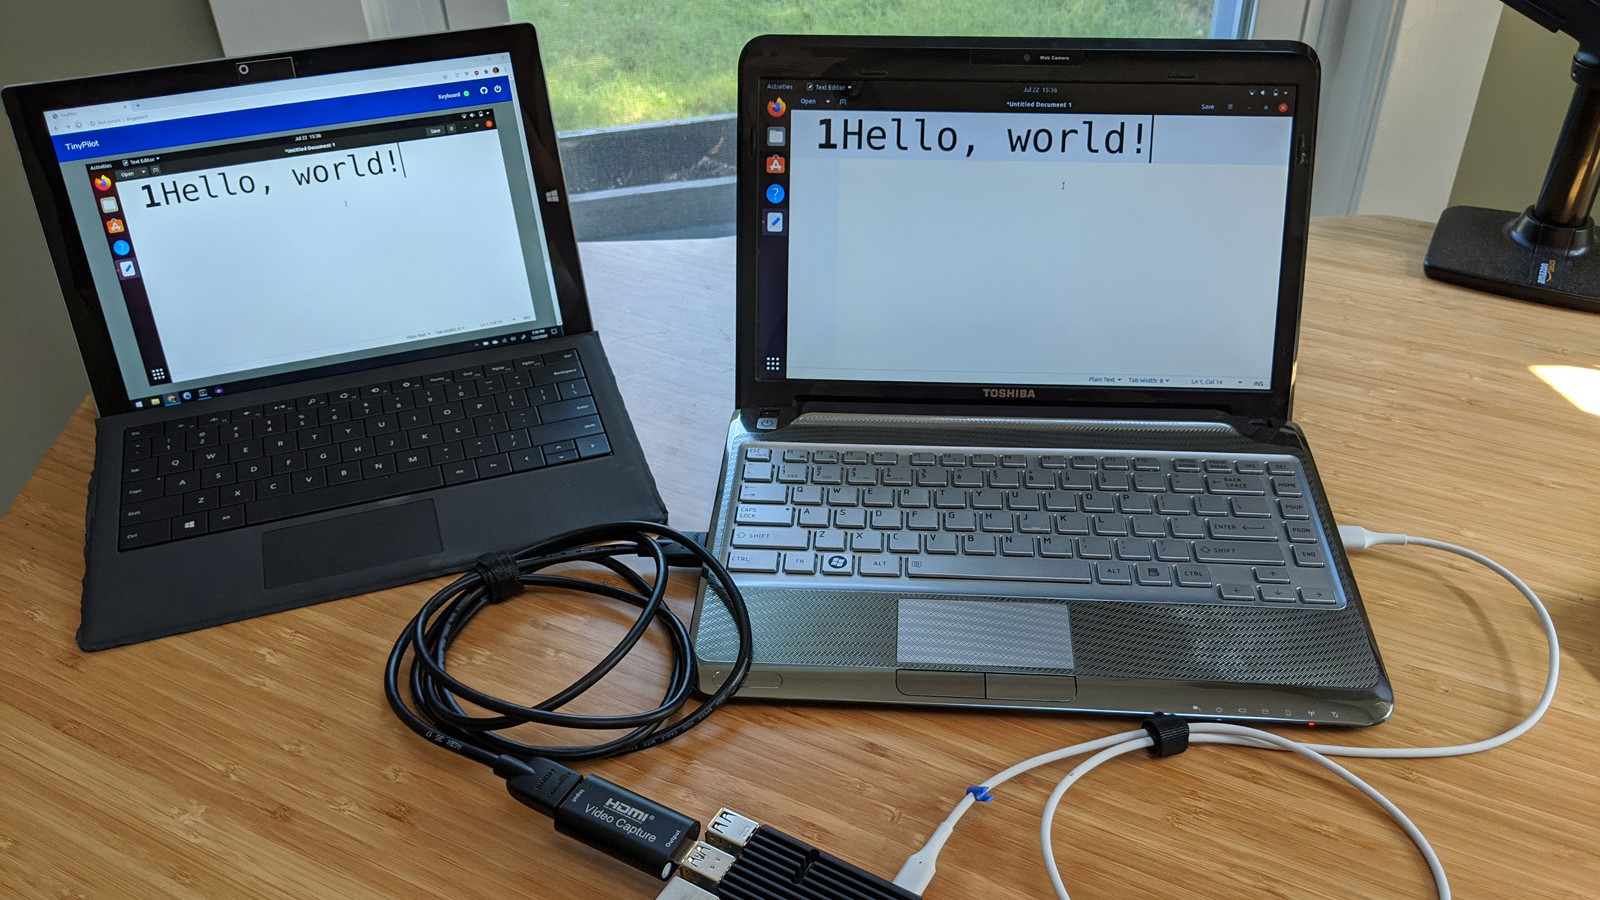
Ubuntu laptop (right) being accessed over IP, via web browser on the left.
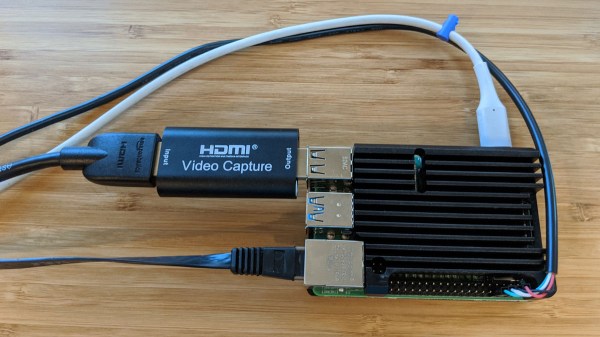
For most people, swapping cables in this way is an infrequent task at best. But for those who work more closely with managing hardware or developing software, the need to plug and unplug a keyboard and monitor into machines that otherwise run headless can get tiresome. The modern solution is KVM (keyboard, video, mouse) over IP, but commercial options are expensive. [Michael Lynch]’s TinyPilot on the other hand clocks in at roughly $100 of parts, including a Raspberry Pi and USB HDMI capture device. It does have to drop the ‘M’ from KVM (meaning it does not support a mouse yet) but the rest of it hits all the bases, and does it all from a web browser.
What exactly does TinyPilot do? It provides remote access via web browser, but the device is an independent piece of hardware that — from the host computer’s point of view — is no different from a physical keyboard and monitor. That means keyboard and video access works before the host machine even boots, so even changing something like BIOS settings is no problem.
[Michael] demonstrates his design in the video embedded below, but we encourage you to check out the project page for a fascinating exploration of all the challenges that were part of TinyPilot’s development.
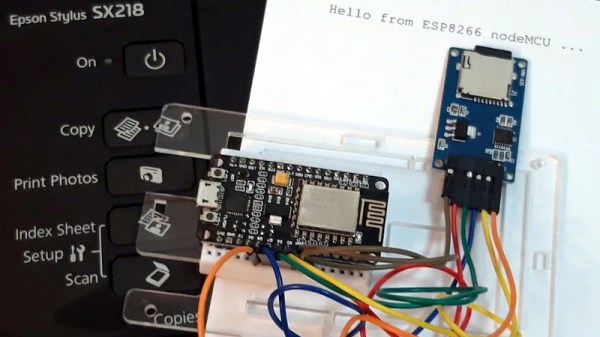
The ESP8266 has become the hacker’s microcontroller of choice because it’s exceptionally easy to get the chip connected to the network and talking to other devices. The fact that it’s also absurdly cheap is just a bonus. Since nearly every piece of electronics you buy today is “smart” enough to include some form of Internet control, that means there’s no shortage of gadgets these MCUs can potentially poke and prod.
In their latest tip, [TecnoProfesor] shows how you can interface the ESP8266 with Google’s Cloud Print, a service that enables simple remote printing over the web without having to worry about having the proper device drivers. Remote printing from the ESP8266 might seem like little more than a gag at first glance, but if you’re the kind of person who likes to have hard copies of data, adding the capability to generate a daily printed report to your weather station could be a nice weekend project.
[TecnoProfesor] provides explanations and source code for printing documents of various sizes from both the ESP8266’s internal flash storage and an SPI-attached SD card. Towards the end of the write-up, there’s even some explanation of how the setPrintDocument() function of the Cloud Print API can be used in more advanced scenarios, such as printing web pages or documents stored in Google Drive.
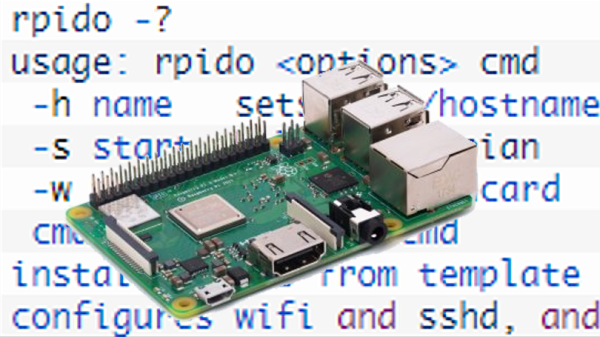
There are differences between setting up a Raspberry Pi and installing an OS on any other computer, but one thing in common is that if you do enough of them, you seek to automate the process any way you can. That is the situation [Peter Lorenzen] found himself in, and his solution is a shell script to install and configure the Raspberry Pi for headless operation, with no need to connect either a keyboard or monitor in the process.
[Peter]’s tool is a script called rpido, and with it the process for setting up a new Raspberry Pi for headless operation is super streamlined. To set up a new Pi, all [Peter] needs to do is:
Plug an SD card into his laptop (which happens to be running Ubuntu.)
Run: rpido -w -h myhostname -s which downloads and installs the newest version of Raspbian lite, does some basic setup (such as setting the hostname), configures for headless operation, and launches a root shell.
Use the root shell to do any further tweaks or checks (like launching raspi-config for additional changes.)
Exit the shell, remove the SD card from his laptop, and install the card into the Raspberry Pi.
There are clear benefits to [Peter]’s script compared to stepping through a checklist of OS install and setup tasks, not to mention the advantage of not needing to plug in a keyboard and monitor. Part of the magic is that [Peter] is mounting the SD card’s filesystem in a chroot environment. Given the right tools, the ARM binaries intended for the Pi run on his (Intel) Ubuntu laptop. It’s far more convenient to make changes to the contents of the SD card in this way, before it goes to its new home in a Pi.
Not everything has to revolve around an SD card, however. [Jonathan Bennet] showed that it’s possible to run a Raspberry Pi without an SD card by using the PXE boot feature, allowing it to boot and load its file system from a server on the same network, instead of a memory card.
Internet of Things startup Garadget remotely bricked an unhappy customer’s WiFi garage door for giving a bad Amazon review and being rude to company reps. Garadget device owner [Robert Martin] found out the hard way how quickly the device can turn a door into a wall. After leaving a negative Amazon review, and starting a thread on Garadget’s support forum complaining the device didn’t work with his iPhone, Martin was banned from the forum until December 27, 2019 for his choice of words and was told his comments and bad Amazon review had convinced Garadget staff to ban his device from their servers.
The response was not what you would expect a community-funded startup. “Technically there is no bricking, though,” the rep replied. “No changes are made to the hardware or the firmware of the device, just denied use of company servers.” Tell that to [Robert] who can’t get into his garage.
This caused some discontent amoung other customers wondering if it was just a matter of time before more paying customers are subjected to this outlandish treatment. The Register asked Garadget’s founder [Denis Grisak] about the situation, his response is quoted below.
It was a Bad PR Move, Martin has now had his server connection restored, and the IOT upstart has posted a public statement on the matter.– Garadget
This whole debacle brings us to the conclusion that the IoT boom has a lot of issues ahead that need to be straightened out especially when it comes to ethics and security. It’s bad enough to have to deal with the vagaries of IoT Security and companies who shut down their products because they’re just not making enough money. Now we have to worry about using “cloud” services because the people who own the little fluffy computers could just be jerks.