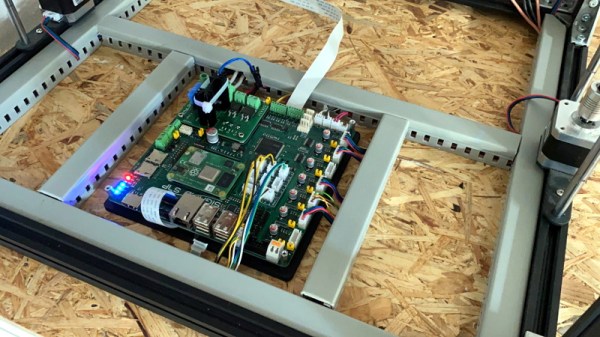
Cluster Deck Packs Four Pis Into One Portable Package

Parallel computing is a fair complex subject, and something many of us only have limited hands-on experience with. But breaking up tasks into smaller chunks and shuffling them around between different processors, or even entirely different computers, is arguably the future of software development. Looking to get ahead of the game, many people put together their own affordable home clusters to help them learn the ropes.

As part of his work with decentralized cryptocurrency, [Jay Doscher] recently found himself in need of a small research cluster. He determined that the Raspberry Pi 4 would give him the best bang for his buck, so he started work on a small self-contained cluster that could handle four of the single board computers. As we’ve come to expect given his existing body of work, the final result is compact, elegant, and well documented for anyone wishing to follow in his footsteps.

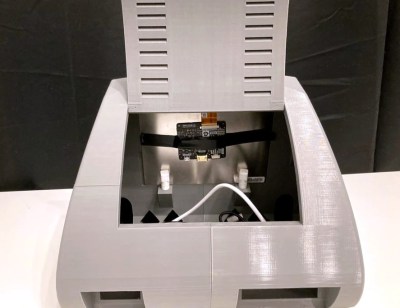
The core unit would make a great desktop cluster.

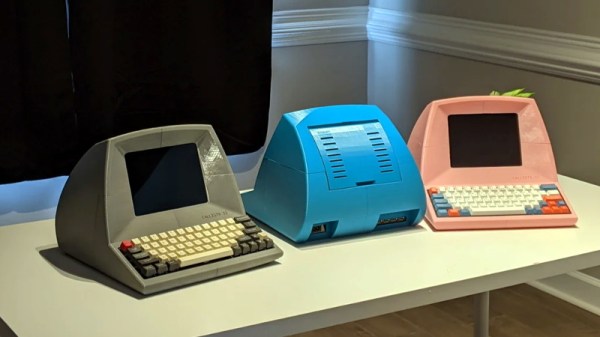
Outwardly the cluster looks quite a bit like the Mil-Plastic that he developed a few months back, complete with the same ten inch Pimoroni IPS LCD. But the internal design of the 3D printed case has been adjusted to fit four Pis with a unique staggered mounting arrangement that makes a unit considerably more compact than others we’ve seen in the past. In fact, even if you didn’t want to build the whole Cluster Deck as [Jay] calls it, just printing out the “core” itself would be a great way to put together a tidy Pi cluster for your own experimentation.

Thanks to the Power over Ethernet HAT, [Jay] only needed to run a short Ethernet cable between each Pi and the TP-Link five port switch. This largely eliminates the tangle of wires we usually associate with these little Pi clusters, which not only looks a lot cleaner, but makes it easier for the dual Noctua 80 mm to get cool air circulated inside the enclosure. Ultimately, the final product doesn’t really look like a cluster of Raspberry Pis at all. But then, we imagine that was sort of the point.

Of course, a couple of Pis and a network switch is all you really need to play around with parallel computing on everyone’s favorite Linux board. How far you take the concept after that is entirely up to you.

Raspberry Pi And Raspberry Pi Spy: This Is How Trademark SNAFUs Should Be Handled

In the eight years or so since the Raspberry Pi first landed as tangible hardware, we’ve all dealt with the Pi folks whether as customers or through their many online support and outreach activities. They’ve provided our community with the seed that led to an explosion of inexpensive Linux-capable single board computers, while their own offerings have powered so many of the projects we have featured here. Their heart lies in their educational remit, but they have also become an indispensable part of our community.

The statement from the Pi Foundation’s Philip Colligan.

Thus it was a surprise when [Raspberry Pi Spy], a long-time commentator on all things Pi, received a legal notice from the Raspberry Pi Foundation that their use of the Raspberry Pi name contravened the acceptable use guidelines and demanding that all content be removed and the domains be handed over. Some consternation ensued, before Pi foundation boss [Philip Colligan] released a statement retracting the original letter and explaining that the incident was the result of an over-zealous legal adviser and that the Foundation has no wish to undermine the Pi community.

All’s well that ends well, but what just happened? In the first instance, it’s natural for any organisation to wish to protect their brand, and there would be plenty of unscrupulous entities ready to sell fake Pi products were the Foundation not active in asserting their rights. In this case it seems that it was the use of the full Raspberry Pi trademark in a domain name that triggered the letter and not the fair-use blogging about the Pi products. We can see that however much we might wish otherwise it was not without legal merit. There have been numerous cybersquatting cases heard since the creation of the Web, and even though some of them have been on more dubious ground than others it remains a well-trodden path.

Where this story differs from so many others though is that the Pi Foundation acted with common sense in withdrawing the notice issued against a member of its community. It is inevitable that sometimes even the best of us can take regrettable paths by whatever means, and respect is earned by how such situations are resolved. We applaud the Pi folks for their swift action in this matter, we’d suggest to anyone that they take care when registering domain names, and we suspect that somewhere a legal adviser will be in the doghouse. But that all such incidents in our community could be resolved with such ease.

Thinking About Creating A Raspberry Pi Replacement?

If you’ve ever wanted to try your hand at creating a Raspberry Pi-like board for yourself, you should check out [Jay Carlson’s] review of 10 different Linux-capable SoCs. Back in the 1960s, a computer was multiple refrigerator-sized boxes with thousands of interconnections and building one from scratch was only a dream for most people. Then ICs came and put all the most important parts in a little relatively inexpensive IC package and homebrew computing became much more accessible. Systems on Chip (SoC) has carried that even further, making it easier than ever to create entire systems, like the Pi and its many competitors.

Only a few years ago, making an SoC was still a big project because the vendors often didn’t want to release documentation to the public. In addition, most of the parts use ball grid array (BGA) packaging. BGA parts can be hard to work with, and require a multilayer PC board. Sure, you can’t plug these into a typical solderless breadboard. But working with these relatively large BGAs isn’t that hard and multilayer boards are now comparatively cheap. [Jay] reports that he got cheap PCBs and used a hot plate to build each board, and has some sage advice on how to do it.

Continue reading “Thinking About Creating A Raspberry Pi Replacement?”

Simplifying The Ruggedized Raspberry Pi Portable

Over the last year we’ve seen a wave of portable computer builds that center around the Raspberry Pi taking up residence inside a commercial heavy-duty storage case. It’s not hard to see why; whether you spring for the Pelican case or get a cheaper alternative, these water-tight cases are far stronger than anything you’re going to 3D print or otherwise cobble together in the home shop. Especially if you can avoid popping any holes in the side.

Inspired by these builds but looking to make it even easier and cheaper to roll your own version, [Dmitry] recently took the wraps off of what he calls the Militarish Pi. You don’t need a CNC to cut out any face plates or a 3D printer to create an internal framework for all your components. You could even do it without soldering anything, if you really wanted to. Short of just buying one of these rigs pre-built from somebody, it’s hard to imagine it could get much easier than this.

Most of the effort involves cutting the PVC foam sheet that holds the Raspberry Pi, battery pack, and the driver board for the LCD in the bottom of the $15 USD case [Dmitry] managed to track down on AliExpress. The “carbon fiber” sticker he put on the PVC sheet won’t do much for the structural integrity of the build, but it sure looks nice. Of course if you have access to the appropriate tools, you could certainly cut the plate out of something stouter. As for the display, the nine inch LCD is perfectly sized to press fit into the lid.

Rounding out the build, [Dmitry] found a cheap Android phone case that included a tiny USB keyboard which plugs right into the Pi and he’s looking to add a BlackBerry trackball to the setup down the line. We especially like the large open area that he’s kept around the Raspberry Pi’s ports that allow you to easily hook up to the network or plug in a flash drive. It could also be a nice compartment to keep your RTL-SDR for some mobile radio work.

For those that don’t mind spending name-brand money and have access to a 3D printer, the Raspberry Pi Quick Kit by [Jay Doscher] is another great way to get yourself a rough and tumble Pi without reinventing the wheel.

Escape To An Alternate Reality Anywhere With Port-A-Vid

There was a time when only the most expensive televisions could boast crystal clear pixels on a wall-mountable thin screen. What used to be novelty from “High Definition Flat Screen Televisions are now just “TV” available everywhere. So as a change of pace from our modern pixel perfection, [Emily Velasco] built the Port-A-Vid as a relic from another timeline.

The centerpiece of any aesthetically focused video project is obviously the screen, and a CRT would be the first choice for a retro theme. Unfortunately, small CRTs have recently become scarce, and a real glass picture tube would not fit within the available space anyhow. Instead, we’re actually looking at a modern LCD sitting behind a big lens to give it an old school appearance.

The lens, harvested from a rear-projection TV, was chosen because it was a good size to replace the dial of a vacuum gauge. This project enclosure started life as a Snap-On Tools MT425 but had become just another piece of broken equipment at a salvage yard. The bottom section, formerly a storage bin for hoses and adapters, is now home to the battery and electronics. All original markings on the hinged storage lid were removed and converted to the Port-A-Vid control panel.

A single press of the big green button triggers a video to play, randomly chosen from a collection of content [Emily] curated to fit with the aesthetic. We may get a clip from an old educational film, or something shot with a composite video camera. If any computer graphics pop up, they will be primitive vector graphics. This is not the place to seek ultra high definition content.

As a final nod to common artifacts of electronics history, [Emily] wrote an user’s manual for the Port-A-Vid. Naturally it’s not a downloadable PDF, but a stack of paper stapled together. Each page written in the style of electronics manuals of yore, treated with the rough look of multiple generation photocopy rumpled with use.

If you have to ask “Why?” it is doubtful any explanation would suffice. This is a trait shared with many other eclectic projects from [Emily]. But if you are delighted by fantastical projects hailing from an imaginary past, [Emily] has also built an ASCII art cartridge for old parallel port printers.

Continue reading “Escape To An Alternate Reality Anywhere With Port-A-Vid”

New Raspberry Pi 4 Compute Module: So Long SO-DIMM, Hello PCIe!

The brand new Raspberry Pi Compute Module 4 (CM4) was just released! Surprised? Nope, and we’re not either — the Raspberry Pi Foundation had hinted that it was going to release a compute module for the 4-series for a long while.

The form factor got a total overhaul, but there’s bigger changes in this little beastie than are visible at first glance, and we’re going to walk you through most of them. The foremost bonuses are the easy implementation of PCIe and NVMe, making it possible to get data in and out of SSDs ridiculously fast. Combined with optional WiFi/Bluetooth and easily designed Gigabit Ethernet, the CM4 is a connectivity monster.

One of the classic want-to-build-it-with-a-Pi projects is the ultra-fast home NAS. The CM4 makes this finally possible.

If you don’t know the compute modules, they are stripped-down versions of what you probably think of as a Raspberry Pi, which is officially known as the “Model B” form-factor. Aimed at commercial applications, the compute modules lack many of the creature comforts of their bigger siblings, but they trade those for flexibility in design and allow for some extra functionality.

The compute modules aren’t exactly beginner friendly, but we’re positively impressed by how far Team Raspberry has been able to make this module accessible to the intermediate hacker. Most of this is down to the open design of the IO Breakout board that also got released today. With completely open KiCAD design files, if you can edit and order a PCB, and then reflow-solder what arrives in the mail, you can design for the CM4. The benefit is a lighter, cheaper, and yet significantly more customizable platform that packs the power of the Raspberry Pi 4 into a low-profile 40 mm x 55 mm package.

So let’s see what’s new, and then look a little bit into what is necessary to incorporate a compute module into your own design.

Continue reading “New Raspberry Pi 4 Compute Module: So Long SO-DIMM, Hello PCIe!”

Cheap All-Sky Camera Is Easy As Pi

Combining a Raspberry Pi HQ camera and a waterproof housing, [jippo12] made an all-sky, all-Pi meteorite tracking camera on the cheap, and it takes fantastic photos of the heavens. It’s even got its own YouTube channel. Inside there’s a Raspberry Pi 4 plus an HQ camera to take the pictures. But there’s also a system in place to keep everything warm and working properly. It uses a Raspberry Pi 3+, a temperature sensor, and a relay control HAT to pump pixies through a couple of 10 W resistors, making just enough heat to warm up the dome to keep it from fogging.

A few years ago, we reported that NASA was tracking meteorites (or fireballs, if you prefer) with a distributed network of all-sky cameras — cameras with 360° views of the night sky. Soon after, we found out that the French were doing something quite similar with their FRIPON network. We pondered how cool it would be to have a hacker network of these things, but zut alors! Have you seen the prices of these things?  Nice hack, [jippo12]!

Rather do things the old fashioned way? Dust off that DSLR, fire up that printer, and check out OpenAstroTracker.