Name of the game

Repairing And Reviewing A 1976 PONG Clone

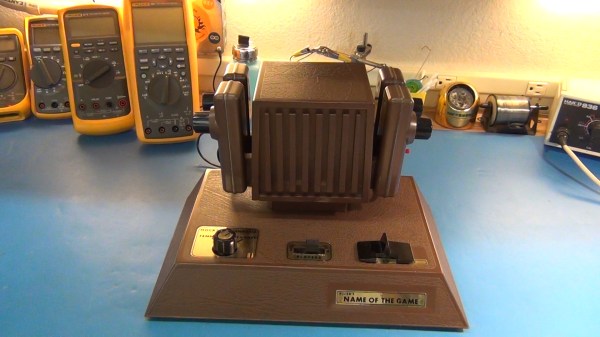
Hackaday alum [Todd] has been searching for an old PONG clone for the last two years. This variant is called, “The Name of the Game”. [Todd] has fond memories of playing this game with his sister when they were young. Unfortunately, being the hacker that he is, [Todd] tore the game apart when he was just 14 to build his own Commodore 64 peripherals. He’s been wanting to make it up to his sister ever since, and he finally found a copy of this game to give to his sister last Christmas.

After opening up the box, [Todd] quickly noticed something strange with the power connector. It looked a bit charred and was wiggling inside of the enclosure. This is indicative of a bad solder joint. [Todd] decided he’d better open it up and have a look before applying power to the device.

It was a good thing he did, because the power connector was barely connected at all. A simple soldering job fixed the problem. While the case was still opened, [Todd] did some sleuthing and noticed that someone else had likely made repairs to several other solder joints. He also looked for any possible short circuits, but everything else looked fine. The system ended up working perfectly the first time it was started.

The end of the video shows that even after all this time, simple games like this can still capture our attention and be fun to play for hours at a time. [Todd] is working on part 2 of this series, where he’ll do a much more in-depth review of the system. You can watch part 1 below. Continue reading “Repairing And Reviewing A 1976 PONG Clone”

tweeter

Repairing Burnt Speakers With A Steady Hand

[Martin] seems to have a knack for locating lightly damaged second-hand audio gear. Over the years he’s collected various types of gear and made various repairs. His most recent project involved fixing two broken tweeter speakers.

He first he needed to test the tweeters. He had to remove them from the speaker cabinet in order to gain easier access to them. The multimeter showed them as an open-circuit, indicating that they had likely been burned. This is an issue he’s seen in the past with this brand of speaker. When too much power is pumped through the speaker, the tiny magnet wire inside over heats and burns out similar to a fuse.

The voice coil itself was bathing in an oily fluid. The idea is to help keep the coil cool so it doesn’t burn out. With that in mind, the thin wire would have likely burned somewhere outside of the cooling fluid. It turned out that it had become damaged just barely outside of the coil. [Martin] used a sharp blade to sever the connection to the coil. He then made a simple repair by soldering the magnet wire back in place using a very thin iron. We’ve seen similar work before with headphone cables.

He repeated this process on the second tweeter and put everything back together. It worked good as new. This may have ultimately been a very simple fix, but considering the amount of money [Martin] saved on these speakers, it was well worth the minimal effort.

Repairing A Router Plagued By Capacitors

[psgarcha]’s modem/router comes straight from his internet provider, is on 24/7, and is built with the cheapest components imaginable. Eventually, this will be a problem and for [psgarcha], this problem manifested itself sooner than expected. Fortunately, there was a soldering iron handy.

The problems began with a boot loop – starting the router up, watching the blinking LEDs, and watching these lights follow the same pattern forever. Initially thinking this would be a problem with the firmware, [psgarcha] did the only thing he could do – take it apart. Inside, he found some bulging capacitors. Unsheathing his iron and replacing the obviously faulty components, [psgarcha] plugged the router in and had everything work. Great. Until those caps failed again a few months later.

There was obviously something wrong with the circuit, or wrong with the environment. Figuring it was hot out anyway, [psgarcha] replaced those caps again and added a fan and a small heatsink to the largest chip on the board. This should solve any overheating problems, but the real testing must be done in summer (or putting the router in a well-insulated enclosure). It’s an easy fix, a good reminder of exactly how often caps fail, and a great example of reducing the electronic cruft building up in landfills.

Philly Fixers Guild Will Teach You How To Fish

One crisp Saturday afternoon a couple of weeks ago, the Philly Fixers Guild held its second Repair Fair. Not second annual, mind you; the first fair was held in September. People came from miles around, hauling with them basement and attic treasures that needed, well, fixing. [Fran] is one of the Guild’s volunteer fixers, and she shot some video of the event which is waiting for you after the break.

The Philly Fixers Guild aims to promote sustainability in the surrounding community by teaching interested parties to repair their possessions that might otherwise end up in a landfill. The fairs are not meant to be a drop-off repair site—attendees are expected to stay and learn about what’s wrong with their item and how it can or can’t be fixed.

The Guild is open to volunteers who are interested in teaching people how to fish, as it were. Expertise is not limited to electronics repair; guild members are just as interested in teaching people how to sew a replacement button on their winter coat or building that thing they bought at IKEA.

Nowhere near Pennsylvania? Several groups like the Philly Fixers Guild have already been established in a few larger US cities. If you’re not near any of those either (and we can sympathize), you could do worse than to start your own. If you’re part of a ‘space, creating such a guild would be a good way to spread the word about it and the gospel of DIY.

In the video, [Fran] discusses an Atari 2600’s control problem with its owner. She re-seats the 6532 RIOT chip and explains that this may or may not have solved the problem. If not, [Fran] is confident that new old stock chips are available out there on the hinterwebs. There might still be some landfill carts on ebay if the owner gets it up and running. [Fran] also fixes the controls on a Peavey amp and gets some Pink Floyd to issue forth from a previously non-functioning Zenith portable AM/FM radio that’s old enough to have a snap cover.

Continue reading “Philly Fixers Guild Will Teach You How To Fish”

Improving The T-962 Reflow Oven

The T-962A is a very popular reflow oven available through the usual kinda-shady retail channels. It’s pretty cheap, and therefore popular, and the construction actually isn’t abysmal. The controller for this oven is downright terrible, and [wj] has been working on a replacement firmware for the horribly broken one provided with this oven. It’s open source, and the only thing you need to update your oven is a TTL/UART interface.

[WJ] bought his T-962A even after seeing some of the negative reviews that suggested replacing the existing controller and display. This is not in true hacker fashion – there’s already a microcontroller and display on the board.

The new firmware uses the existing hardware and adds a very necessary modification: stock, the oven makes the assumption that the cold-junction of the thermocouples is at 20°C. The controller sits on top of an oven with two TRIACs nearby, so this isn’t the case, making the temperature calibration of the oven slightly terrible.

After poking around the board, [WJ] found an LPC2000-series microcontroller and a spare GPIO pin for a 1-wire temperature sensor. The temperature sensor is placed right next to the terminal block for the thermocouples for proper temperature sensing.

All the details of updating the firmware appear on a wiki, and the only thing required to update the firmware is a serial/USB/UART converter. A much better solution than ripping out the controller and replacing it with a custom one.

Fixing Ghost Touch In The OnePlus One

The OnePlus One is the flagship phone killer for 2014, available only by invite, and thus extremely cool. So far it’s a limited production run and there will, of course, be problems with the first few thousand units. When [vantt1] got his One, he noticed a few issues with the touch screen. Some touches wouldn’t be registered, typing was unpredictable, and generally, the touchscreen was unusable. [vantt] had seen this before, though, so with a complete teardown and a quick fix he was able to turn this phone into something great.

[vantt] realized the symptoms of a crappy touchscreen were extremely similar to an iPad mini that had recently had its digitizer replace. From the Foxconn plant, the digitizer in the iPad mini is well insulated from the aluminium enclosure. When the screen and digitizer are replaced, the cable connecting it to the rest of the iPad can come in contact with the case. This leads to the same symptoms – missed touches, and unpredictable typing.

Figuring the same cure will fix the same symptoms, [vantt] tore apart his OnePlus One and carefully taped off the digitizer flex cable. Reassembling the phone, everything worked beautifully, and without any extra screws in the reassembly process. You can’t do better than that.

Solving Arduino’s Stk500_getsync() Error

[psgarcha] took a year-old Arduino Uno on an international trip and upon returning found something was wrong. Every time he would try to upload, he would get the dreaded avrdude error, ‘stk500_getsync(): not in sync resp=0x00’. The Rx light would blink a few times during the attempted upload, but the tx light did not. Somehow, something was terribly wrong with the ‘duino, and [psgarcha] dug deep to figure out why.

To test the quality of the Arduino’s serial connection, [psgarcha] performed a loopback test; basically a wire plugged into the Tx and Rx pins of the Arduino. Sending a short message through the serial port showed the problem wasn’t the USB cable, the ATmega16u2 on the ‘duino, or any traces on the board. This would require more thought.

The main reason for the error would then be no communication between the computer and the ‘duino, the wrong COM port selected, the wrong board selected in the Arduino text editor, or timing errors or a corrupt bootloader. The first three errors were now out of the question, leaving timing errors and a corrupt bootloader. Troubleshooting then moved on to ordering a new programmer, and still this didn’t work with the broken Uno.

Frustrated with one of the greatest failures to become an Arduino tinkerer, [psgarcha] took a good, long look at the Uno board. He glanced over to an Arduino Mega board. Something looked different. On the Uno, the resonator had blown off. Problem found, at least.

Replacing the blown part with a hilariously large can crystal oscillator, [psgarcha] was back in business. This isn’t how you would fix 99% of getsync() errors, and it’s difficult imagining a situation where a this part would randomly blow, but if you’re ever looking at a nearly intractable problem, you need to start looking at what really shouldn’t fail.

Resonator my fix (1)

Awesome rework, though.