[Anton] recently acquired a broken Nintendo 3DS. When the power button was pressed, the device would start booting up only to shut back down after flashing a blue light and making a popping sound. It turns out this problem is pretty common with the 3DS.
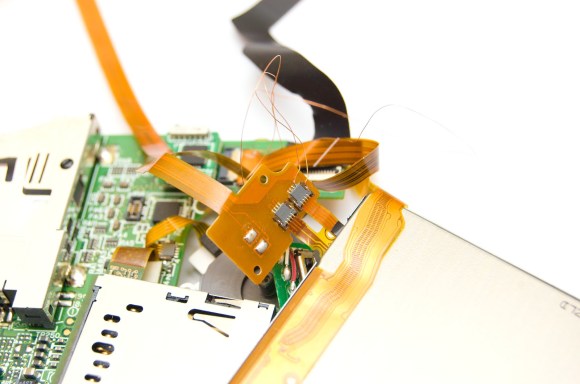
[Anton] could have tossed this device into the landfill, but where’s the fun in that? Instead, he cracked the device open like any self-respecting hacker would. It didn’t take him long to discover two broken flex ribbon cables. [Anton] could have then searched for replacement cables, but his inner hacker told him he could repair this himself. He carefully scraped the insulation off of the broken traces and then soldered on some hair thin wires to bridge the gap.
All that was left to do was to glue the wires securely in place and feed them back through the hinges. This project is a great example of how a little determination and know-how can keep a useful device from the landfill. If you attempt this repair yourself, you may find this 3DS teardown to be a helpful reference. What devices have you been able to save from an untimely demise?
 [Luke] isn’t able to declare total victory yet.


