Eddie The Balance Bot

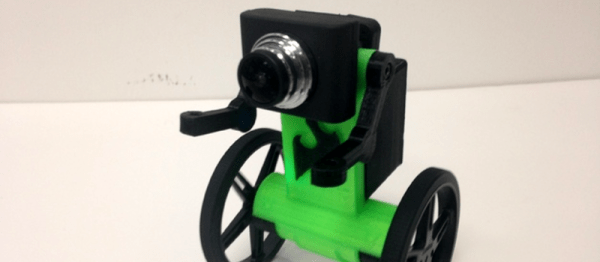
Eddie is a surprisingly capable tiny balancing robot based around the Intel Edison from which it takes its name.

Eddie’s frame is 3D printed and comes in camera and top hat editions. The camera edition provides space for a webcam to be mounted, since the Edison has enough go power to do basic vision. The top hat edition just lets you 3D print a tiny top hat for the robot.

The electronics are based around the Edison board and Sparkfun’s set of, “Blocks” designed for it. This project needs the battery block, the H-Bridge block, the GPIO block, and the USB block along with a 9DOF block for balancing. It’s, somewhat unfortunately, not a cheap robot. The motors are Pololu all-metal gearmotors with hall-effect sensors acting as encoders.

We’re really impressed with [diabetemonster]’s design and documentation on the robot. Full source code is provided along with a very nice build guide to get the platform going fast.

There are a few videos of it in action, available after the break. They show it handling situation such as a load being placed on the robot and slopes as well as bonus features like dancing and remote control.

Continue reading “Eddie The Balance Bot”

Glue Your Sumo Robot To The Mat With Custom Sticky Tires

Mini Sumo seems like one of those hobbies that starts out innocently enough, and ends up with a special room in the house dedicated to it. One day you’re excitedly opening up your first Basic Stamp kit, and the next you’re milling out mini molds on a mini lathe to make mini extra sticky tires.

[Dave] started out trying to find a part from the local big box store that was just a little bigger than the wheel he wanted to rubberize. He set the wheel inside a plumbing cap and poured the urethane in. It worked, but it required a lot of time with a sharp knife to carve away the excess rubber.

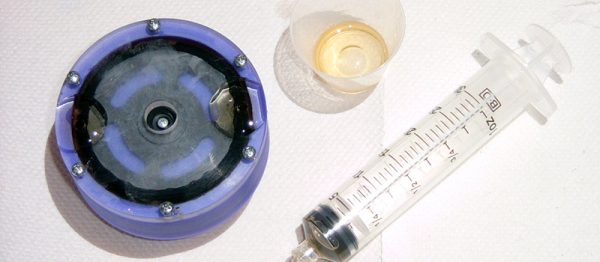
In the meantime he acquired a Sherline Mini Mill and Lathe. With the new tools available to him, he made a new mold out of a bit of purple UHMW and some acrylic. This one produced much nicer results. Using a syringe he squeezed resin into the mold through a hole in the acrylic. Much less cleanup was needed.

He later applied these methods to smaller, wider wheels as his mini sumo addiction took a stronger hold on his life.

Perfecting The DIY BB-8

Until about a year ago, the Droid Builder’s Club had just about everything figured out to build any sort of robot from Star Wars. Building an R2D2 clone was easy, and even R5 and R6 droids were common. There were even a few attempts to clone IG-88. Then Disney happened, The Force Awakens was released, and the world was introduced to the hero of the third trilogy, BB-8. Several people have gone to incredible lengths to replicate BB-8 as a unique homebrew robot, but no one has put in more effort than [James Bruton]. He’s wrapping up his third DIY version of BB-8.

[James]’ third version of the BB-8 droid has two older brothers we’ve seen before. [James] started the construction of his earliest BB-8 not long after the trailer for The Force Awakens, and long before we knew the makers of Sphero robot toys weren’t behind this hero puppet. Since then, a number of improvements have been made to the drive system, allowing the third version of [James]’ BB-8 to turn on a dime and roll just like its on-screen counterpart.

Right now, [James] is about 80% done with his newest droid, with just a bit extra circuitry to have all the functionality seen on the ‘real’ stage droid. Like most of the R2D2 builds out there, there might be enough room inside this droid for some additional capabilities. There appears to be enough space behind one of the body panels for an extending arm, making the possibility of a flamethrower thumbs up very real.

[James] is also one of the judges for this year’s Hackaday Prize, and will (hopefully) be at this year’s Hackaday Prize award ceremony and Hackaday SuperConference in San Francisco. If a set of highly likely probabilities pans out, [James]’ BB-8 will also be at the con, and we’ll see it careening down that one weird block of Lombard Street. Awesome.

Entire playlist for the build of BB-8 v.3 below. Pictures are available here.

Continue reading “Perfecting The DIY BB-8”

Gyroman Walks With Just One Motor

For some reason, we seem to really want our robots to walk on two legs like we do. And this despite how much the robots themselves want to be made out of motors, which match up so naturally with wheels. The result is a proliferation of inventive walking mechanisms. Here’s another.

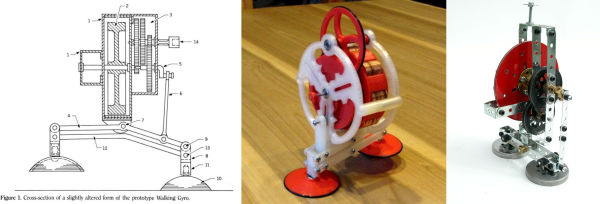
Gyroman is a 3D printed gyroscope with legs. The gyroscope is geared down to lift one leg and then the other. First-semester physics, that we still find a little bit magical, makes the gyro precess and the robot turns a bit. Time these just right and it walks. See the video below for a demo. (Admittedly, Gyroman looks like he’s had a bit too much to drink as he winds down.)

Continue reading “Gyroman Walks With Just One Motor”

Hacklet 106 – Robots That Teach

One of the best ways to teach electronics and programming is with hands-on learning. Get the concepts off the computer screen and out into the real world. Students of all ages have been learning with robots for decades. Many older Hackaday readers will remember the turtle robots. These little ‘bots would drive around drawing shapes created in the logo programming language. This week’s Hacklet is all about the next generation of robots that teach electronics, mechanics, programming, and of course, hacking. So let’s check out some of the best educational robot projects on Hackaday.io!
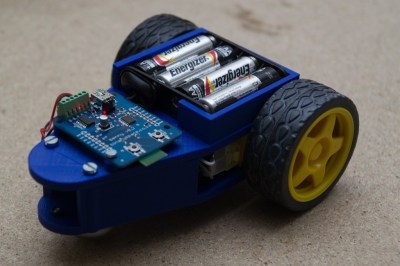
edubotWe start with [Tom Van den Bon] and Edubot Controller (Benny). Buying one or two robots can get expensive. Equipping a classroom full of them can break the bank. [Tom] is hoping to make robots cheaper and more accessible with Edubot, his entry in the 2016 Hackaday prize. Edubot rides on a 3D printed frame with low-cost gear motors for a drive system. Edubot’s brain is an STM32F042, a low-cost ARM processor from ST micro. The micro and motor drives are integrated into a custom board [Tom] designed. He’s has even begun creating lesson plans so students of various ages and skill levels can participate and learn.
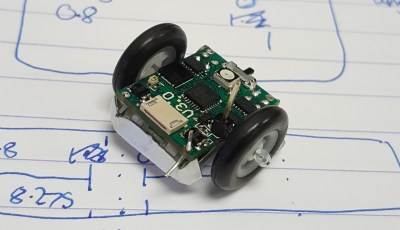
microbotNext up is [Joshua Elsdon] with Micro Robots for Education. Big robots can be intimidating. They can also cause some damage when hardware and software created by budding engineers doesn’t operate as expected. Tiny robots though, are much easier to wrangle. [Joshua ] may have taken tiny to an extreme with these robots. Each robot is under 2 cm square. The goal is for each one to cost less than  £10 to produce. These micro bots have big brains with their ATmega328P micro controllers. [Joshua] is currently trying to figure out a low-cost way to produce wheels for these robots.
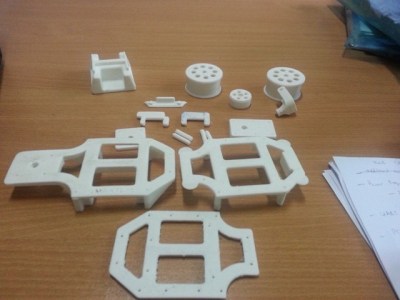
Next we have [shamylmansoor] with 3D printed mobile robot for STEM education. Robots are expensive, and international shipping can make them even more expensive. [Shamyl] is shooting for a robot which can be made locally in Pakistan. 3D printing is the answer. The robot’s chassis can be printed on any FDM printer. Wheels,and tires are low-cost units. Motors are RC servos modified for continuous rotation. The brains of the robot is an Arduino Mega 2560, which should provide plenty of inputs for sensors. [Shamyl] even included a solderless breadboard so students can prototype circuits and sensors right on the robot’s body.
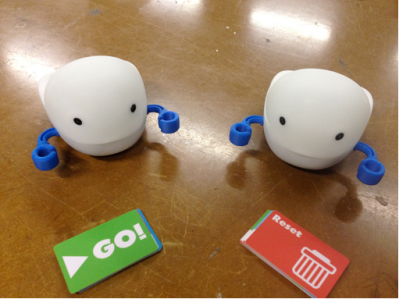
 

plobotFinally we have [Rodolfo] with Plobot. Plobot is a robot designed for the youngest hackers – those from four to seven years old. [Rodolfo] designed Plobot to be programmed with RFID cards. Each card contains a command such as move forward, turn, start, and reset. Many of the language mechanics are inspired by the Scratch programming language. Plobot’s processor is a Sanguino, running [Rodolfo’s] custom code. An ESP8266 allows Plobot to be connected to the outside world via WiFi. [Rodolfo] has even created a custom over the air update system for Plobot’s firmware. Plobot has already been tested with students, where it made a great showing. We’re hoping both [Rodolfo] and Plobot do well in the 2016 Hackaday Prize!

If you want more mind hacking goodness, check out our brand new educational robot list! Did I miss your project? Don’t be shy, just drop me a message on Hackaday.io. That’s it for this week’s Hacklet, As always, see you next week. Same hack time, same hack channel, bringing you the best of Hackaday.io!

Chomper Antweight Robot Kraves Combat

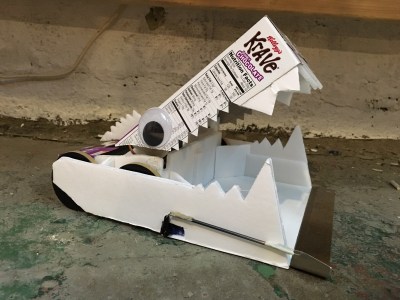
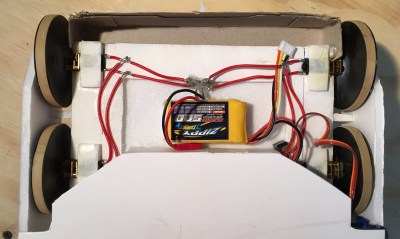
Antweight combat robots are really lightweight. [Carter Hurd] used leftover materials to create a dustpan robot with a chomper (comically made from a Krave cereal box) to hold captured competitors in place. The main body is made of foam board. The only metal is in the front wedge which is lifted by a servo to help trap the other robot.

[Carter] fully expects the foam to be eaten by competitors during the match. This led him to position his electronics at the center of the robot to keep it from being damaged. We’ll have to see how well that works. He’s hoping for an advantage over vertical flip weapons since they may simply cut through the foam without getting enough purchase for a flip.

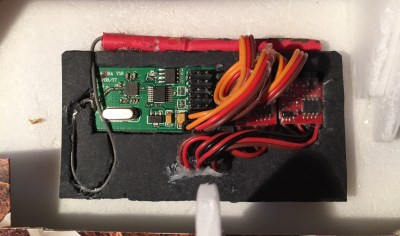
The electronics is on a modular board so it can be easily moved from one robot to another. All that is on the board is the RC receiver and two FingerTech Tiny Electronic Speed Controllers. A battery is slung underneath.

Best of luck for Krave ‘bot eating up the opposition. We’ve seen some other light weight designs in the cardboard competitors from the Columbia Gadget Works makerspace.

Continue reading “Chomper Antweight Robot Kraves Combat”

Simple Robot Arm With Steppers Has Pleasingly Smooth Motion

The usual go-to when building a simple robot arm is the ever-pervasive hobby servo. However, these devices are not precise, and are typically jerky and unreliable. They have their advantages, but if strength is not needed a stepper motor would provide much better motion in the same price range.

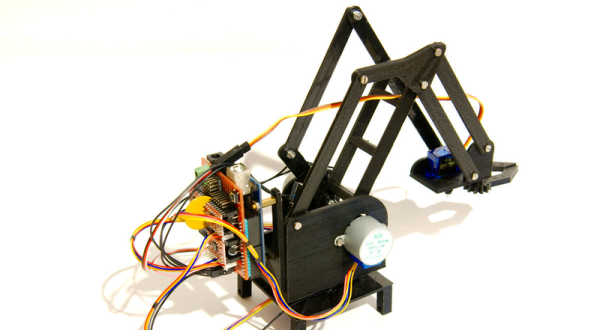
Those are the lines along which [Bajdi] was thinking when he forked the Mearm project, and adapted it for small stepper motors. First he tried printing out the servo version on thingiverse. It worked, but the parts were not ideal for 3D printing, and he didn’t like the movement.

So he purchased some 28BYJ-48 motors. These are tiny little geared steppers that tend to show up in the odd project. He modified and simplified the files in FreeCAD. With the addition of a CNC shield and an Arduino he had every thing he needed for the upgrade. A servo is now only used for the gripper.

The robot is almost certainly weaker in its payload ability, but as you can see in the before and after videos after the break, it is dramatically smoother and more accurate.

Continue reading “Simple Robot Arm With Steppers Has Pleasingly Smooth Motion”