Back in the late 80s and early 90s, a lot of young electronics hobbyists cut their teeth with BEAM robots – small robots made with logic chips and recycled walkmans that tore a page from papers on neural nets and the AI renaissance of the 80s. Twenty years later, a second AI renaissance never happened because a generation of genius programmers decided the best use of their mental faculties was to sell ads on the Internet. We got the Arduino, though, and the tiny robot family is a more than sufficient spiritual successor to the digital life of the old BEAM bots.
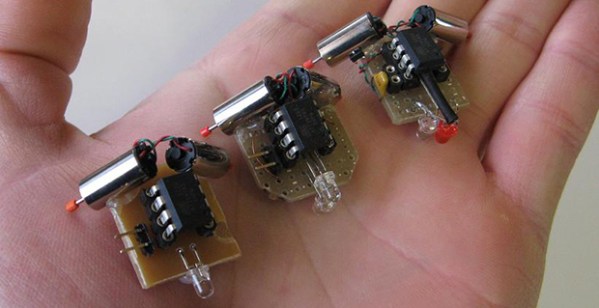
The tiny robot family is [shlonkin]’s growing collection of small autonomous vehicles that perceive the world with sensors and act with different behaviors. They all contain an ATtiny85, a small battery, two motors, and at least one phototransistor and a LED. One robot has left and right eyes pointing down, and can act as a line follower. Another has a group of LEDs around its body, allowing it to signal other bots in all directions. The goal of the project is to create a whole series of these tiny robots capable of interacting with the environment and each other. Video of the line follower below.