Shop safety is important regardless of what kind of work you do. For those of us soldering, that means extracting the noxious fumes released by heating up the solder flux used in our projects. [yesnoio] brings to us his own spin on the idea of a fume extractor, and it pulls out all stops with bells and whistles to spare.
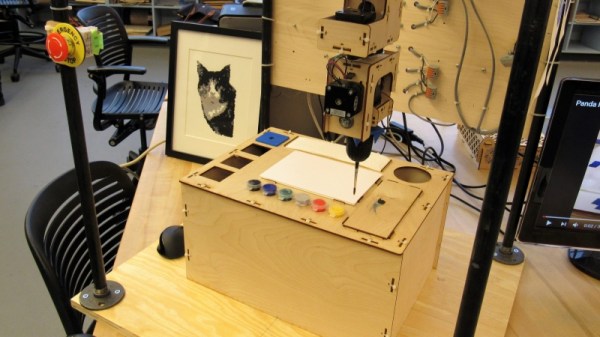
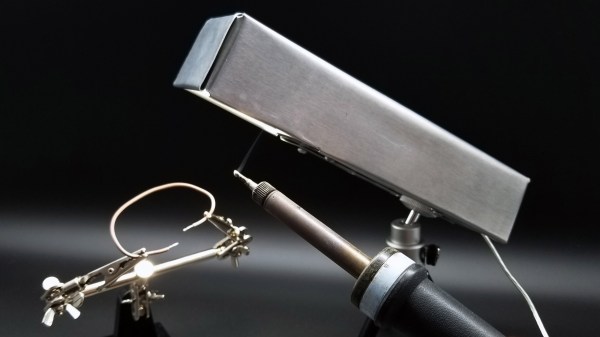
The Workbench Assistant bot, as [yesnoio] describes it, is an integrated unit mounted atop a small tripod which extends over the working area where you’re soldering. Inside the enclosure are RGBW lights, an IR camera, and an Adafruit ItsyBitsy M4 Express driving the whole show. Aside from just shining a light onto your soldering iron though, the camera senses thermal activity from it to decide when to ramp up the server-grade fan inside which powers the whole fume extraction part of the project.
But the fun doesn’t stop there, as [yesnoio] decided to go for extra style points. The bot also comes with an amplified speaker, playing soundbites whenever actions such as starting or stopping the fan are performed. These soundbites are variations on a theme, like classic Futurama quotes or R2-D2’s chattering from Star Wars. The selectable themes are dubbed “performers”, and they can be reprogrammed easily using CircuitPython. This is a neat way to give your little desktop assistant some personality, and a fun way to break up the monotony of soldering up all those tiny SMD components on your next prototype.
If even after all this you still need more than just a cute little robotic voice beeping at you to convince you to get a fume extractor for your bench, then maybe some hands-on results could give you that little push you need. And if you’re already convinced and want to build your own, there is no shortage of DIY solutions we’ve seen around here at Hackaday. Check out this one in action after the break!


Continue reading “Workbench Fume Extractor Sucks, But Has A Charming Personality”