When can you be sure that you’re logging enough data? When you’re logging all of the data! Of course there are exceptions to the above tongue-in-cheek maxim, but it’s certainly a good start. Especially since data storage on, for instance, an SD card is so easy and cheap these days, there’s almost no reason to not record most every little bit of data that your project can produce. Even without an SD card, many microcontrollers have enough onboard flash, or heck even RAM, to handle whatever you throw at them. The trick, then, is to make sense out of that data, and for me at least, that often means drawing pretty pictures.
I was impressed this week by a simple but elegant stepper motor diagnosis tool hacked together by [Zapta]. Essentially, it’s a simple device: it’s a “Black Pill” dev board, two current sensors, an EEPROM for storing settings, and a touchscreen. Given that most of us with 3D printers rely on stepper motors to get the job done, it’s certainly interesting to do some diagnostics.
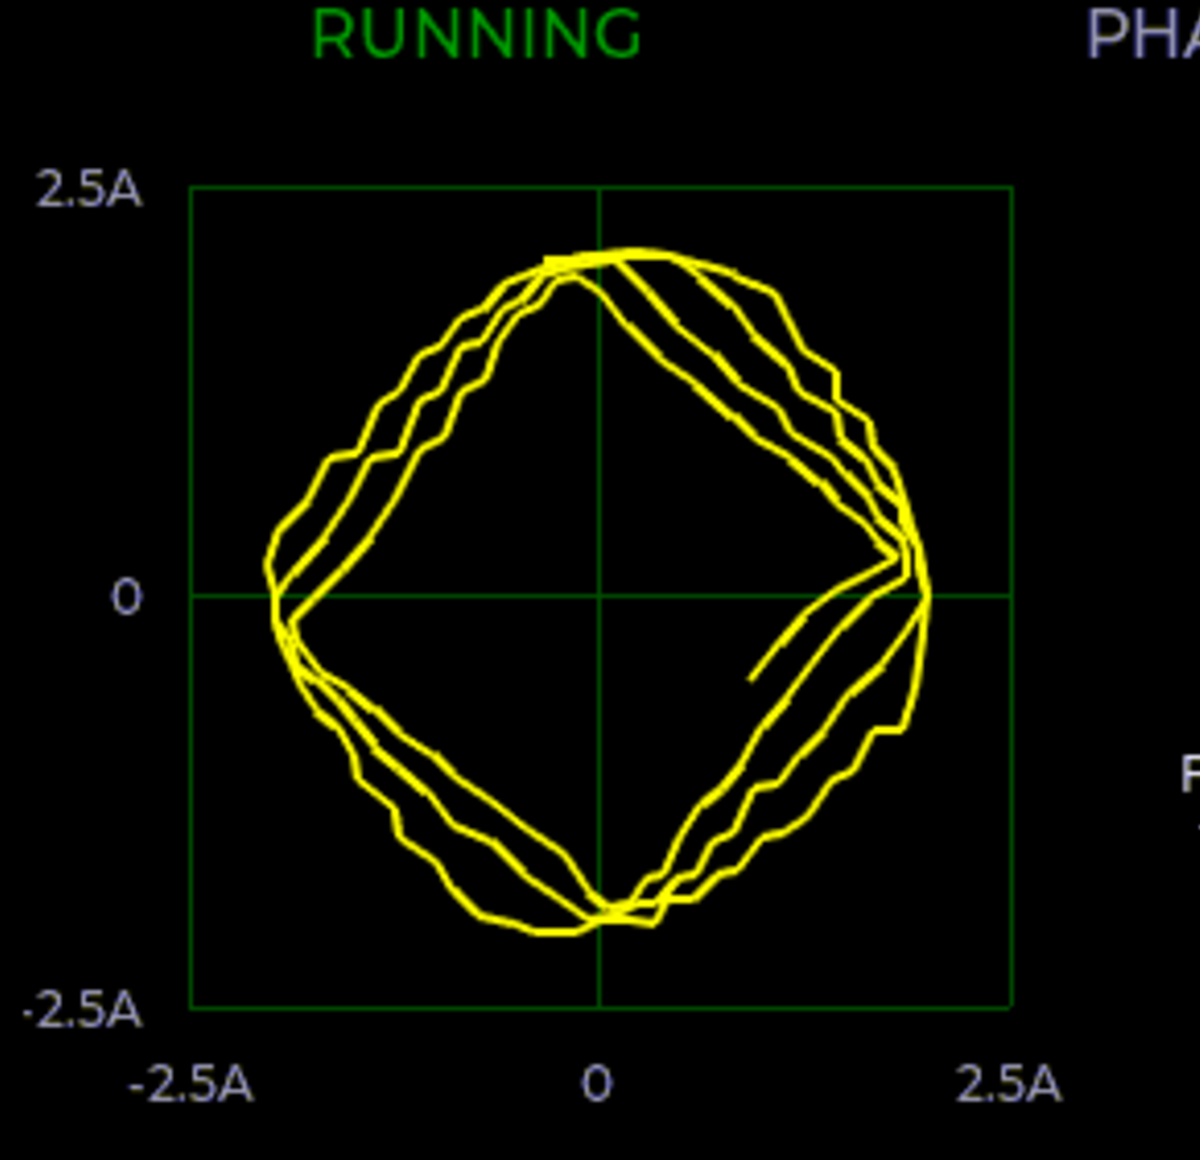
 By logging voltage and current measurement on each phase of a stepper motor, you can learn a lot about what’s going on, at least if you can visualize all that data. And that’s where [Zapta]’s tool shines. It plots current vs motor speed to detect impedance problems. Tuning the current in the first place is a snap with Lissajous patterns, and it’ll track your extruder’s progress or look out for skipped steps for you across an entire print job. It does all this with many carefully targeted graphs.
I was talking to [Niklas Roy] about this, and he said “oh check out my hoverboard battery logger“. Here we go again! It sits inline with the battery and logs current and voltage, charging or discharging. Graphs let you visualize power usage over time, and a real-time-clock lets you sync it with video of using the hoverboard to help make even more sense of the data.
So what are you waiting for? Sensors are cheap, storage is cheap, and utilities to graph your data after the fact are plentiful. If you’re not logging all the relevant data, you’re missing out on some valuable insights. And if you are, we’d love to see your projects! (Hint, hint.)