Beverage Coaster Indicates Ideal Drinking Temperature

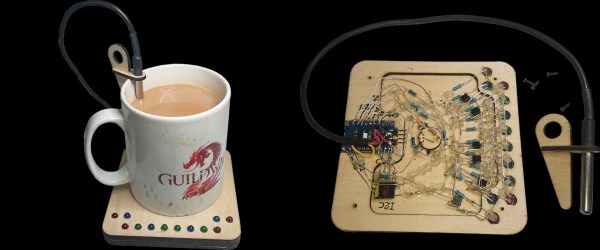
When temperatures plummet, there’s nothing like a hot beverage to keep you warmed up inside. [Palingenesis] aka [Tim] sure does fancy a nice cuppa, but only within a certain temperature range is it ideal to drink. In an attempt to signal when the time is just right, he created various iterations of a hot beverage coaster.

To be clear, this is a plywood sandwich that does not keep the beverage warm, though that would be an interesting addition to the project. Rather, it indicates when the beverage’s temperature is just right using LEDs. When it’s too hot, the red LEDs are lit. The green LEDs flash while it’s just right, and once [Tim]’s tea has gone cold, the blue LEDs take center stage.

The brains of the operation is an STM8S103F module, aka the Blue Pill, which is paired with a DS18B20 temperature sensor. [Tim]’s original coaster has one in a TO-92 package embedded in the top layer, but ultimately he went with the probe version as it reads a truer temperature by virtue of being directly in the liquid. Be sure to check out the video after the break which covers planning the original version.

If you do want to keep you drink warm, here’s an ESP8266-based solution. If you’re more into looks, check out this blinkencoaster.

Continue reading “Beverage Coaster Indicates Ideal Drinking Temperature”

The New Hotness

If there’s one good thing to be said about the chip shortage of 2020-2023 (and counting!) it’s that a number of us were forced out of our ruts, and pushed to explore parts that we never would have otherwise. Or maybe it’s just me.

Back in the old times, I used to be a die-hard Atmel AVR fan for small projects, and an STM32 fan for anything larger. And I’ll freely admit, I got stuck in my ways. The incredible abundance of dev boards in the $2 range also helped keep me lazy. I had my thing, and I was fine sticking with it, admittedly due to the low price of those little blue pills.

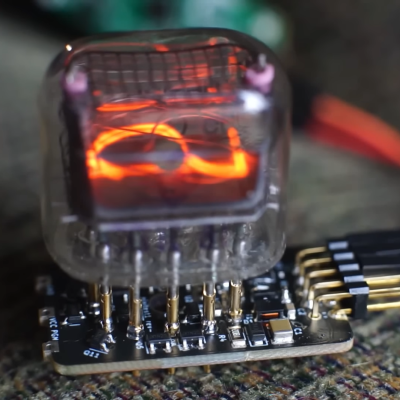
An IN-12B Nixie tube on a compact driver PCBAnd then came the drought, and like everyone else, my stockpile of microcontrollers started to dwindle. Replacements at $9 just weren’t an option, so I started looking around. And it’s with no small bit of shame that I’ll admit that I hadn’t been keeping up with the changes as much as I should have. Nowadays, it’s all ESP32s and RP2040s over here, and granted there’s a bit of a price bump, but the performance is there in abundance. But I can’t help feeling like I’m a few years back of the cutting edge.

So when I see work like what [CNLohr] and [Bitluni] are doing with the ultra-cheap CH32V003 microcontrollers, it makes me think that I need to start filling in gaps in my comfortable working-set of chips again. But how the heck am I supposed to keep up? And how do you? It took a global pandemic and silicon drought to force me out of my comfort zone last time. Can the simple allure of dirt-cheap chips get me out? We’ll see!

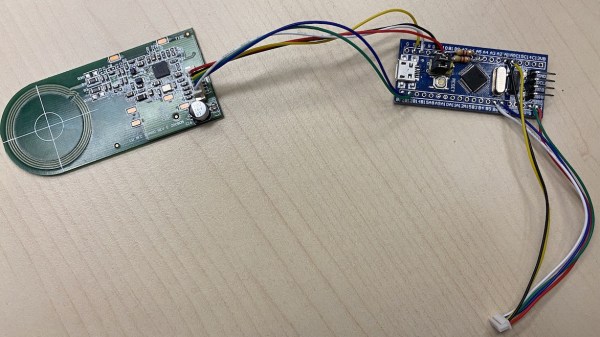
The BluePill board used for this hack, wired to the DYMO RFID reader, after all the wires for this hack have been soldered onto the BluePill board.

#FreeDMO Gets Rid Of DYMO Label Printer DRM

DYMO 550 series printer marketing blurb says “The DYMO® LabelWriter® 550 Turbo label printer comes with unique Automatic Label Recognition™”, which, once translated from marketing-ese, means “this printer has DRM in its goshdarn thermal stickers”. Yes, DRM in the stickers that you typically buy in generic rolls. [FREEPDK] didn’t like that, either, and documents a #FreeDMO device to rid us of yet another consumer freedom limitation, the true hacker way.

The generic BluePill board and two resistors are all you need, and a few extra cables make the install clean and reversible – you could definitely solder to the DYMO printer’s PCBs if you needed, too. Essentially, you intercept the RFID reader connections, where the BluePill acts as an I2C peripheral and a controller at the same time, forwarding the data from an RFID reader and modifying it – but it can also absolutely emulate a predetermined label and skip the reader altogether. If you can benefit from this project’s discoveries, you should also take a bit of your time and, with help of your Android NFC-enabled phone, share your cartridge data in a separate repository to make thwarting future DRM improvements easier for all of us. Continue reading “#FreeDMO Gets Rid Of DYMO Label Printer DRM”

Optical Theremin Makes Eerie Audio With Few Parts

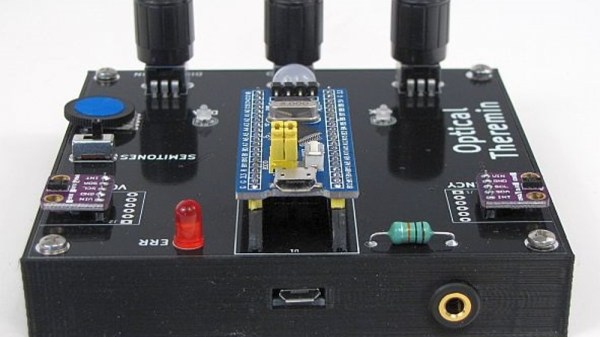
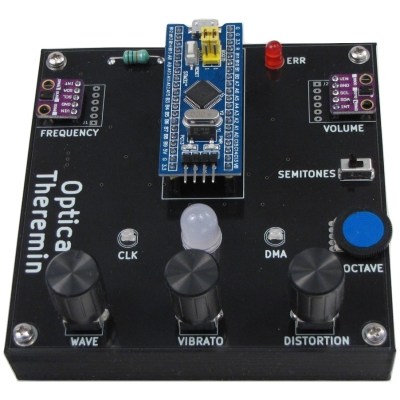
[Fearless Night]’s optical theremin project takes advantage of the kind of highly-integrated parts that are available to the modern hacker and hobbyist in all the right ways. The result is a compact instrument with software that can be modified using the Arduino IDE to take it places the original Theremin design could never go.

The design is based on a ‘Blue Pill’ STM32 MCU development board and two Avago APDS-9960 gesture sensor breakout boards, along with a few other supporting components. Where the original Theremin sensed hand proximity using two antenna-like capacitive sensors to control note frequency and volume, this design relies on two optical sensors to do the same job.

[Fearless Night] provides downloads for the schematic, code, parts list, and even 3D models for the enclosure. PCB files are also included for a convenient assembly, but since the component count is fairly low, a patient hacker should be able to get away with soldering it up by hand without much trouble.

This project creates the audio using the STM32’s Direct Digital Synthesis (DDS) capability and a simple low-pass filter, and has several ways to fine-tune the output. What’s DDS? Our own Elliot Williams explains it in terms of audio output for microcontrollers, and if you’d like a more comprehensive overview, Bil Herd will happily tell you all about it.

Test Your ‘Blue Pill’ Board For A Genuine STM32F103C8 MCU

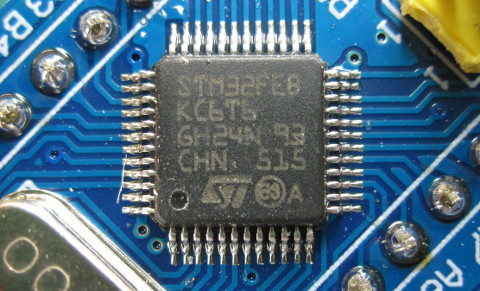
With the market for STM32F103C8-based ‘Blue Pill’ boards slowly being overrun with boards that contain either a cloned, fake or outright broken chip, [Terry Porter] really wanted to have an easy, automated way to quickly detect whether a new board contains genuine STM32 silicon, or some fake that tries to look the part. After more than a year of work, the Blue Pill Diagnostics project is now ready for prime time.

We have covered those clone MCUs previously. It’s clear that some of those ‘Blue Pill’ boards obviously do not have a genuine STM32 MCU on them, as they do not have the STM32 markings on them, while others fake those markings on the package and identifying can be hard to impossible. Often only testing the MCU’s actual functionality can give clarity on whether it’s a real STM32 MCU.

These diagnostics allow one to test not only the 64 kB of Flash, but also the 64 kB of ‘hidden’ Flash that’s often found on these MCUs (rebadged 128 kB STM32F103 cores). It further checks the manufacturer JDEC code and uses a silicon bug in genuine STM32F1xx MCUs where the BGMCU_IDCODE cannot be read without either SWD or JTAG connected.

Another interesting feature of Blue Pill Diagnostics is using Mecrisp-Stellaris Forth as its foundation, which allows for easy access to a Forth shell via this firmware as well, not unlike MicroPython and Lua, only in a fraction of the Flash required by those. We have previously written about using Mecrisp-Stellaris in your projects.

Portable, Digital Scoreboard Goes Anywhere

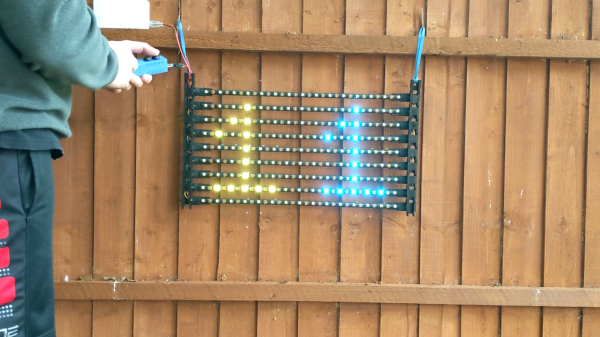
It’s that time of year in both hemispheres — time to get outside and play before it gets unbearably hot (or cold). No matter what your game, don’t keep score in your head or with piles of rocks — make yourself a portable, fold-able scoreboard like [LordGuilly] did and be on the bleeding edge of display technology. It’s really more roll-able than fold-able, which is awesome because you get to unfurl it like a boss.

All you need is a place to hang it up and you’re good to go. This thing runs on a beefy 10,000 mAH USB power bank, and [LordGuilly] says that it’s easy to read even on really sunny days. As you may have guessed, those are WS2812 strips and they are set into rectangular PVC bars. The bars are set equidistant from each other in a frame made from modified version of cable tracks — plastic chain links for cable management.

Good looks aside, we especially like that there are two controller options here. If you want to assign a dedicated scorekeeper, there’s a handled version that uses an STM32 blue pill and is wired to the display. But if you’re short on people, use the ESP8266 version and update the score with the accompanying app. Check out the demo after the break so you can see it in action.

We’ve seen a few scoreboards over the years, including this beauty that’s meant for indoor games.

Continue reading “Portable, Digital Scoreboard Goes Anywhere”

Reliable Frequency Reference From GPS

GPS technology is a marvel of the modern world. Not only can we reliably locate positions on the planet with remarkable accuracy and relatively inexpensive hardware, but plenty of non-location-based features of the technology are available for other uses as well. GPS can be used for things like time servers, since the satellites require precise timing in order to triangulate a position, and as a result they can also be used for things like this incredibly accurate frequency reference.

This project is what’s known as a GPSDO, or GPS-disciplined oscillator. Typically they use a normal oscillator, like a crystal, and improve its accuracy by pairing it with the timing signal from a GPS satellite. This one is a standalone model built by [Szabolcs Szigeti] who based the build around an STM32 board. The goal of the project was purely educational, as GPSDOs of various types are widely available, but [Szabolcs] was able to build exactly what he wanted into this one including a custom power supply, simple standalone UI, and no distribution amplifier.

The build goes into a good bit of detail on the design and operation of the device, and all of the PCB schematics and source code are available on the projects GitHub page if you want to build your own. There are plenty of other projects out there that make use of GPS-based time for its high accuracy, too, like this one which ties a GPS time standard directly to a Raspberry Pi.