Get Your Acrylic Bends Just Right

Acrylic is a popular material. It’s easy to find, attractive, and available in all manner of colors, thicknesses, and grades. Being a thermoplastic, it’s also simple to apply heat and form it in various different ways. If you’re wanting to build parts out of sheet acrylic, you might find a purpose-built bender useful. [DIY Perspective] built just such a tool to get the job done.

Plywood is used as the base of the tool, and several off-the-shelf hinges are used to make the folding apparatus. Stops are cut out of scrap wood to allow the bender to accurately recreate angles of 45, 90, and 135 degrees. Heat is supplied via a nichrome wire, powered by a laptop power supply and a PWM controller. This allows the temperature of the wire to be controlled, to avoid melting or otherwise damaging the acrylic being bent.

If you find yourself routinely working with acrylic, you might find this tool useful to have around the workshop. Vacuum forming may also be relevant to your interests. Video after the break.

Continue reading “Get Your Acrylic Bends Just Right”

Mechanical Integration With KiCad

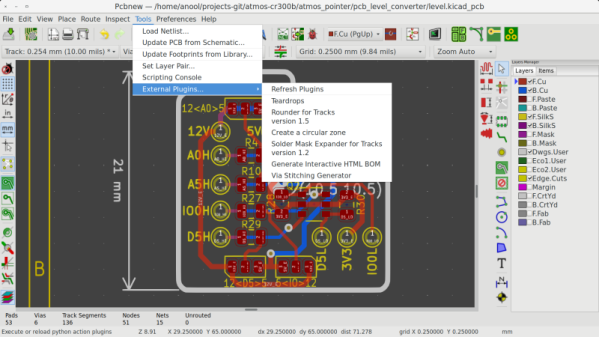
Eagle and Fusion are getting all the respect for integrating electronic and mechanical design, but what about KiCad? Are there any tools out there that allow you to easily build an enclosure for your next printed circuit board? [Maurice] has one solution, and it seamlessly synchronizes KiCad and FreeCAD. KiCad will give you the board, FreeCAD will give you the enclosure, and together you have full ECAD and MCAD synchronization.

This trick comes in the form of a FreeCAD macro (on the Github, with a bunch of documentation) that loads a KiCad board and components into FreeCAD and export them as a STEP file. You can align the KiCad board in FreeCAD, convert STEPs to VRMLs, check interference and collision, and create an enclosure around a KiCad board.

KiCad has gotten some really great visualization tools over the past few years, and we would be remiss if we didn’t mention it’s one of the best ways to visualize a completed circuit board before heading to production. Taking that leap from electronic CAD to mechanical CAD is still something that’s relatively rare in the KiCad ecosystem, and more tools to make this happen is always wanted.

JigFab Makes Woodworking Easier

Woodworking is an age-old craft that requires creativity and skill to get the best results. Experienced hands get the best results, while the new builder may struggle to confidently produce even basic pieces. JigFab is here to level the playing field somewhat.

Much of the skill in woodworking comes with mastering the various joints and techniques required to hold a piece together. Cutting these joints often requires specialized tools and equipment – ideally, some sort of jig. These jigs can be difficult to build in themselves, and that’s where JigFab shines.

The workflow is straightforward and quite modern. A piece is designed in Autodesk Fusion 360. Various joints can then be defined in the model between individual parts. JigFab then generates a series of laser cut constraints that can be used with power tools to easily and accurately cut the necessary parts to build the final piece.

It’s an impressive technology which could rapidly speed the workflow of anyone experimenting with woodwork and design. There’s even smart choices, like having a toolkit of standard predefined elements that reduce laser cutting time when producing new constraints. If you’re eager to get stuck in to woodwork, but don’t know where to start, don’t worry – we’ve got a primer for that. Video after the break.

Continue reading “JigFab Makes Woodworking Easier”

A Breadboard Power Supply That’s More Universal Than Most

A favorite project of ours is the humble breadboard power supply. Yes, you can still prototype on breadboards, no, you don’t need an entire bench power supply to prototype on one, and every breadboard made in the last forty years has had the same pattern of holes. There’s plenty of opportunity to improve the breadboard power supply.

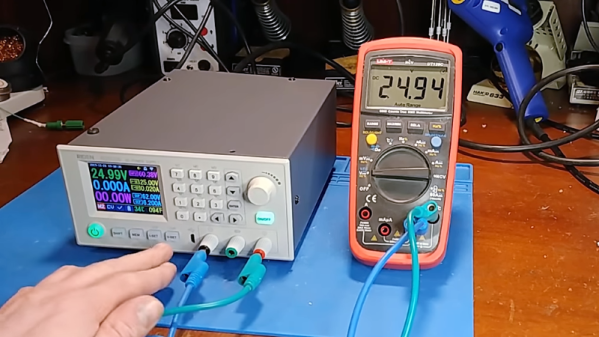
One of the best ones we’ve seen yet comes from [John Loeffler]. It’s a simple, constant voltage power supply that’s variable from 0.6 V all the way up to 12 V. It’s powered through a micro USB port, and you get 3.3 V and 5 V rails automagically. There’s even voltage indication.

The mechanical design of this power supply is simple enough, with pins that plug into the detachable power rails on either side of the breadboard. Where it gets interesting is the voltage indication. There’s a resistor ladder and a series of LEDs to indicate the voltage on the variable side of this power supply. Add in some modern switched mode power supply based on the MIC5225 series of chips (a popular regulator that’s very nice for the price) and you have a completely functional power supply hanging off a breadboard.

While it’s not a really nice rack mounted bench power supply that weighs a lot, or even one of the cheapo bench supplies, this does fulfill a need. Sometimes you just need a simple power supply for a breadboard, and this is one of the best ones we’ve seen yet.

Cast Aluminium Becomes A Machine Tool

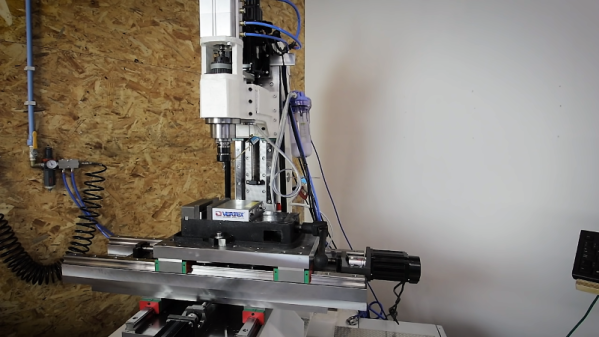
Shaper tools were, at one time, a necessary tool for any machine shop. With a shaper and a lathe, you can rebuild or manufacture almost anything. At the very least, you can make the tool to manufacture anything. For the last few months, [Makercise] has been working on building his own homemade shaper, and now it’s making chips. (YouTube, also embedded below.)

First off, what exactly is a metal shaper? It’s not commonly seen in machine shops these days, but at the turn of the last century, these were popular and practical machines to cut keyways into a piece of stock. Effectively, it’s kind of like a jigsaw, in that it cuts with a reciprocating action and is able to plane the entire surface of a metal plate. Today, if you want to surface a piece of stock, you would just throw it onto the Bridgeport, but there are still some use cases for a metal shaper.

The design of this shaper comes directly from the Gingery series of books, the famous series of books that are step-by-step instructions on how to build a machine shop starting from the technology of rubbing two sticks together. [Makercise] has built one of these machines before, the metal lathe, and the second in the Gingery series of books after a foundry, and the next book is instructions on how to build a mill.

Sure, [Makercise] is using modern tools and modern techniques to build this shaper. There’s a CNC machine involved, and nobody is going to Greenland to make aluminum anymore. Still, this is a flat piece of metal made from scratch, an a great example of how far you can take home machining in a post-apocalyptic scenario.

Continue reading “Cast Aluminium Becomes A Machine Tool”

A USB -C Soldering Iron For Weller Tips

There was a time when a decent temperature controlled soldering iron took the form of the iron itself and a box of electronics, but now it’s just as likely to be a miniaturised affair with the temperature controller built into a slim and lightweight handle. Irons such as the Miniware TS series have become firm favourites, displacing a traditional soldering station for many.

[Thomas.lepi] has combined the best of both worlds, with a TS-style microprocessor-driven handle driving the familiar Weller RT elements. Its interface is very simple, but through its USB power socket a serial port provides opportunities for adjustment. Providing control is an STM32F042G6U6 ARM Cortex M0 microcontroller, with USB power control coming from an STUSB4500QTR .

If you are used to irons such as the Miniware TS100 then this one with its smartly 3D-printed case will be very straightforward to use. Whether or not the ready availability of the TS100 or its USB-C sibling would remove the need to build this iron is up to you, but then again that’s hardly the point. The Weller tips are some of the better ones of their type, so perhaps that might make this project worth a second look.

Continue reading “A USB -C Soldering Iron For Weller Tips”

Byte Sized Pieces Help The KiCad Go Down

It’s no surprise that we here at Hackaday are big fans of Fritzing KiCad. But to a beginner (or a seasoned veteran!) the learning curve can be cliff-like in its severity. In 2016 we published a piece linking to project by friend-of-the-Hackaday [Chris Gammell] called Contextual Electronics, his project to produce formalized KiCad training. Since then the premier “Getting to Blinky” video series has become an easy recommendation for anyone looking to get started with Libre EDA. After a bit of a hiatus [Chris] is back with bite sized videos exploring every corner of the KiCad-o-verse.

A Happy [Chris] comes free with every video
The original Getting to Blinky series is a set of 10 videos up to 30 minutes long that walks through everything from setting up the the KiCad interface through soldering together some perfect purple PCBs. They’re exhaustive in coverage and a great learning resource, but it’s mentally and logistically difficult to sit down and watch hours of content. Lately [Chris] has taken a new tack by producing shorter 5 to 10 minute snapshots of individual KiCad features and capabilities. We’ve enjoyed the ensuing wave of learning in our Youtube recommendations ever since!

Selecting traces to rip up

Some of the videos seem simple but are extremely useful. Like this one on finding those final disconnected connections in the ratsnest. Not quite coverage of a major new feature, but a topic near and dear to any layout engineer’s heart. Here’s another great tip about pulling reference images into your schematics to make life easier. A fantastic wrapped up in a tidy three minute video. How many ways do you think you can move parts and measure distances in the layout editor? Chris covers a bunch we hadn’t seen before, even after years using KiCad! We learned just as much in his coverage of how to rip up routed tracks. You get the idea.

We could summarize the Youtube channel, but we aren’t paid by the character. Head on down to the channel and find something to learn. Make sure to send [Chris] tips on content you want him to produce!