We all have old projects which maybe didn’t quite deliver knocking about, sometimes they gather dust for years. They have a use though, in that when you *really* need that part you can lift it from that forgotten project. That’s what [Mustie1] did with a forgotten electric bicycle project, he took its motor and used it to automate his bead roller.
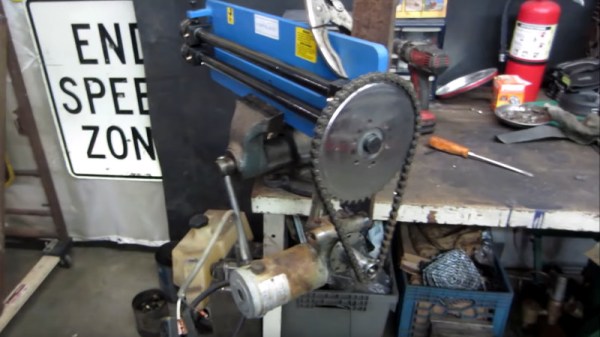
A bead roller is a tool used in the world of automotive bodywork to press a bead — a continuous depression — into a piece of sheet metal. The inexpensive roller he had fitted in a bench vice, and was operated by means of a handle. Unfortunately the size of the tool meant that it was difficult to operate at the same time as rolling a precise bead, so improvement was required.
He first considered using a cordless drill, but then remembered the electric bicycle project. Its geared motor had come from an electric wheelchair and certainly possessed the right speed, but he needed a suitable sprocket. This was supplied from a scrap engine-assisted bicycle that he’d acquired, and proved to be perfect for the job. The final automated roller used the trigger controller from a cordless drill mounted in a foot switch, and the roller mounted on a stand repurposed from a piece of gym equipment. The result is a useful, and above all controllable, tool that can run a perfect bead in any shape desired on a piece of sheet metal.
Surprisingly this is the first bead roller we’ve featured here, but sheet metal work is a constant in hardware hacker projects. Read our guide to sheet metal bending, for a start.