Continuity testing is one of the most valuable functions on the modern multimeter. It will help you investigate wiring problems in your car, tell you if you’re holding a nullmodem serial cable or the regular kind, and even reveal when you’ve accidentally shorted the data lines right to the power supply. However, all that beeping can get annoying, so [bitelxux] built a vibrating version instead.
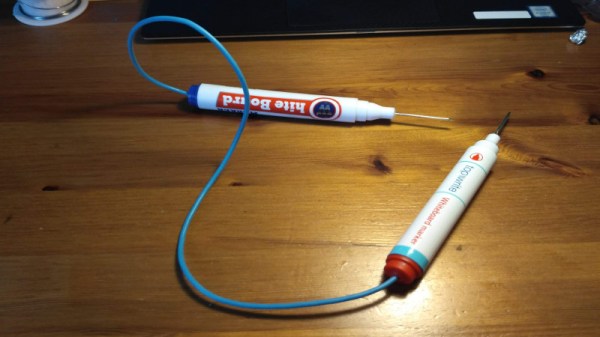
The build was borne out of necessity; [bitelxux]’s meter lacked a buzzer, and it grew frustrating to always look at the display. In order to allow late night hacking sessions to go on undisturbed, an unobtrusive vibrating tester was desired, as opposed to the usual audible type. Two whiteboard markers donated their shells to the hack, fitted with small nails to act as probes. Inside, a pager vibration motor is connected, vibrating when continuity is found. The circuit runs from a 1.5V AA battery which neatly fits inside the marker shell.
It’s a basic build, but gets the job done with a minimum of fuss using parts that most makers probably have lying around. Of course, you can always go a slightly more complicated route and throw an Attiny at the problem.