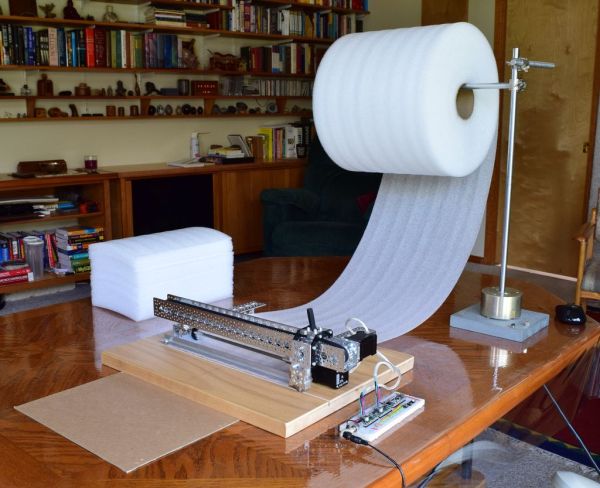
Tired of cutting your foam sheets down to size? [jgschmidt] certainly was, and after one-too-many hours cutting foam manually, he built himself a machine that cuts sheets automatically, and he guides you through the process step-by-step.
[jgschmidt’s] build is a clever assembly of stock parts acquired from ServoCity. That’s a nice touch, considering we don’t often see their components in quick hacks. With a stepper to feed more foam, and a stepper to drive the blade mechanism, the device can consistently cut foam from a roll to desired lengths.
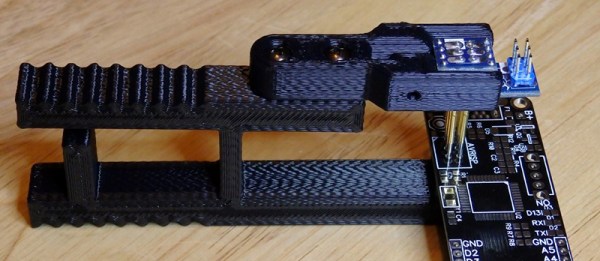
The blade mechanism consists of two exacto blades fixed nose-to-nose such that the machine can cut on both forward and reverse sweeps. While we’ve certainly seen some stellar past foam cutter builds, we can’t resist drooling over the speedy throughput of [jgschmidt’s] machine as it cuts on both forward and back-strokes. Finally, when the blades dull, they can be swapped out for a few dime’s worth of new parts.
Many of the steps in [jgschmidt’s] build are laudably practical with a “get it done” attitude. From hot-glued wire insulation to the double-edged blade formed from exacto knives, we’re thrilled to see him take a few pieces off the shelf and few pieces off the web and build himself a new workshop tool. Perhaps the neatest feature of this hack is its ability to rapidly transform a raw material into numerous repeatable, useful forms for his customers.
via [Instructables]
Continue reading “Robo Foam Cutter Makes Short Work Of Your Foam Rolls”


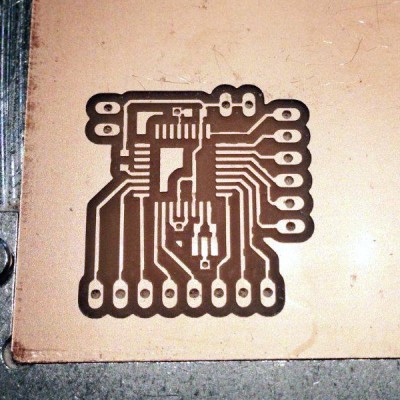 It’s a tome of a review, but that means there’s something for everybody. We especially enjoyed seeing the 10 mil board shown here which took about 1-hour to mill. Considering it has also been through-hole drilled we’d put that on part with the time it takes to etch a board. There are obvious places where the traces are not perfectly smooth (not sure if that’s burring or over-milling) but they are not broken and the board’s ready to be populated.