DVD Drives Turned Into Microscopes

With the advent of streaming services, plenty of people are opting to forego the collection of physical media. In turn, there are now a lot of optical drives sitting unused in parts bins and old computers. If you’d like something useful to do with this now-obsolete technology, you can have a try at turning one into a laser microscope.

This build requires two DVD pickups. By scanning once horizontally and once vertically and measuring the returning light from the DVD laser, an image can be created. For this build, the second pickup is used to move the object itself. The entire device is controlled by an Analog Discovery 2, although this principle could be ported to other microcontroller platforms. Thanks to the extremely fine laser in a DVD and the precise movements of the motors found in the control machinery, the images obtained using this method have the potential to be more detailed than comparable visible light microscopes.

While this isn’t quite scanning electron microscope territory, it’s good enough to clearly image the internal workings of a de-capped integrated circuit. Something like this could be indispensable for reverse-engineering ICs or troubleshooting other comparably small electronics, with resolutions higher than can typically be obtained with visible light microscopes. We’ve even seen similar builds in the past which build microscopes like this as dedicated lab equipment.

A High-Powered Vacuum Cleaner For Tough Jobs

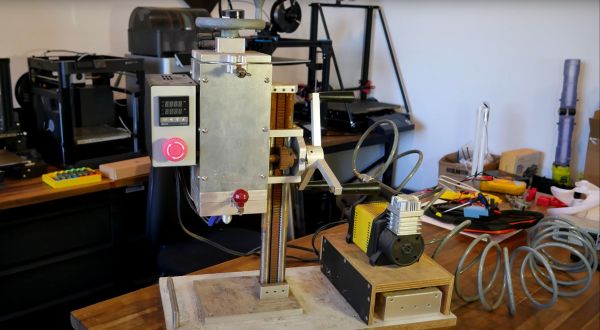
Vacuum cleaners are great for tidying up the home, but they typically can’t deal with the bulky, gross messes of a proper workshop. [CraftAndu] is currently building a sailing vessel, and has found that there’s simply too much sawdust for a regular vacuum to take on. Thus, he built a mighty vacuum of his own that’s able to deal with such conditions.

The core of the build is a giant 3.8 kW dust collector that’s used as part of a workshop dust extraction system. It’s of the type you’d normally use to suck up dust from machine tools. It’s then fitted with a long flexible hose that goes to the vacuum handle itself. The handle is made up of lengths of sewage pipe and several adaptors to fit it all together and hook up to the flexible tube. It’s also fitted with a set of wheels to allow it to be easily skated about the floor of the shop.

It’s a neat way to suck up all the lightweight sawdust that collects around the workshop. However, [CraftAndu] notes that even with the 3.8 kW extraction system powering it, it’s still quicker to use a broom for bigger detritus like wood chips and the like.

A lot of people think that vacuum projects suck, but we’ve always had a soft spot for them. Pun intended, and you’ll find the video after the break!

Continue reading “A High-Powered Vacuum Cleaner For Tough Jobs”

New controller PCB shown below the original one. The new PCB has an ESP module with an antenna, a lot of support circuitry, and all the same connectors that the original board does.

Controller For 946C Hotplate Adds Reflow Profile Upload Over BLE

Reflow hotplates are a wonderful tool for PCB assembly if you can keep your designs single-sided. The 946C hotplate in particular has been on hackers’ radar for a while – a 200x200mm working surface hotplate available for under $100 is a decent investment. As with other reflow tools, it was a matter of time until someone made a replacement controller for it. This one, you’ll want to keep in mind – it’s a replacement controller project by [Arnaud Durand] and [Elias Rodriguez Martin], called Reflow946.

Keeping to best practices, the board is a drop-in replacement for the stock controller – swap cables over and go. The host processor is an ESP32, and it lets you can program reflow profiles in using BLE, with a Python application to help. The whole design is open-source and on GitHub, of course – keeping with best 3D printing traditions, you can already order the parts and PCBs, and then assemble them using the hotplate you’re about to upgrade. As far as aftermarket controllers go, here’s no doubt this board gives you way more control in reflow and lets you compensate for any possible subpar calibration while at it. Continue reading “Controller For 946C Hotplate Adds Reflow Profile Upload Over BLE”

Peer-Reviewed Continuity Tester

One of the core features of the scientific community is the concept of “peer review” where any claims made by a scientist are open to be analyzed and reproduced by others in the community for independent verification. This leads to either rejection of ideas which can’t be reproduced, or strengthening of those ideas when they are. In this community we typically only feature the first step of this process, the original projects from various builders, but we don’t often see someone taking those instructions and “peer reviewing” someone’s build. This is one of those rare cases.

[oxullo] came across [Leo]’s original build for the ultimate continuity tester. This design is much more sensitive than the function which is built in to most multi-meters, and when building this tool specifically some other refinements can be built in as well. [oxullo] began by starting with the original designs, but made several small modifications. Most of these were changing to surface-mount parts, and switching some components for ones already available. Even then, there was still a mistake in the PCB which was eventually corrected. The case for this build is also 3D printed instead of being made out of metal, and with the original video to work from the rest fell into place easily.

[oxullo] is getting comparable results with this continuity tester, so we can officially say that this design is peer reviewed and tested to the highest of standards. If you’re in need of a more sensitive continuity sensor, or just don’t want to shell out for a Fluke meter when you don’t need the rest of its capabilities, this is the way to go. And don’t forget to check out our original write-up for this tester if you missed it the first time around.

Casting Metal With A Microwave And Vacuum Cleaner

Metalworking might conjure images of large furnaces powered by coal, wood, or electricity, with molten metal sloshing around and visible in its crucible. But metalworking from home doesn’t need to use anything more fancy than a microwave, at least according to [Denny] a.k.a. [Shake the Future]. He has a number of metalworking tools designed to melt metal using a microwave, and in this video he uses them to make a usable aluminum pencil with a graphite core.

Before getting to the microwave kiln, the pencil mold needs to be prepared. A 3D-printed pencil is first created with the graphite core, and then [Denny] uses a plaster of Paris mixture to create the mold for the pencil. The 3D printed plastic is left inside the mold and placed in the first microwave kiln, which is turned on just enough to melt the plastic out of the mold, leaving behind the graphite core. From there a second kiln goes into the microwave to melt the aluminum.

Once the molten aluminum is ready, it is removed from the kiln and poured in the still-warm pencil mold. This is where [Denny] has another trick up his sleeve. He’s using a household vacuum cleaner to suck the metal into place before it cools, creating a rudimentary but effective vacuum forming machine. The result is a working pencil, at least after he wears down a few razor blades attempting to sharpen the metal pencil. For more information about how [Denny] makes these microwave kilns, take a look at some of his earlier projects.

Continue reading “Casting Metal With A Microwave And Vacuum Cleaner”

Measuring Impedance Virtually

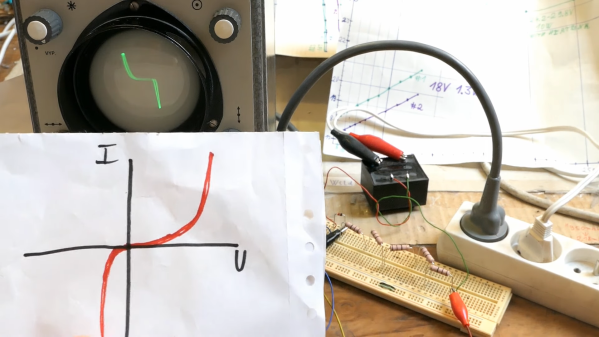
We always enjoy a [FesZ] video and we wonder if the “Z” stands for impedance? That’s the topic of his latest video series: measuring impedance with LTSpice. Of course, he also does his usual thorough job of mapping the virtual world to the real one. You can see the video below.

It is simple enough. Impedance is very similar to resistance. That is to say, we have a ratio of voltage and current. However, since it is an AC quantity, you need a complex number to represent it and there is an associated phase shift.

Continue reading “Measuring Impedance Virtually”

On the left, an image of a COB on the multimeter's PCB. On the right, a QFP IC soldered to the spot where a COB used to be, with pieces of magnet wire making connections from the QFP's pins to the PCB tracks.

Epoxy Blob Excised Out Of Broken Multimeter, Replaced With A QFP

The black blobs on cheap PCBs haunt those of us with a habit of taking things apart when they fail. There’s no part number to look up, no pinout to probe, and if magic smoke is released from the epoxy-buried silicon, the entire PCB is toast. That’s why it matters that [Throbscottle] shared his journey of repairing a vintage multimeter whose epoxy-covered single-chip-multimeter ICL7106 heart developed an internal reference fault. When a multimeter’s internal voltage reference goes, the meter naturally becomes useless. Cheaper multimeters, we bin, but this one arguably was worth reviving.

[Throbscottle] doesn’t just show what he accomplished, he also demonstrates exactly how he went through the process, in a way that we can learn to repeat it if ever needed. Instructions on removing the epoxy coating, isolating IC pins from shorting to newly uncovered tracks, matching pinouts between the COB (Chip On Board, the epoxy-covered silicon) and the QFP packages, carefully attaching wires to the board from the QFP’s legs, then checking the connections – he went out of his way to make the trick of this repair accessible to us. The Instructables UI doesn’t make it obvious, but there’s a large number of high-quality pictures for each step, too.

The multimeter measures once again and is back in [Throbscottle]’s arsenal. He’s got a prolific history of sharing his methods with hackers – as far back as 2011, we’ve covered his guide on reverse-engineering PCBs, a skillset that no doubt made this repair possible. This hack, in turn proves to us that, even when facing the void of an epoxy blob, we have a shot at repairing the thing. If you wonder why these black blobs plague all the cheap devices, here’s an intro.

We thank [electronoob] for sharing this with us!