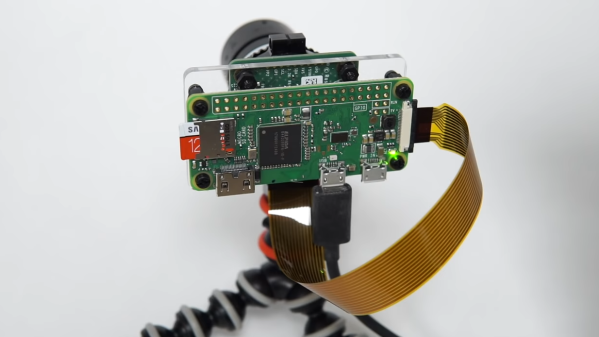
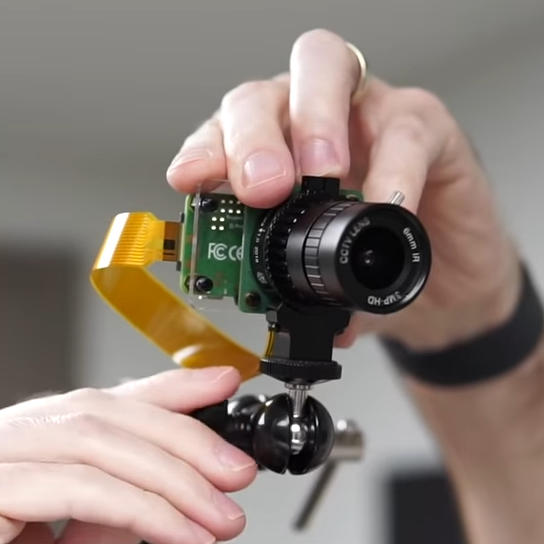
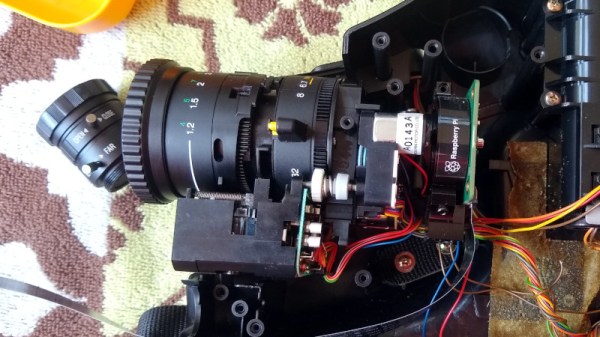
Camcorder Viewfinder Converted To Diminutive Vector Display

We generally cast a skeptical eye at projects that claim some kind of superlative. If you go on about the “World’s Smallest” widget, the chances are pretty good that someone will point to a yet smaller version of the same thing. But in the case of what’s touted as “The world’s smallest vector monitor”, we’re willing to take that chance.

If you’ve seen any of [Arcade Jason]’s projects before, you’ll no doubt have noticed his abiding affection for vector displays. We’re OK with that; after all, many of the best machines from the Golden Age of arcade games such as Asteroids and Tempest were based on vector graphics. None so small as the current work, though, based as it is on the CRT from an old camcorder’s viewfinder. The tube appears to be about 3/4″ (19 mm) in diameter, and while it still had some of its original circuitry, the deflection coils had to be removed. In their place, [Jason] used a ferrite toroid with two windings, one for vertical and one for horizontal. Those were driven directly by a two-channel push-pull audio amplifier to make patterns on the screen. Skip to 15:30 in the video below to see the display playing [Jerobeam Fenderson]’s “Oscilloscope Music”.

As much as we’d love to see a tiny game of Battlezone played on the diminutive display, there’s only so much it can do. Maybe an analog version of this adorable digital oscilloscope would be possible?

Continue reading “Camcorder Viewfinder Converted To Diminutive Vector Display”

VGA Signal In A Browser Window, Thanks To Reverse Engineering

Epiphan VGA2USB LR VGA-to-USB devices

[Ben Cox] found some interesting USB devices on eBay. The Epiphan VGA2USB LR accepts VGA video on one end and presents it as a USB webcam-like video signal on the other. Never have to haul a VGA monitor out again? Sounds good to us! The devices are old and abandoned hardware, but they do claim Linux support, so one BUY button mash later and [Ben] was waiting patiently for them in the mail.

But when they did arrive, the devices didn’t enumerate as a USB UVC video device as expected. The vendor has a custom driver, support for which ended in Linux 4.9 — meaning none of [Ben]’s machines would run it. By now [Ben] was curious about how all this worked and began digging, aiming to create a userspace driver for the device. He was successful, and with his usual detail [Ben] explains not only the process he followed to troubleshoot the problem but also how these devices (and his driver) work. Skip to the end of the project page for the summary, but the whole thing is worth a read.

The resulting driver is not optimized, but will do about 7 fps. [Ben] even rigged up a small web server inside the driver to present a simple interface for the video in a pinch. It can even record its output to a video file, which is awfully handy. The code is available on his GitHub repository, so give it a look and maybe head to eBay for a bit of bargain-hunting of your own.

A 3D Printer Scratch Built For Your Viewing Pleasure

Today it’s almost always cheaper to buy an imported 3D printer kit than it is to source your own parts and build one yourself. But that doesn’t stop people from doing it anyway. Whether they’re looking for something a bit more solid, or just want to do things their own way, there are still valid reasons to design and build your own machine. Luckily for us in the audience, [Rob Mech] decided to document the build of his custom “LayerFused C201” printer on his YouTube Channel.

If you’ve ever dreamed of taking the plunge and building a 3D printer exactly the way you want, but were never able to manage the time, this seven video series might be the next best thing. Each video takes you through a different step of the construction, from building the frame out of aluminum extrusion all the way to wiring up the endstop switches and the 32-bit SKR v1.3 controller. There’s even a video that introduces the viewer to the concept of a “Frankenstein” printer that uses cobbled together parts just long enough to produce its own final components.

All told, [Rob] says the Bill of Materials for the LayerFused C201 comes to at least $200, but that’s going to take shopping around for the lowest possible prices and potentially even salvaging some components from other machines and projects. Like we said, building a cheap printer is absolutely not the goal here; it’s all about building a printer you want to use. Continue reading “A 3D Printer Scratch Built For Your Viewing Pleasure”

Behold A 3D Display, Thanks To A Speeding Foam Ball

We’ve seen 3D image projection tried in a variety of different ways, but this is a new one to us. This volumetric display by Interact Lab of the University of Sussex creates a 3D image by projecting light onto a tiny foam ball, which zips around in the air fast enough to create a persistence of vision effect. (Video, embedded below.) How is this achieved? With a large array of ultrasonic transducers, performing what researchers call ‘acoustic trapping’.

This is the same principle behind acoustic levitation devices which demonstrate how lightweight objects (like tiny polystyrene foam balls) can be made to defy gravity. But this 3D display is capable of not only moving the object in 3D space, but doing so at a high enough speed and with enough control to produce a persistence of vision effect. The abstract for their (as yet unreleased) paper claims the trapped ball can be moved at speeds of up to several meters per second.

It has a few other tricks up its sleeve, too. The array is capable of simultaneously creating sounds as well as providing a limited form of tactile feedback by letting a user touch areas of high and low air pressure created by the transducers. These areas can’t be the same ones being occupied by the speeding ball, of course, but it’s a neat trick. Check out the video below for a demonstration.
Continue reading “Behold A 3D Display, Thanks To A Speeding Foam Ball”

Water Flow Meter Knows Tank Level

There’s almost always more than one way to get any particular job done. Suppose for instance you have a tank you fill up from a well, and you’d like to know when the time is right to refill the tank. The obvious answer is to measure the level of the tank, and there are plenty of ways to do that. However, [Liam Hanninen] has a different approach. Using a flow meter, he measures how much water leaves the tank. Assuming that you know it was once full, you can deduce how much water is left.

Using a YF-S201 flowmeter on a Raspberry Pi, the code uses Python to populate a database. The meter will need to be calibrated to get an exact volume measurement.

Continue reading “Water Flow Meter Knows Tank Level”

Atari Tape Drive Turned Security DVR

We know that a lot of our beloved readers don’t take kindly to abuse of vintage hardware, so the Atari fans in the audience may want to avert their eyes for this one. Especially if they’re particularly keen on spinning up their Jawbreaker cassette on authentic hardware, as [iot4c] has gutted an Atari XC12 Program Recorder to turn it into an enclosure for a Raspberry Pi video storage device.

Step one of this conversion was, as you might expect, removing all the original hardware from the cassette recorder case. From there, [iot4c] fitted the Raspberry Pi, a USB hard drive, and a YDS-5A DC-DC converter to power them. Depending on what the drive setup looks like, it might also make sense to add a USB powered hub. A length of Ethernet cable was left hanging out the back of the Atari XC12 so it could be plugged into the network, but a panel mount RJ45 connector could spruce things up a bit.

Of course, gutting an old piece of hardware and sticking a Pi into it isn’t exactly breaking any new ground at this point. But we did appreciate that [iot4c] went the extra mile to wire it up so the “Save” LED now doubles as a network activity indicator. Which pretty much brings it full circle in terms of functionality for a network-attached video recorder.

Earlier in the year [iot4c] converted a 65XE into a USB keyboard with the help of an Arduino Leonardo, but the vintage Atari aficionados will be happy to note that at least in that case the donor machine remained fully functional.

Monochrome CRT And Liquid Crystal Shutter Team Up For Color Video

If you were tasked with designing a color video monitor, it’s pretty clear how you’d go about it. But what if you’d been asked to do so 20 years ago? Would it have been a cut and dried from an engineering standpoint? Apparently not, as this hybrid LCD-CRT video monitor demonstrates.

We’d honestly never heard of this particular design, dubbed “LCCS”, or liquid crystal color shutter, until [Technology Connections]’ partial teardown of the JVC monitor and explanation of its operation. The idea is simple and hearkens back to the earliest days of color TV in the United States, when broadcasters were busy trying to bring color to a monochrome world in a way that would maximize profits. One scheme involved rotating a color wheel in front of the black-and-white CRT and synchronizing the two, which is essentially what’s happening in the LCCS system. The liquid crystal panel cycles between red, blue, and green tints in time with the CRT’s images behind it, creating a full-color picture. “But wait!” you cry. “Surely there were small color CRTs back in the year 2000!” Of course there were, but they kind of sucked. Just look at the comparison of a color CRT and the LCCS in the video below and you’ll see why this system carved out a niche in the pro video market, especially for video assist monitors in the days before digital cinematography. A similar system was used by Tektronix for color oscilloscopes, too.

As usual, [Technology Connections] has managed to dig up an interesting bit of the technological fossil record and present it in a fascinating way. From video on vinyl to 1980s copy protection to the innards of a toaster, we enjoy the look under the hood of forgotten tech.

Continue reading “Monochrome CRT And Liquid Crystal Shutter Team Up For Color Video”